Waiting to Inhale: Breath-Holding Drills for Kayakers

Upside-down in the chilly water, I crank my blade up to the surface, sweep it out to the side and hip snap to drive my upper body through the surface.

Then I raise my head, stall and plunge back underwater–but not before filling my lungs with a big gulp of fresh air.

Again I crank my blade to the surface, sweep, hip snap, raise my head, gulp air and–splash back seaward. It is my third failed roll and a carbon copy of the first two ragged attempts.

I continue the process a fourth and a fifth time. I’m running out of breath as well as feeling the onset of an ice-cream headache.

On my sixth attempt, I pause, focus and slow everything down: I sweep cleanly and hip snap, and this time I keep my head down, ear pasted to shoulder, and rise up easily, modeling the best “instructor’s demonstration technique” I can muster. “So that’s what the ‘cass-a-roll’ drill looks like.”

I gush, with all the enthusiasm of Tom Sawyer whitewashing a fence. “Now you try it!” My class of four floats around me in their kayaks, alternately nodding their heads in understanding and shaking them in disbelief: You want us to do what?! I can see I’ve piqued their interest, but no one is quite convinced to pick up a paintbrush just yet.

The cass-a-roll drill, along with the other breath-holding exercises presented here, was designed to help students learn to relax after capsizing, whether they’re going to try a roll, as in this drill, or simply wet exit.

Its purpose is to increase your tolerance for missing your roll, especially in a “combat roll” situation, when you’ve accidentally tipped over in rough seas. It’s a great confidence booster, and it really helps you learn to overcome the panic that often sets in after an unexpected capsize.

As I’ve discovered from years of teaching, most paddlers tend to bail out after only a roll attempt or two. In small part, this is due to running out of air, but mostly it’s psychological: people simply panic.

A missed roll washes away confidence. So the cass-a-roll drill is designed to help build confidence by practicing missing rolls on purpose, as many times as possible, before finally rolling up. If you usually wet exit after only one or two tries, you can train yourself fairly quickly to push it to three or four. Once you get up to four, it’s not that hard to build up to six or eight, or even more.

After a bit more cajoling, I soon have everyone in class cass-a-rolling and practicing other confidence-building drills. Whatever your skill level–whether you’re just learning to roll, your roll is basically bombproof or you’re a non-roller just hoping to become more comfortable after a capsize–the following drills can help you learn to be more relaxed and comfortable, and ultimately more successful, when you find yourself upside-down in the drink.

These drills are partly about training yourself to take deeper, bigger breaths and partly about teaching yourself to relax so you don’t burn that breath of air so quickly.

I’ve modified several of them from practice drills used by competitive free divers, those freaks of nature who, through dedicated practice of breath-control techniques, are able to remain underwater for several minutes at a time (some of them diving to depths of 100 to 200 feet or more) with only a mask.

My own meager training last year enabled me to double my breath-hold time after only a week of practicing the on-land drills, then nearly double that again until I began to plateau a week or so later.

I was easily able to enjoy one- to two-minute bottom times and could push it to three minutes with some effort. I routinely dived to 30 or 40 feet and eventually reached a maximum depth of over 60 feet. I quickly saw the relevance for kayakers to train to relax and hang out underwater.

Deep “Orca” Breaths: The Key to Success

The ability to take a quick, deep breath is a cornerstone skill to all the breath-hold drills presented here. While you sit reading this article, with each breath you are likely exchanging in the neighborhood of a mere 15 percent of total lung volume that’s typical of most humans.

That’s less than a liter of your four-to-five-liter average capacity. Compared to the 90 percent exchange common among most marine mammals, it’s easy to see that we Homo sapiens are gross underachievers in this arena. Learning to boost that percentage closer to that of our fin-footed mammalian cousins, however–what I call orca breathing–is fairly simple and can quickly reap huge results.

If you’ve ever heard orca whales breathe, you have a sense of how much air they move in and out of their lungs. There is this sudden huge whoosh of exhalation, followed immediately by a giant, equally sudden but less obvious in-rush of breath.

Then they dive. The whole air exchange–again some 90 percent of their total volume–takes barely a second. Not bad for an animal with lungs about the size of your cockpit! With just a little practice, the benefits of orca breathing can be yours.

Start slowly at first, by practicing to increase your exchange of air. If you’ve done any yoga breathing, you’re probably already familiar with this. (Most competitive free divers, by the way, are proponents of meditation and deep-breathing techniques.)

The main difference is learning to do it quickly. First, take a couple of slow deep breaths. See how much air you can exhale, as if you were trying to blow out all 969 candles on Methuselah’s birthday cake. You might try bending over and even pressing on your stomach to squeeze out as many cc’s (cubic centimeters) as you can of that final liter in your lungs.

Then breathe in slowly–the trick is to fill your lungs from the bottom up–by pushing your belly out first, then filling your chest, then finally doing what free divers refer to as “packing” your upper chest and neck area.

When you have taken as big a breath as you can, raise your chin and extend your neck, and try “sipping” in a few more cc’s of oxygen through pursed lips, as if sipping up the last few drops of a milkshake through a straw.

Take as many sips as you can, until you can’t fit any more air into your lungs. Then hold for a few seconds and focus on what it feels like to have your lungs so full of air. Repeat this exercise several times until you have a good sense of what a deep lungful of air feels like.

But be careful–taking more than three deep breaths in succession can cause you to hyperventilate and pass out, which would be especially dangerous in the water. While practicing, remember to take a few normal breaths between each deep breath.

Now it’s time for orca breathing. Unfortunately, in the context of rolling, we don’t have time for a full, slow, yoga breath.

So imagine rolling up enough to get your head above water but missing your roll and quickly taking a big gulp of air in the second or two that you have before plunging back underwater.

Think about trying to exhale on your way up, and take a big gulp as you stall, so that you don’t breathe in water on your way down. Start slower at first, maybe taking two seconds or so on both the exhale and the inhale. Eventually practice speeding it up to one second or so total. At the end of the “in” breath, hold for a few seconds, then try packing and sipping to see how much more air you can get in.

With practice, you’ll soon find yourself consistently able to gulp from 60 to 90 percent of your lung volume, so that you have little space left for sipping in much more air. Now it’s time to move on to the next step.

Static Apnea Drills

Static apnea is a fancy term for holding your breath while static, that is, sitting quietly relaxed on the sofa (or floating facedown in a pool of water as the competitive free divers do–the world record, by the way, is just over eight minutes!).

Since kayakers don’t have the luxury of several minutes of deep breathing and meditation between rolls, the modification I practice involves single-breath holds, using orca breathing. Blow out and gasp in, doing a quick orca breath, and hold for five seconds.

Repeat this orca breath and five-second hold five times (be careful to stop if you get dizzy; however, hyperventilation should not be a problem because you are holding your breath for several seconds each time and not taking more than one deep breath at a time).

The next step is to try a series of five 10-second holds. Most beginners, I’ve found, can do this fairly comfortably with only a little practice.

The next step is pyramid practice. This does not involve traveling to Egypt, but simply refers to increasing the length of breath holds to a peak, then reversing back down.

For example, using one orca breath between each breath hold, hold for five seconds on the first breath, 10 seconds the next breath, 15 seconds the next, then back down to 10 seconds, then five and stop. When this becomes too easy, try double pyramids–hold twice at five seconds, twice at 10, twice at 15, then back down, twice each at 10 and five–and even triple pyramids.

The point of pyramids is to build confidence by training to reach a peak well beyond the time you need for a roll. Then, as you descend back into the five- or 10-second breath-hold range, still well within the time limit for a typical roll, it’ll seem easy.

But don’t wait until mastering triple pyramids before moving on to the next drills. Just spend five minutes or so to do four to eight pyramids. Start easy and build up to whatever level presents a comfortable challenge: if you attempt a double pyramid and can’t hold your breath twice at 15 seconds, just do one.

You may be tempted to build up into the 20-second range or beyond, and such training certainly has value. But such times are well beyond the context of typical rolling times, and the longer you hold your breath, the more health risks are involved.

While the shorter times I propose should be fairly safe, realize that serious free divers who routinely practice holding their breath for several minutes at a time occasionally develop heart arrhythmia. So as with any new exercise program, check with your physician first.

And if you are serious about learning how to hold your breath for minutes at a time, consider taking a course taught by free-diving professionals. Instead of going for longer breath holds with static apnea, the next step in my progression is to get up off the couch and take the single-breath holds on the road.

Dynamic Apnea Drills

Dynamic apnea refers to holding your breath while exercising, and it’s much more relevant to kayakers. After all, you won’t be sitting on the sofa all “Zenned” out when you capsize.

Walking pyramids is a dry-land, free-diver drill that is particularly effective for paddlers. Start walking at an easy pace. Now, instead of holding your breath for five seconds, take an orca breath and hold your breath for five steps.

Take another orca breath and hold for 10 steps, breathe, hold for 15 steps and so on. Practice the same single, double and triple pyramid drills you used while sitting on the couch.

Stop if you start feeling dizzy so you don’t fall and hurt yourself. Until you’re familiar with how your body responds to the exercises, you may want to practice on a lawn or other soft surface.

While it isn’t that common to get dizzy and fall, it is a possibility. Once you are comfortable with the walking drills, it’s time to take to the water.

It’s a good idea to practice paddling pyramids with a partner, particularly one who knows the Hand of God rescue (SK, June ‘00). While the likelihood of your passing out while practicing is slim, if you did manage to hyperventilate and pass out upside-down, you’ll want someone around who can quickly right your boat with you in it.

Paddling pyramids are performed using the same progression as walking pyramids, only you count strokes instead of steps. A more advanced version of this drill for those with solid rolling skills is to actually roll at the end of each stroke count.

That is, take an orca breath, paddle five strokes, roll; orca breath, 10 strokes, roll; orca breath, etc. When you can do triple paddling pyramids to 15 strokes with rolls in between, you are well on your way to becoming master of breath control, a near amphibious aqua-man or woman!

Reverse Breath Holds

A particularly challenging technique that can be applied to most of the drills here is the reverse breath hold, which refers to taking a big orca breath in, then blowing it out and doing a roll or pyramid practice, either sitting, walking or paddling.

The idea is that you’re practicing after the out breath, with your lungs empty. With a little practice, you’ll be surprised at how long you can hold your breath when you don’t even have any breath to hold.

More “Evil Rolling Drills”

One of my students dubbed the following drills (double roll, roll and hold, crash and roll) my “evil rolling drills” because she found them particularly challenging–more mentally than physically.

Those who are learning to roll can practice them with a paddle float on the paddle to increase their breath-holding confidence without worrying about missing their rolls.

A double roll is simply two rolls on the same breath hold. Take a breath and roll. Capsize again and roll up before taking another breath. The next steps, you guessed it, are the triple and quadruple rolls.

With a little practice, it’s a good challenge for experienced rollers to do four to six rolls (or even more) off a single breath. Since each roll typically takes less than five seconds, the total breath-hold time is only 20 to 30 seconds for half a dozen rolls.

A version of this drill that my students find particularly evil is doing reverse breath holds–breathing out–between double or triple rolls. This teaches you to remain calm and perform physically even if you aren’t able to get a good breath before going over.

The roll-and-hold drill is a rolling pyramid drill. Capsize and count to five, roll up, orca breath, capsize and count to 10 (yes, that’s right, while upside-down under water).

This is an extremely challenging drill in cold water. The ice cream headache will get you long before you get to your first 15, much less any double or triple pyramids! In a swimming pool or warm water, however, this drill can really help teach you to relax and take as much time as you need to set up to execute a nice, clean, unhurried roll.

The crash and roll is a common bomb-proofing exercise where you sprint either forward or backward and lunge into a violent, splashing capsize, even letting go of your paddle with one hand.

The idea is that you are trying to simulate a wipeout in rough water, instead of going over all ready and set up for a roll. While underwater, you have to reorient your paddle before setting up to roll. For a little extra challenge, how about trying a double crash and roll with a reverse breath hold? That is, paddle hard, breath out, crash and roll up twice before taking another breath!

Cass-a-Roll Revisited

I developed this miss-on-purpose drill while teaching a friend named Cass to bombproof his combat roll. His roll was pretty consistent in the swimming pool, but once he got to the ocean, he tended to panic and rush his set up, causing his paddle to dive as he raised his head for air, no matter how many times I yelled “Head up last!” to him. This is a common problem I’ve seen when students take their pool roll out to sea.

By learning to relax while missing your roll several times in succession–and training yourself to grab a quick orca breath between each attempt–you can dramatically increase your ability to remain calm under pressure.

Instead of starting to freak out after missing a roll or two, you train yourself to get used to missing a half dozen or more. Practice this in a controlled situation with a buddy nearby for a bow recovery. Next time you go over in the real world, you won’t be so worried about running out of breath after only one or two attempts.

Surf Rolls and “Arithmetic” Rolls

I have two types of surf rolls I use to teach students to relax and roll in waves. The first is to capsize in the soup zone in front of a small wave and let it wash over you before rolling up. Try bigger and bigger waves as you get more comfortable, and try capsizing early, so you have to wait several seconds before the wave washes over you.

The second version of this is to set up sideways to the waves and let one knock you over–just make sure you are in deep enough water that you don’t hit your head. And of course, you should always wear a helmet whenever paddling in surf.

You can also practice surfing in and broaching on the wave, then window shading–that is, capsizing on purpose toward shore and having the breaking wave roll you several times–to re-create the typical surf-zone capsize.

To teach himself to relax underwater, an instructor friend of mine invented arithmetic rolls. He would capsize with a dive mask and solve a simple algebra problem on a dive slate before rolling back up. If, like me, you’re more scared of algebra than of drowning, you might consider word puzzles or maybe a quick game of tic-tac-toe or hangman between partners.

The point is to realize that rolling–and the ability to hold your breath calmly underwater–is as much a mind game as it is a physical skill. It has as much to do with training your body to perform with less oxygen as it does with learning to accept that your body can do without air for a lot longer than your panicky mind may think. And panic only burns oxygen faster.

By practicing these drills, you’ll gain both mental confidence as well as muscle memory. Even if you feel confident that you can easily hold your breath for 20 seconds, it’s another thing when you train your muscles to know this as well. This lets your body take over and tell your mind in essence to “Chill out, man–we’ve got plenty of oxygen in here.”

With daily practice of the dry-land drills, you should quickly see big improvements in your ability to comfortably hold your breath. Even two or three times a week should give noticeable results in a week or so.

Once you are familiar with the various techniques, it’s easy to practice them throughout the day. I often play around with holding my breath while walking down the street, standing in line at the grocery store, wherever. I’ll hold my breath while working at the computer–write a sentence, orca breath, write two sentences, etc.–or even sitting at stoplights.

On weekends (or whenever you paddle), try practicing paddling pyramids. I’ll at least do this even if I don’t feel like rolling and getting wet.

But I usually do. I find the “evil rolling drills” challenging and fun, so I usually do end up wet and breathless before I land for the day. I’ve actually come to enjoy practicing these drills so much–along with the extra “bottom time” and confidence they’ve added to my already bomber rolling skills–that you might even say they’ve breathed new life into my rolling practice!


Different Stroke Techniques for Kayaking

Our three forward-stroke experts have spent years refining their individual stroke techniques. Using these tips, you can benefit from their experience and learn to develop the ideal forward stroke.

The forward stroke is so basic, so intuitively simple, that just about anyone can hop in a boat and have it moving forward in a matter of minutes, if not seconds, with no instruction whatsoever.

Developing an efficient forward stroke, however, or any degree of “mastery,” can be a lifelong project. Indeed, serious competitive paddlers typically spend their entire careers focusing on perfecting the elusive “ideal” stroke.

But an efficient forward stroke is not necessarily just for dedicated racers. As the following three forward-stroke experts point out, recreational kayakers can reap countless benefits from refining their forward strokes.

The first of our contributors, Olympic kayaking medalist Greg Barton, believes that even the most relaxed recreational paddlers can cut years of trial and error off of developing efficient stroke technique by learning a “racing stroke,” then modifying it to suit their touring needs and the sea conditions.

Paddling is “simply more fun if you’re not as tired,” suggests former wildwater champ Brent Reitz, the second of our contributors. Brent, an instructor specializing in the forward stroke, believes that aspects of racing technique can benefit recreational paddlers from all walks of life. His method consists of five components and focuses on the body’s “power core.”

Our third and final author, sea kayak instructor Dan Lewis, is, like many recreational paddlers, admittedly more concerned with scenery than with speed. He believes that developing both an “effortless” low-angle touring stroke as well as a powerful, high-angle racing-style stroke allows him to choose a stroke style that matches the conditions.

As a serious recreational paddler and an American Canoe Association kayak instructor trainer, I have been a longtime student of forward-stroke technique. Whether I’m working with beginners or other instructors, I start with the foundation of the modern racing stroke, then dial it down to meet my needs or those of my students.

Whether you are out to win races or just beat the afternoon wind back to camp, the following advice on technique should give you plenty to work on.

Starting with Greg’s high-angle, high-performance racing stroke and working our way to Dan’s low-profile touring stroke seemed a natural progression for this article. There are more similarities in the writers’ contributions than not. Common themes include using torso rotation to involve the larger muscles of your back, upright posture, ending the stroke as your hand reaches your hip and a relaxed grip.

The differences may seem subtle to many paddlers: how far apart to space your grip on the paddle shaft, whether to cross the centerline with your top hand or not, how high to hold your top hand, how much to bend your elbows, and so on.

While trivial to those not as well versed (or obsessed) with the finer points of stroke mechanics, such differences have created a personal style that works for each of the writers and can help set you on the path to developing a style that best suits your needs.

Paddling in a Group Guide (Caring the Red Lantern)

There are a number of things a paddler can do to move faster. But if a paddler starts to fall to the rear of the pack, it’s the group’s responsibility to make sure that person isn’t struggling to keep up.

In the Netherlands, “carrying the red lantern” is an expression used to describe someone at the back—the last person in the group. How many times have you paddled in a group that had a slow paddler lagging behind?

Were you ever that paddler? How did it feel?

If you are reading this, you probably didn’t stop paddling because of it. But you might have thought of giving up kayaking if the groups you paddled with consistently ignored you and left you in the unenviable position of bringing up the rear. 

When I started paddling, I always seemed to have trouble keeping up with the group. I thought I was the root of the problem and that I probably wasn’t cut out to be a kayaker. I focused on my “inability” — too little skill, experience, stamina and strength.

I was frequently frustrated and paddled to the brink of exhaustion trying to keep up. I even ordered a new “fast” sea kayak, hoping it would make a difference.

It didn’t. I progressed slowly, and over time, my technique improved.

I grew to be a stronger paddler. I remember well the day I could paddle from the back of the pack up to the front paddler to say hello. But my early experiences did not have to be so difficult and discouraging.

There are a number of things a paddler can do to move faster. But if a paddler starts to fall to the rear of the pack, it’s really the group’s responsibility to make sure that person isn’t struggling to keep up.

The Speed of a Group

A group of kayakers is only as fast as its slowest paddler.

In my early years of sea kayaking, there were a few considerate paddlers in my group who kept me company. And yes, the group waited every now and then for me to catch up. But the moment I drew even with them, they would immediately start paddling again.

Most of them had had time to rest, drink and eat a snack while waiting for me. The other paddlers may have thought I was doing fine, but because they started moving again as soon as I caught up, I never got a break. I was too proud to speak up and kept paddling at the limits of my endurance.

Psychology and Group Control

Nobody wants to be left behind. If it is inability that puts a paddler at the back in the first place, no amount of effort will help that person keep up consistently.

That paddler may resort to muscle power with less attention to forward paddling technique. The paddler becomes inefficient or tense or, even worse, gets exhausted and paddles even more slowly.

One of the quickest and most effective solutions for the person “carrying the red lantern” is for the group to put the slowest paddler in front to determine the paddling speed of the whole group. If the trip is planned around this estimated paddling speed, there is no reason for anyone in the group to go any faster.

This removes the pressure to go fast and lets the paddler in front concentrate on efficient, relaxed paddling. I’ve often observed that the person stationed at the front of a group paddles faster than when paddling at the rear. And that even holds true for myself!

If you are in a group that is moving slower than you’d like, be supportive of the paddler who is not “up to speed” on that trip. Your patience and support will create a positive learning experience that will encourage the paddler to embark on future trips.

It’s also important to be honest, especially when putting a group together for a trip.

Novice paddlers must be aware or made aware of their skill level and abilities relative to the standards needed for the trips they would like to undertake. What is just an ordinary trip for you can be a challenge for someone less able.

Rough Water

In waves, novice paddlers or, more generally speaking, paddlers outside their comfort zone tend to focus more on stability than on forward speed.

Paddlers feeling uncomfortable in rough water will often use wider sweep strokes to augment their stability, which offer less-efficient forward progress. Also, when paddlers are anxious, their performance suffers.

If possible, offer a route around patches of rough water. Use a buddy system. An experienced paddler offering encouragement can do much to help keep feelings of panic and anxiety in check and be in a position to offer assistance if necessary.

Prior to paddling into rough water, the trip leader can reduce the build-up of anxiety by explaining the best approach to keeping the group together and who will be paired up. This briefing should take place before launching or, at the latest, well before entering rough water.

Following Sea

For most experienced sea kayakers, a following sea provides a “free” ride. Paddlers who are adept at surfing on wind waves can cover distance very quickly.

Taking advantage of waves requires short bursts of high energy and quick paddle techniques. A paddler who can’t or doesn’t know how to surf will soon be well behind.

If the paddlers are surfing waves that come at an angle to the group’s course, they may follow a zigzag course to get the best rides on the waves. The person at the rear of the group may become frustrated by the frequent and seemingly random course changes and may not know which direction to paddle. This paddler might make frequent course adjustments that deter from forward paddling and the most direct path to the goal.

The paddlers who are not surfing should maintain a consistent heading. Those surfing should drop back from the group before catching waves and pull up before getting ahead.

That way, they can keep the group from spreading out too much. The trip leader can also do a better job at the back, overseeing the whole group and spotting paddlers who may have trouble.

Quartering Winds

You can control weathercocking—the tendency of a kayak to veer off course because of the wind—by the weight distribution of your gear stowed in the front and aft hatches.

When a kayak veers off course downwind, you can make a quick fix by putting one or more water bottles in the front hatch of the affected sea kayak. (If the bottles are empty, fill them with seawater.)

If you ever have the opportunity to help someone with this trick, you’ll be considered a miracle worker. Of course, this technique should only be used when you can safely open the hatch.

While paddling in crosswinds, a paddler can use up a lot of energy trying to keep a sea kayak on course. If the rudder, skeg or changing trim can’t solve the problem, setting up a course-holding tow may be the best option. Offer the tow well before the struggling paddler gets exhausted.

A course-holding tow is more effective when the paddler being towed hasn’t been pushed to exhaustion—if the towed paddler can make some forward progress, the towline will be slack most of the time, with only an occasional tug needed to bring the paddler back on course.

With any tow, a second buddy should paddle back and to the side of the towed paddler to offer assistance if needed.

Surf-Zone Launching

Clearing the surf zone at the start of a trip can use up a lot of energy, putting paddlers with less strength at an early disadvantage. For some, the drain of energy can start even earlier with carrying the sea kayaks to the beach. I like to take at least half an hour to recover after hauling kayaks to the water. Allow for delays when choosing a departure time.

Capsizing and re-launching also eat away time and energy. Pushing paddlers off the beach is good for conserving their energy, but don’t make a routine of it. Providing a boost does not make less-experienced paddlers proficient in launching on their own.

Make sure novices take the time to check for wave sets, and coach them through the surf. The experienced paddlers will probably get through the surf with minimum effort, so when everyone has gathered outside of the surf zone, start paddling easy. There will already be a separation between fit and tired paddlers.

Surf-Zone Landing

Many trips will start from a sheltered put-in but will head for a less protected destination. Paddlers who seem quite capable at the launch site may not be up to handling the surf zone on an exposed shore.

If for some reason your group must land through surf, then carefully estimate the surf height. Anything higher than two feet should be considered big surf. Beaches subject to regular dumping surf should be off-limits for trips involving groups of paddlers with mixed abilities.

The standard procedure in sea kayaking is to send in the most experienced paddler first. When you have other experienced paddlers in your group, pair them up with less experienced paddlers. I often see paddlers stay in the surf zone way too long, despite executing exactly what they were taught. Although they back-paddle to let waves break in front of them, overall progress is rather slow.

There is often too much time and chance for that big ugly wave to arrive. The more experienced paddlers could give their buddies instructions on when to paddle hard, wait or back-paddle. Before deciding to land for a break, the trip leader should be certain that everyone in the group is fit and capable of the landing and subsequent launching.

A lot of time and energy can be spent in the surf zone. Everyone in the group must have enough energy left to paddle back to the put-in. If some paddlers are already getting tired, it may be the wiser choice to raft-up out at sea for a break.

Fit is It

So far, it might sound like the difference in skill or experience determines if someone is able to keep up with the group. But even when you are among “equals,” a paddler may still fall off the group’s pace.

For some, it is very difficult to admit to not feeling fit or strong enough for the challenge ahead. If you are having doubts about your condition, it is important to speak up before setting out. It is much more embarrassing and risky if you have to fess up halfway into a long crossing.

It is not unusual for a tired or hypothermic paddler to grow quiet, so everyone in the group should keep an eye on each other, just in case.In rough conditions, some paddlers may not be comfortable pausing to eat and drink. Considerate paddlers should regularly check to see if their companions need to raft up for a refreshment break.

Experienced paddlers who are comfortably stable in their boats will be able to relax and rest while they set their paddle on their spray deck or in a paddle park. Those who feel unsteady will keep using their paddle for bracing, burning up energy on balancing even if they are not moving forward. For them, there is never a rest in rough water.

Exhaustion

Most of the time, it is very easy to tell when a paddler is struggling to keep up. If you’ve set a fast pace and gone without breaks or if the wind picks up and conditions get rough, check to see if the group has spread out and some paddlers have fallen behind.

If so, it is time to gather the group around the trailing paddler. If an exhausted paddler is no longer able to paddle independently, a rafted tow is needed. Having to accept a tow can be an embarrassing situation for some paddlers, especially more experienced ones.

They often feel that they have failed, although in fact, it is the group that has failed. And depending on the conditions, the whole group could be in danger. It is difficult to decide when to tow a paddler who is not yet exhausted. If weather or tidal conditions are deteriorating, swift action should be taken. If the need for a tow is explained clearly, the paddler in question will usually understand the need and readily agree to accept the tow.

Exhaustion can induce hypothermia and vice versa. When energy reserves are low because of exhaustion, there might not be enough energy left to warm the body. It’s a good idea to keep an exhausted paddler warmly dressed during towing. In a rafted tow, the buddy who has stopped paddling to raft up and steady someone’s kayak might become cold due to lack of activity.

It is best to take care of tiring paddlers quickly before they get to the point of requiring a great deal of assistance from others in the group. At that stage, the progress of the whole group is impeded even more.

Time to Spare

Strong paddlers might get frustrated if they have to maintain a slower pace or paddling cadence. They might even complain of being cold because they’re paddling too slowly.

Depending on their attitude, faster paddlers can use this time to socialize, navigate, work on skills, take pictures, be a considerate paddler and trusted buddy and become a competent trip leader.

The most experienced paddlers can take turns being the “shepherd” roaming around the group. They’ll get plenty of exercise by paddling from the back of the pack to the front paddler. If the fast paddlers put their energy to good use while staying close to the group, it creates a setting that takes the pressure off the less-experienced paddlers, allowing them to improve rapidly.

Red Flag

A trip starts when the last paddler is on the water and ends when the last paddler is off the water. Obviously that last paddler should never consistently be the same person.

This is a bit of an oversimplification, as a trip really starts even before getting on the water and probably only ends after debriefing. But by being aware of the paddler carrying the red lantern, the red flag signaling trouble may not need to be raised.

Breaking the Ice: Winter Paddling

Don’t let winter hinder your passion for paddling
Text and photography by Nicolas Bertrand

It’s a perfect winter day. With the previous night’s low of –15°C/5°F, I know there will be lots of ice in the St. Lawrence River in Montreal Harbor in the Canadian province of Quebec. The sky is clear, the air is still and the temperature will rise during the day, making the cold milder. For me, these are ideal conditions for a day of sea kayaking. 

In the winter, even going for a single-day outing involves careful and methodical preparation. I don’t go out if I feel tired. For winter paddling to be safe and enjoyable, it requires being completely rested, and this morning, I am. With all the layers and gaskets I have to put on, getting dressed takes even longer than bundling up a toddler for the snow. The kettle whistles, and I fill my insulated bottle with hot water.

At Charron Island, my usual take-out (located midway down the St. Lawrence River, south-east of Montreal’s harbor), conditions are not good. A ribbon of ice chunks mixed with slush is drifting against the ice edge. The ribbon is uninterrupted—there is no place to launch from. At this distance, I am unable to tell whether I can cross the ice ribbon to reach open water. Furthermore, coming back across the ribbon might be impossible if the density of the floating ice increases during the day. I decide to continue my scouting.

I head back to the car to move a little farther upstream. There is another put-in at Longueuil. I don’t often launch from this area because the current is faster; however, today it may be my best option.

In Longueuil, I drop the kayak from the car rooftop directly to the snow and drag the kayak like a sled toward the water. Today, Montreal’s harbor is a complex world of ice; a majestic ribbon of moving colors and reflections, alive and whispering.

Before setting foot on ice, I dress for immersion in frigid water (in the range of 3°C to –2°C/37°F to 28°F). At this temperature, water is cold enough to cause pain to bare hands. I zip my dry suit, tighten my boot gaskets and put on a neoprene hood and a pair of neoprene gloves.

With the paddle in my left hand and the bow of the kayak in my right, I step onto the ice. Even after a few winters of doing this, I am always a bit nervous when first setting foot on an icy surface. Holding onto a 17-foot kayak and a 7-foot paddle and wearing proper immersion gear and a PFD makes this activity safe, but it still feels weird. Today, the ice cracks and squeaks. It is slippery, too. A few people ashore watch me slip and fall. Ouch! How can water be so hard?

As I continue my scouting, I notice a large area of water free of ice. Currents push the ice north of this area. By launching here, I will be able to get closer to the moving ice to assess its density. If it turns out to be too dense to paddle in, I can return to my point of departure. Because there is no wind, only the current affects the movement of the ice. I must pay close attention to the air surrounding me—if a breeze begins to blow, I must be aware of it and assess its influence on the movement of ice and on my planned route.

I walk 300 meters to yesterday’s ice edge. The demarcation between yesterday’s and today’s edge is sharp and clear. I can see pieces of ice pointing up in the air, frozen in place after being pushed up by the current, then clear translucent ice beyond.

The final 30 meters consists of ice formed over the last 12 hours: a bizarre patchwork of white ice chunks called shuga (so named because of its resemblance to powdered sugar). The shuga drifted, aggregated and, surrounded by a thin, transparent layer of newly formed ice called nilas, froze in place. The nilas, approximately one or two inches thick, flexes under my bodyweight.

Walking on nilas gives me chills, especially when it’s brand new and still elastic, like today. Bending down, I drag the kayak by the coaming, ready to lie down on the kayak should the ice give way. When possible, I hop from one chunk of shuga to the next, avoiding the nilas as much as possible. I see little bubbles moving underneath the ice. Water finally! With the kayak resting on a piece of shuga, I get in, secure the spray skirt and push myself into the water.

From where I sit, it looks unlikely that I’ll be able to paddle at all today. There are traces of water in my immediate surroundings, but in the distance, there seems to be only ice. It looks like I would need snowshoes to get anywhere.

As I proceed, however, one channel opens up to another, and lines of frazil (small plates of ice just under the surface of the water) are easy to cross. Frazil gives the water a slick, oily feel. When it hardens, it turns into slush or semi-solid snow. Slush can be paddled, but doing so can become very tedious. Today it isn’t. The ice that looked too dense actually has enough water to be paddled.

Little ponds among the ice fields grow and shrink here and there. In spite of the –5°C/23°F air temperature, the warm sun and still air make for comfortable paddling conditions. I decide to go toward the Old Port of Montreal, where I might grab a hot drink. I hope that the floating ice I see will continue to look more packed than it really is.

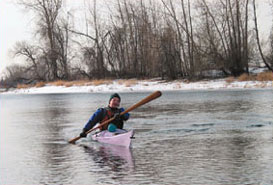
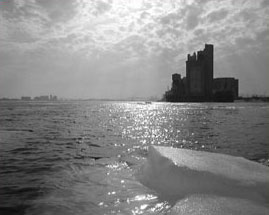
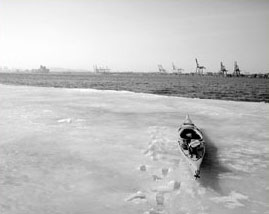
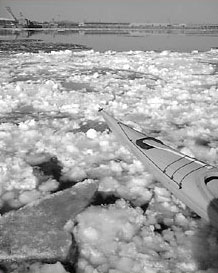
After some hit-and-miss route-finding through the ice, a few chunks of which hit the kayak, I reach the Old Port. A couple of ducks sit on the thin ice of the still-water basin. At first, the ice is like paper, then it thickens very progressively. I break over five kayak lengths of it until I find ice too strong to be broken by the paddle, but not strong enough to support the kayak’s weight. Unable to dig my paddle in, I can’t exert enough force to advance. Because the kayak itself is not supported by the ice, I can’t stand or even crawl on it. It looks like my planned stop won’t be possible today. This is yet another reminder that, in the winter, you don’t always get to do what you’d like, so you can only take advantage of what the conditions allow. Flexibility is a must.

In the summer, navigating your way out of the Old Port is hellish because the area is overrun with powerboats and jet skis. High speeds, drunk drivers and powerful currents make the area unpleasant, if not outright hostile, to sea kayakers.

But today, thanks to the cold, there is absolutely no one in sight. The river is all mine. On my way back, I drift down along the frazil. It is like being on a magic carpet ride. Sitting in frazil, the kayak is surprisingly stable. I change gloves and drink a little warm water. I realize that I need to start making my way back. The sun is getting lower and I will eventually become tired if I stay out too long. It is wiser and safer to stop before fatigue sets in.

Practical Aspects

This article addresses the specifics of paddling in below-freezing temperatures with ice and frigid water, but it does not cover the basics of safe sea kayaking in cold water. Knowledge about self-rescue and proper clothing for immersion in cold water is a prerequisite.

Extending your paddling season to include the winter months should be done only after you have developed strong safety skills during the regular season. Be aware that rescue potential is different for winter conditions than for summer.

The Coast Guard probably expects outdoor enthusiasts to be on skis rather than in kayaks at this time of the year. Their ability to travel by boat will either be significantly reduced or made impossible by ice, so assume that you are on your own. Last winter, two ice fishermen near Montreal had gone on an unplanned “cruise” when the ice they were fishing on broke loose from shore. A helicopter had to fly in from Ontario to rescue them.

Assistance can take several hours if it’s available at all.

Being Dry

For winter paddling, the usual cold-outdoor-activity wisdom applies: Avoid sweating, and stay dry. This is especially difficult to achieve when enveloped in a dry suit, Gore-Tex or not. Gore-Tex breathes, but may not be able to allow body condensation to evaporate entirely during even moderate exertion. Being wet in winter is perilous.

Even winter-sports amateurs are generally aware of the importance of staying dry in subfreezing temperatures. When your winter sport is sea kayaking, the challenge of being dry is even greater. A good dry suit, waterproof gloves and neoprene boots make it possible to stay close to a state of dryness.

Using a wetsuit, river shoes and pogies is a mistake in subfreezing conditions: They won’t keep you warm enough while you’re paddling and will be dangerously ineffective if you wind up in the water. Aside from the danger of paddling with improper equipment, you’ll be so cold, it won’t be any fun.

I regularly go out for five- to eight-hour intervals in temperatures as low as –15°C/5°F, and even if there is a breeze adding a wind-chill factor, I’m comfortable most of the time. I can’t stress enough how important a dry suit and waterproof gloves are to safe winter paddling.

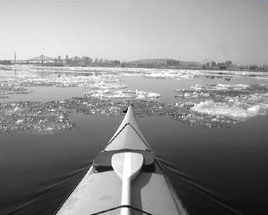
For my outings, I start by layering synthetic fleece. The amount of fleece I put on depends on temperature and wind speed. For conditions below –5°C/23°F, I start with a base of four layers. The first layer is moisture-wicking fleece long underwear, which covers my legs, torso, arms and the bottom of my neck, in the area just below the dry-suit gasket.

The second layer is an expedition-weight fleece top. The third layer is a farmer john fleece garment, covering my legs and torso but not my shoulders and arms. This one-piece farmer john is especially useful for covering my back and waist comfortably, preventing cold gaps in clothing. The fourth and final base layer is a big, heavy, thick fleece top.

Over all four layers, I put on my dry suit. The last step in putting on the dry suit is to expel air from it. With an inch of the zipper left to close, I crouch, round my back and try to squeeze out as much air as I can, then close the zipper. Standing up, I can feel the outside air pressure pushing the fabric against my skin.

The spray skirt and PFD form a final layer. My legs have a little less fleece coverage than my upper body, but the closed kayak provides a means of protection from the cold.

The golden rule for staying dry is to adjust the intensity level of the activity to the current heat needed by the body. If you’re feeling cold, paddle a little more vigorously until you warm up a bit.

Don’t overdo it and reach the point of sweating. If you are too warm, slow down. The goal is to be as dry as possible. I recently switched to a Greenland paddle and found that it lets me more finely tune my paddling pace, especially in light cadences, allowing better temperature control. When it is below freezing, you’ll feel drier than you will at near or above freezing.

The condensation that builds up inside a dry suit will ice up the inside of the fabric. At a break, simply turn your dry suit inside out, reversing it down to the knee, and brush off the icy buildup.

Extremities

If your hands, feet and head are cold, your core is probably not warm enough. Warm waterproof gloves are a must. I find that fleece-lined neoprene gloves work best.

Make sure the seams are glued and watertight. Good neoprene gloves are expensive and can also wear quickly, but they are reparable. I take two pairs on each outing and alternate them throughout the day as one pair gets damp, usually every two to four hours.

At home, I test for leaks regularly and repair them as needed with Aquaseal neoprene sealant. 

Even with perfect gloves, your hands will eventually become humid, either from water infiltrating the wrist areaor from perspiration. Your hands are very vulnerable to low temperatures.

Cold and humidity can affect tendons and finger articulations, making them stiff and painful for several hours after paddling. According to professional divers working on the maintenance of a low-temperature aquarium in Montreal, frequent and repeated exposure of the hands to cold water can lead to arthritis.

Do not wear damp gloves for too long. Your hands will thank you for frequent glove changes.

Another good practice to adopt is to wiggle your fingers while paddling, which will keep them loose and keep your blood circulating. Use very light pressure when pushing the paddle shaft so you can wiggle your fingers at the same time. The increased blood circulation in your hands will keep them warm.

Neoprene boots and wool socks keep feet warm and dry. I use neoprene mukluks and find them to be very warm. Allowing wiggle space for your toes is very important.

A common mistake is to wear boots that are too tight, which hinders blood circulation and causes cold feet even if your core temperature is ideal. The same is true with too-tight gloves.

A skull cap will keep your head warm. Properly adjusted, it will even prevent water from entering your ears during immersion. I use a neoprene shell lined with Lycra fleece that fits snugly around my face.

Finally, a scarf or facemask is nice if the wind is blowing. The mountaineering-style neoprene facemask covers from the nose down and secures around the neck, protecting it as well. Under some conditions, small splashes and wind can cause blisters on your face quicker than you can say “freeze!” A good facemask will let you fully enjoy the beauty of a snowstorm from an unusual setting. Are we warm enough now?

Before Ice

Maybe the biggest mistake you can make in sea kayaking is overconfidence. Don’t assume that just because you can reliably roll or do a recovery in cold water on a fall day that you will be able to do the same among chunks of ice in February. Gradual preparation and practice are essential.

How will your body react to frigid water? Is your equipment up to the task? Failures that might be annoying in warmer conditions are likely to become catastrophic in the winter. There is only one way to find out if you are ready: Go for a swim.

Observe the local conditions regularly for the area you want to paddle over the course of fall and early winter. When a little ice begins to form in the area, paddle out on the water (appropriately dressed, of course), exit the kayak and swim.

This exercise should be done near shore, in chest-deep water with a partner nearby. Take a look around to see if anyone might see you capsize. It is wise to warn passersby about your drill. They might think that the situation requires an emergency call and take action. 

Once in the water, observe the effect of the cold on your body, but come ashore before you get hypothermic. Be aware that poor judgment is one of the early symptoms of hypothermia. Other deceptive symptoms include apathy, confusion, inability to solve problems, unawareness of a dangerous situation and making no effort to protect yourself. Your partner should be reliable, dressed for immersion and able to drag you out of the water. In all cases, be very cautious and try to recognize the early symptoms of hypothermia, and have your partner closely involved in keeping you safe.

When you are done swimming, remove your gloves and immerse your bare hands in the water. If the water is frigid, it should convince you to keep your gloves on at all times.

Frigid water can render your hands useless in less than 30 seconds. Furthermore, taking bare hands out of the water into subfreezing air temperatures is also very painful. It’s essential to wear gloves at all times when walking on ice or when paddling where the water is cold, especially when ice is present.

At near-freezing water temperatures, even with a dry suit, you can actually feel your body heat quickly draining out. It can’t be stressed enough how deadly frigid water is. Experience it in a controlled manner before committing yourself to the challenge of winter paddling.

Practice swimming and reentry in cold water close to a beach, even if your roll is bombproof. At some point, you will fall in the water while walking on ice. If you paddle in icy conditions, assume you will regularly wind up in the water, whether you want to or not. This is especially true in late winter or under conditions where breaking through the ice will be either more frequent or certain.

A Little Extra Advice

Your kayak must stay afloat no matter what happens. Use float bags in the forward and aft compartments and place all your cargo in dry bags. Should a watertight hatch fail, the float bags will ensure proper flotation of the kayak.

Taking extra warm clothes and food is a good idea. In dry bags, carry a complete change of dry fleece, a winter coat, dry mitts, a hat, extra gloves, boots and a warm sleeping bag if you are in an area that is even a little remote. Besides adding flotation, these items can be very useful in case of an emergency situation.

Equipment

One extra piece of equipment specific to winter paddling is a set of ice claws, or any other object sharp enough to bite the ice, enabling you to get a grip in it. On my first outing on ice, I was paranoid enough to take along an ice axe.

Although an impressive prop to display on the deck of your kayak, the ice axe is bulky, rusts easily and sinks quickly. A paddler’s knife, either a sheath knife or a folder with a locking blade, can be a useful tool to get a grip in the ice, but make sure the tip is not filed off, as is sometimes the case.

A blunt tip will make it more difficult to get a secure grip in the ice. The fact that knives do not float also reduces their utility. In this sense, ice claws are a better choice. They are easy-to-make, effective tools used to drag yourself out of the water over slippery ice. 

To make your own, cut a 1-foot long, 1 1/4-inch thick dowel in half. Drive a 2-inch-long screw about an inch into the center of the end of each stick (or farther if using a longer screw).

Use a hacksaw to cut off the head of each screw and file the tip to a point sharp enough to dig into ice. (The important thing is that the screw is firmly embedded in the dowel and will resist pulling. It shouldn’t move at all or break away from the dowel under some force.

If you try to pull yourself over a lawn with it, you should damage the lawn, not loosen the screw. Force exerted on the dowel will be less on ice, where there is less friction than on a lawn.) On the other end, drill a hole through the dowel approximately an inch from the end, and thread a 4-foot piece of small rope through the hole to tie the claws together. Carry them in a convenient, accessible location. Ice claws cost almost nothing to make and can be truly useful.

Portable Heat

A warm water bottle is another excellent way to stay in the comfort zone. It is a surprisingly effective, portable heating device. Use a Thermos or MSR bottle parka that you can carry under a deck bungee cord. You can also wrap a hot water bottle in several layers of fleece and carry it inside the kayak.

Fleece is an excellent insulator. Feeling cold? Sip a little hot water. Be careful not to overuse it, however. If you become hot and sweaty, your clothes will dampen, and shortly thereafter, you will be cold and miserable unless you stop to dry out in the wind and change your damp clothes.

Even if you don’t feel damp, it’s always nice to stop for a dry out. I try to do it every four hours or so. At these times, the warm water bottle plays an essential role. When you remove the dry suit and roll it down to expose the fleece to the wind to dry it out, your body experiences a tremendous heat loss. Typically, I try to stand in the windiest place possible with my arms raised, turning to expose my back, torso and legs.

This makes even the most hardened northerners shiver unless they drink warm liquid!

De-icing

In subfreezing temperatures, ice will eventually form on the kayak and paddle shaft. This glaze is pretty at first, but can build up and become heavy. Use something hard to break it, such as the ice claw handles, which are very effective.

Gently tap the kayak and paddle shaft with the ice claw handle to break the ice. Dipping the paddle shaft in water will make breaking the ice easier. Cold as it is, water is still warmer than ice. It will weaken the ice, especially the bond between the paddle shaft and ice. As the owner of a plastic kayak, I can bend my boat in soft spots to help break the ice buildup.

The type of plastic used in my kayak remains flexible without breaking well below freezing. A flexible skin-on-frame kayak is very easy to de-ice. Of course, using a rudder or skeg is impossible under freezing conditions, as they become jammed with ice. My advice is to retract or remove them.

Scouting for Open Water

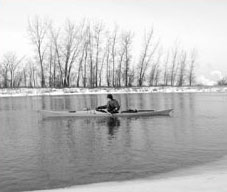
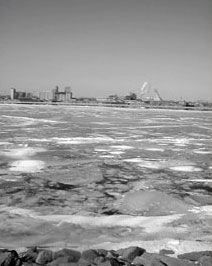
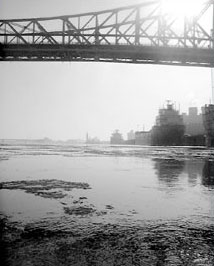
As with any kayak trip, a day of winter paddling starts at the water’s edge. In summer, getting to the water is usually straightforward: drive to the water, park, unload and launch. In winter, it’s not always as simple. A weak ice edge, where ice meets water, can complicate entering the water or make it impossible. Drifting ice, at the mercy of wind and current, can alter course during the day, and rapidly evolving ice conditions can hinder landing. Thus, scouting is essential to get to open water and to note places to take out if the ice shifts.

Finding an acceptable put-in is part of the joy of winter kayaking, particularly if it involves a bit of a hunt. Changing conditions are also a large part of the fun: In winter, no two days of paddling are ever the same.

When winter conditions are warmer, such as early and late in the season, searching for places with the most floating ice is often a good reason to drive around. When ice is scarcer, I tend to paddle in the areas where it is more concentrated, usually channels with less current.

Snow coverage may mean I have to park in places more distant from the river, but it is easy to pull a kayak across the snow—even a one- or two-mile walk is manageable if the snow is compact or if I use snowshoes.

My waterproof kayaking footwear is warm and sturdy enough to allow for walks of this distance. Not Ice, Not Water

Probably the worst thing a kayaker can encounter while winter paddling is the combination of ice and water that’s too firm to paddle through, but not solid enough to walk on.

Conditions can change every day, every hour. Most of the time, it’s no problem to put in and get out. I’ll walk to a solid ice edge, sit, secure my spray skirt and push myself in. To make a landing on the ice, I’ll paddle fast, aiming the kayak directly at the ice edge.

If I have enough momentum, the kayak can even slide far enough to get me over solid ice.Sometimes it’s possible to get around some fairly strange mixtures of ice by crawling, jumping and swimming. These types of endeavors can actually be fun—sometimes more enjoyable than paddling itself.

Jumping from one piece of ice to the other, discovering which ones are large enough to support you and which ones are not, even feeling the ice move under your foot and sink slowly is very enjoyable. Crawling in slush is also enjoyable. These are experiences I like very much. It is always so new, I feel like a child discovering the world.

Finally, beware of current going under the ice edge. On May 16, 1999, two river kayakers on the Copper River, in the Wrangell–St. Elias National Park, Alaska, were dragged under the edge by the current.

Fortunately, they lived to tell their tale, which involved being under an ice edge for a full minute. Under the right circumstances, even a weak current can be strong enough to drag someone under the edge.

Cheated by Time

Somehow, time moves faster when I paddle in the winter than in the summer. Maybe this is an indication that paddling is more fun in the winter! Maybe it is the solitude or the wonderful spectacle of ice, its colors and sounds.

Whatever the reason, I get the most thrill and satisfaction out of sea kayaking in the winter. With adequate preparation, the right equipment and the proper skills, you might also discover that the snowy months of the year are the best for paddling.

Winter paddling can be contemplative, even a little magic. Dazzling as it is, however, this is a hostile environment. There is no such thing as safe ice.

Thin or not, it can always be treacherous. Each winter in Quebec, there are casualties when people break through ice. The formation and transformation of ice is a constant evolution, every moment a wonder. But equipment and procedure are essential to paddling safely in the winter.

The beauty of the setting must not take precedence over pragmatism and awareness of danger.

I’ll leave you with my main piece of advice on paddling in the winter: Don’t do it unless you are totally confident about it. It’s better to be prepared and safe so that you have plenty of winter paddling experiences ahead of you.

Nicolas Bertrand is a schoolteacher from Montreal, Quebec, Canada. He has paddled most of the Gulf of St. Lawrence’s north coast, and he started winter kayaking in 1999.

Resources

Ice Conditions
Canadian Ice Service (http://ice-glaces.ec.gc.ca/)
The Canadian Ice Service is a complete source of information on ice in Canada. Although not designed specifically for sea kayakers, it is an essential reference for current conditions.
National Ice Center (www.natice.noaa.gov)
The National Ice Center provides current conditions for the United States.

Additional Information
The Minnesota Department of Natural Resources website has some helpful information on ice safety and the fabrication of ice claws
Wrangell-St. Elias Park & Preserve
“An Account of a Kayak Trip Gone Wrong,” National Park Service, May 16, 1999 (www.nps.gov/wrst/kayaksafety.htm)

Pump & Dump (Draining Water From the Kayak)

Anyone who has pumped water out of a flooded cockpit knows that it can be difficult and time consuming to pump five or 10 gallons out of a kayak. With an assisted rescue, your partner can lift the bow of your kayak and, assuming it has bulkheads, drain most of the water in a matter of seconds. If you’re recovering from a capsize and wet exit on your own, just rolling the kayak over from a position near the cockpit will allow a lot of water aboard.

I use a wonderfully simple, straightforward method for draining water from the cockpit that requires neither fancy gadgets nor assistance.

It’s called the “pump and dump.” After a few practice sessions in safe, flat water, the pump-and-dump should become a fluid and efficient technique to add to your self-rescue repertoire.

The Method

After you have capsized and done a wet exit, work your way to the bow without losing contact with the kayak or your paddle. If you are right-handed, position yourself in front of the kayak so that your left shoulder is at the bow. Place your left hand under the bow against the forward end of the deck.

The best and most powerful position for the paddle is with the middle of the shaft on your shoulder. With your right hand, place the paddle over your right shoulder and hold it there with your knuckles up. The blade in front of you should be flat on the water to the right side of the kayak.

The beginning of the pump-and-dump is a lightning-quick combination of pulling down on the paddle, doing a scissors kick and lifting the bow as high out of the water as you can. The water will drain out of the cockpit as the bow rises.

At the apex of the lift, flip the kayak over to its right-side-up position. The cockpit should be close to fully drained, so you can work your way back to the middle of the kayak and set up for your preferred method of reentry.

Practice Makes Perfect

I have taught this maneuver to many people and have noticed that the crux of the sequence is typically in the wrist flip when the bow is at its highest above the water.

Some kayaks, especially those with upturned bows, will practically flip themselves; others take some coaxing. You may find it helpful to practice by splitting the technique into two exercises. To practice the kayak-flip part of the pump-and-dump, stand in chest-deep water and shove the bow of the upturned kayak as high above you as you can, and flick your wrist to push the kayak over.

Twist the kayak so that it rolls toward your thumb-it will be easier to keep your grip on the bow. If the kayak rolls in the opposite direction, you may lose your grip, so make sure the boat doesn’t get away from you. Keep working on the lift and wrist flick until the motion is fluid and consistent.

In deeper water, without the kayak, practice the scissors kick and paddle motion. Pull the paddle down firmly as you do a scissors kick. In no time, you should be able to lift yourself out of the water to waist level.

Applying the Technique

Once you have both of these components worked out, put them together in one fast and fluid motion to flip a capsized boat. You’ll have a righted kayak free of water, or very nearly so.

I should note that the closer the aft bulkhead is to the cockpit opening, the less water the cockpit will retain. If your bulkhead is several inches aft of the opening, expect to find a bit of water remaining in the cockpit.

Bjorn Olson is a sea kayak guide and instructor. He has been guiding in south coastal Alaska for nine years. He makes his home in Seward, Alaska.

Technique: Rescues with a Skin-on-Frame Kayak

Performing a rescue in any type of kayak can be challenging, and a skin-on-frame kayak can present additional complications.

These kayaks consist of a series of wooden ribs that make up the frame and a nylon or canvas skin that wraps around the frame. Skin-on-frame kayaks do not have bulkheads and, as is the case with many Greenland kayaks, can be very low volume.

Most modern sea kayaks have bulkheads that create enclosed pockets of air to provide flotation in the event of a flooded cockpit. The bulkhead behind the cockpit also serves as a wall to make it easy to pour water out of the kayak during assisted rescues.

Skin-on-frame kayaks lack bulkheads, so in the event of a wet exit, the kayak floods from the bow to the stern. It is for this reason that standard rescues, such as the T-Rescue, cannot be performed.

Special techniques are needed to empty the kayak and flotation needs to be added to compensate for the lack of bulkheads. Without flotation, the kayak will sink when you put your weight on it.

A challenge that can arise is that manufactured float bags are often the wrong size or shape for homemade skin-on-frame kayaks. Although manufactured float bags, or even paddle floats, can be used, they certainly aren’t ideal.

If you use float bags, make sure that they are pushed deep into the frame of the kayak before inflating. The inflation tubes can be run under the ribs to keep them out of the way and to hold the bags in place.

In warm weather, the bags will expand, so it is best to release some air when not in use. Before launching, inflate the bags so that they are tight in the bow and stern. If inflated properly, they will grip to the ribs and seal securely between the hull and deck.

Another option is to pack pool noodles into the bow and stern of the kayak. If shaped and packed tightly enough, the pool noodles will stay in place and provide adequate flotation to keep the kayak afloat.

Here we will look at both assisted and unassisted skin-on-frame rescues, when they work and when they don’t.

SELF-RESCUES

There are a couple of options for self-rescues in a skin-on-frame kayak. The first is a paddle-float reentry and the second is a reenter and roll. Although these self-rescues are similar to how they are performed in a kayak with bulkheads, there are some differences.

After capsizing and exiting the kayak, prepare for a paddle-float reentry by keeping the kayak upside down to prevent additional water from flooding into the cockpit. It is important to remain in contact with the kayak, and a good way to do so is to leave a leg hooked in the cockpit while you float on your back.

Place a paddle float on one end of the paddle and inflate it tight enough to stay in place. Then place a second paddle float on the other end of the paddle and inflate that as well. (Self-rescues in skin-on-frame kayaks are easier with two paddle floats because entering a low-volume kayak with a small cockpit requires more balance than with the longer cockpits typically found on manufactured kayaks. The person entering will need to inch into the kayak from a sitting position on the back deck with both legs straight and entering at the same time.)

Place the paddle perpendicular to the kayak behind the cockpit coaming. Kick your legs and slither belly-down onto the back deck. Keep the paddle in place and inch forward until you are directly behind your paddle.

Sit up, keeping one leg in the water on each side of the kayak for stability, and move the paddle so that it is behind you. Grip it on both sides so that your hands are placed slightly wider than the back deck. Using the stability provided by the paddle floats, work your way into the kayak by placing your feet in the cockpit and scooting forward until you can drop into the seat.
Once in the kayak, put the paddle close to your waist and lean slightly forward to hold it in place.

This will give you support while you pump the water out of the kayak. In rough water, or with a very low-volume kayak, you may need to seal the spray skirt first to prevent water from splashing into the cockpit.

Lean on the paddle while you get the skirt secured on the aft end of the coaming. To finish getting the skirt on, keep leaning forward or rest your arms on the paddle. To pump, you can peel back a side of the spray skirt or slip the pump down the spray skirt’s body tube.

When the kayak is clear of water and your spray skirt is secured, carefully deflate the paddle floats and put them away, or attach them to a deck line and put them away once stable.

A second option for a self-rescue is a reenter and roll with or without a paddle float. After capsizing, keep the kayak upside down with one leg hooked in the cockpit to prevent it from drifting away. If using a paddle float, float on your back, inflate it and put it on one end of the paddle.

Hold the paddle parallel to the side of the kayak with the paddle float bow-side. Grab the cockpit coaming on both sides with the paddle trapped under your arm. Inch your way into the upside-down kayak as much as you can while your face is on the surface.

The kayak may float on its side while you are doing this; however, the more upside down it remains, the less water will enter.

Once you have gone as far as possible with your face on the surface, take a deep breath and commit, pulling your lower body into the kayak until you are in an upside-down seated position. Hold the paddle with your palms facing up, parallel to the side of the kayak.

Sweep the paddle out to the side in a wide arc, applying upward pressure to the recovery side knee. Keep your head floppy with your chin in the air and slide onto the back deck.

Once stable, sit upright, place the paddle in front of your waist and perpendicular to the kayak. Lean forward to hold the paddle in place with your waist and lean very slightly toward the paddle float for additional stability. The paddle float provides a stable outrigger while you pump the water out of the kayak as long as you keep your weight on the paddle.

If water is splashing into the kayak, seal the spray skirt first and peel back a corner to pump, or pump down the spray skirt’s body tube. Once the kayak is empty, put the paddle float inside or under a deck line, and seal the spray skirt.

ASSISTED RESCUE

When performing an assisted rescue in a skin-on-frame kayak, both the rescuer and the person in the water (the rescuee) play an active and important role. To begin, the rescuer moves the kayaks so that they are parallel to one another. Meanwhile, the rescuee carefully moves to the open side of the rescuer’s kayak, making sure to keep contact with one of the kayaks and their paddle the entire time.

The rescuer places the rescuee’s kayak on its side with the cockpit facing toward him and begins to pour the water out. As the kayak becomes lighter, the rescuer hooks his arm into the cockpit and begins a slow curl.

This can be a slow process, and the rescuee leans over the rescuer’s kayak to assist in keeping the unoccupied kayak level to prevent water from flowing into the bow or stern. Once the kayak is relatively empty, the rescuee moves to the front of the rescuer’s kayak.

A stable position for the rescuee is to float on her back with her legs and arms wrapped around the bow of the rescuer’s kayak. While in this position, the rescuer moves the empty kayak across his cockpit so that the kayaks are in an X configuration, as in the venerable T-X rescue.

The kayak is turned upside down and rocked back and forth to remove any excess water.

Once empty, the rescuer turns the kayak the right way up, keeping the kayaks in the X position and places the rescuee’s cockpit slightly forward of his own cockpit.

The kayaks are very stable in this position, as the empty kayak acts as a huge outrigger. Instead of sliding the emptied kayak back in the water, as was done in the T-X rescue, the kayak remains on the rescuer’s deck.

The rescuee climbs the bow of the rescuer’s kayak. It is most stable to do this with one leg on each side of the kayak with the legs in the water. The rescuee slithers forward on her stomach until she is close to the empty cockpit and able to sit up on the rescuer’s foredeck.

The rescuer takes the rescuee’s paddle, allowing the rescuee more dexterity to move her feet behind her and to get on her knees on the rescuer’s front deck and then onto the back deck of her kayak.

She can then enter the kayak, seal in and take back her paddle before the rescuer gently pushes her bow-first into the water.

A word of caution

After taking pictures for this article of both assisted and unassisted rescues in flat water, we decided to perform the same rescues in more dynamic conditions.

According to the National Oceanic and Atmospheric Administration (NOAA), wind that day in Trinidad, California, was predicted at 10 knots, with wind waves of four to six feet and a west swell of four feet at six seconds.

We paddled to the back of Trinidad Head to a popular play spot called “Smack Wall,” located about a mile from the beach. This spot is known for its blowhole and reflected waves, and we hoped that these waves would create some chop for the rescues.

Michael Morris and I, with Bryant Burkhardt taking pictures, performed an assisted rescue and were happy to discover that it worked, and worked well. We both agreed that the same rescue could successfully be performed in much larger conditions, since we faced no immediate challenges.

What we discovered later, though, was that the antler deck fittings attached to the deck lines on the front of Michael’s kayak had put three one- to two-inch rips in the bottom of my kayak as it was dragged across his deck.

Not knowing about the rips in the kayak, I attempted a self-rescue in the same dynamic conditions and it soon became apparent  that I was not going to be able to get the water out of the kayak.

The cockpit had gone underwater, so no amount of pumping would help because if I pulled back the edge of my spray skirt a bit to put a pump in, water would pour in around the pump.

The kayak had fully inflated airbags in both the bow and stern, so it wasn’t going to sink, although I would not be able to empty it alone. I wet exited so that we could empty the kayak and Michael came in for an assisted rescue. Bryant noticed the holes in the bottom of the kayak when Michael pulled it across his deck.

We performed an assisted rescue to get me back aboard, knowing that the holes in the hull would soon swamp my kayak again. It only took seconds before it was once again barely afloat.

The beach was a mile away, and we tossed around ideas about how to handle the situation. Michael could raft up with me and Bryant could tow both of us to the harbor.

Once there, Michael could possibly patch the holes with duct tape. Instead I opted to paddle the swamped kayak to shore. During the one-mile paddle I had to throw in several strong braces, and if I slowed down the kayak would lose stability and fall over.

Considering the circumstances, travel speed for that mile was surprisingly quick. At one point I tried holding on to the back of Michael’s kayak for a contact tow, but keeping the bow of the flooded kayak lined up with the bow of his kayak required core strength that I didn’t have, so I opted to just keep paddling. We made it to shore safely and decided to head out the following day with a different skin-on-frame kayak to try the self-rescues again.

The next day had little to no wind, the swell had increased to 10 to 12 feet at 11 seconds and the wind waves had diminished to less than a foot. We went to the same place, the “Smack Wall,” and I capsized and prepared to get myself back in the kayak.

As I climbed onto the back deck using the same method that had worked well in flat water, I watched as the waves filled the cockpit and it gradually sank under the surface. I realized that, once again, I would not be able to empty it myself.

I also attempted a reenter and roll with a paddle float and was successful, but the same problem presented itself, the cockpit was flooded and had submerged below the surface. Michael and I performed an assisted rescue, being careful not to scrape the bottom of my kayak on his deck fittings.

For me, the sinking kayak was a scary realization. In conditions where waves are entering the cockpit, I am not able to remove the water from the kayak to perform a full self-rescue. The good news, though, is that with adequate flotation provided by airbags, a skin-on-frame kayak can be paddled fully flooded but with severe limitations.

The lesson, I think, is that it is important to remember that things can go wrong in any type of kayak and with any type of gear. It is important to practice rescues in all types of kayaks to see what works and what doesn’t and to have a dependable roll.

Airbags in a skin-on-frame are very important, because even though my kayak flooded, I was still able to paddle it. Without the airbags, the kayak would have been lost to the bottom of the ocean. Airbags should be checked before every paddle to make sure that they have sufficient air. It is of course safer to paddle with others, and without a strong roll and good bracing skills, it is probably best to not take a skin-on-frame kayak out alone.

Helen Wilson is a professional sea kayaker who lives in Arcata, CA. She instructs and performs rolling demonstrations and presentations worldwide. Helen competed in the 2008 and 2010 Greenland National Kayaking Championships, and she and her husband Mark Tozer returned to Greenland in 2012 to guide an expedition on the east coast.

Helen is also a certified yoga instructor, specializing in Vinyasa Flow. For more information, visit www.greenlandorbust.org.

Kayak Surfing Etiquette

In places where the waves are well suited to surfing, you’ll often find board surfers. Knowing their rules of etiquette will help you avoid collisions with them and keep the peace at the break.

Kayak surfing in the ocean is growing in popularity. For some kayakers, it has become a sport of its own, involving advanced maneuvers in highly specialized ocean surf kayaks.

For other kayakers, it’s a way to sharpen skills while providing a fun diversion. Unfortunately, many cruising kayakers come into conflict with surf boarders.

Many kayakers show up at the ocean with a whitewater kayak and find themselves among unfriendly, sometimes very unpleasant, board surfers. The problem is one of ignorance.

I believe many kayakers have no understanding of the rules associated with the sport of surfing. This is understandable. At Westport, Washington, I’ve seen kayakers literally bongo slide (trapped sideways in a high brace) over board surfers. I’ve seen kayakers drop in on surfers with no regard for wave etiquette.

What is not cool are the kayakers who say, “The waves are free; I can do what I want.” This attitude is common among kayakers, and it’s causing problems. But in some places, this ignorance will get you into serious trouble.

Kayakers would do well to know the rules, not only to avoid dangerous collisions, but also to show more respect for others. Following these rules has kept me out of trouble and allowed me to coexist with board surfers in California, Costa Rica, Canada and Washington.

1. When possible, surf places that are not popular with board surfers.

Surf boarders require a steep wave face for a drop-in take off. They typically have fewer wave choices than a kayak. Kayaks have the speed to catch waves early, while they are still steepening, and be on a wave before a surfer can drop in. This can be a problem, as the board surfers wait impatiently for a wave, only to see a goober in a kayak hopelessly out of control side surfing toward them. Not only have they lost the wave, they must avoid the kayaker who may have no idea they’re even there. This is worse if it’s a sea kayak that is prone to broaching and cuts a wide swath down the face of the wave.

2. Don’t drop in on surfers, board or kayak.

The person closest to the breaking shoulder of a wave (steepest part) has the right of way. Surfers actually line up and take turns grabbing waves at the break. Kayakers routinely take off away from the break on a building wave while a surf boarder is working across the peeling face, only to encounter a kayak that’s either stuck sideways or surfing straight ahead.

3. Be extra courteous around surfers.

Take some time to size up the situation. If they are working a peak (steep, building part of a wavetake off point), try to find another area. If it’s the only spot, wait your turn. Sometimes I’ll sit a bit in shore from the surfers and grab waves they miss. Other times, I’ll wait for my turn, take a late drop and enjoy the wave. It’s important, though, to have control if you play among surfers. If they see you competently working the wave, they’ll show respect.

If you appear out of control, they’ll get nervous and tell you to go away. Sometimes the wave is hollow and very fast, making it less suitable for all but the best kayak surfers in specialized surf boats. If I’m uncertain of my ability to maintain control on a given wave, I’ll wait until the crowd dies down so my inevitable wipeouts won’t harm anyone.

4. Paddle out in a manner that doesn’t put you in the way of an incoming surfer, and look for surfers paddling out when you’re surfing a wave.

5. If it’s a hot spot, arrive early and enjoy an hour or so of surfing before the board surfers arrive. If you arrive at a hot spot and find a great wave that is populated with board surfers, go elsewhere, come back later or ease your way in. In some areas, surfers sometimes feel they own the place and are just plain nasty.

However, my experience has been that this is rare, especially in the Northwest. It may seem as though I’m allowing board surfers to dictate my experience. Not so. I’m simply learning to respect a tradition that has evolved for a reason. A kayak out of control in crowded waters is a very real hazard.

Acquiring the right skills and playing by the rules will lead to more fun. You’ll learn a lot by being around the surfers, and most of them will appreciate what a kayak can do on a wave.

Maintaining a Cohesive Group: Procedures for Staying and Working Together

Our trio felt like a finely tuned machine, so we all agreed that we didn’t need to continue following our procedures for staying and working together as a group on the last day of the trip. After spending a week paddling and getting along great all the way around the island, all we had left was a twenty-mile crossing back to the mainland.

The weather was calm and the visibility was good. We could even see the point we were heading to across the channel. Naturally working together, we were just going to do the crossing.

Everything started fine, but soon I was struggling to keep up and bridge the quarter-mile-wide gap between my two friends. One was pulling left, and the other right.

They were also racing to get ahead so the other would have to follow. I saw them stealing glances at one another and imagined the thoughts running through their heads. I had my own disappointing thoughts. In less than half an hour, any cohesion between three best paddling buddies had broken down.

Like waving a white flag to surrender, I blew my whistle and raised my paddle in the air. As they paddled over, they shook their heads, letting me know they knew what happened. Being such good friends, they played it up by jokingly accusing each other of going the wrong way.

Then we all laughed about how our competitive natures kept us from staying and working together as a group even though we were going to the same place. For the rest of the crossing, we were happy to resume our procedures, allowing us to paddle together in the same direction and at the same speed.

I find nothing is more difficult in sea kayaking than maintaining a cohesive group. Tired of chasing fast paddlers, gathering up people left behind, and watching groups divide into different routes, I developed procedures to make things easier for everyone on the kayak outings I organize.

Not only are direction and speed handled, but everyone’s participation is maximized, all to keep the group staying and working together.

Direction

Every kayak tracks differently and every paddler drifts slightly left or right of the heading. If you tell everyone to steer by compass following a certain heading, soon the group will be spread out over hundreds of yards.

The same results happen even if they are heading to the same point visible on the horizon. Don’t think it won’t happen using a GPS,  either. We have an infamous case in our local kayak club where two friends steering GPS courses to the same place argued because they felt the other was going the wrong way.

The funny thing is that just about everyone is going the right way. For the most part, navigating by kayak is not difficult. As I like to say, it’s not like going to the moon.

Sure, the heading may not be perfect and the course may zigzag or have a hook at the end, but most everyone will arrive at the same place. It is more important for the group to stay and work together than for the navigation to be perfect.

The best way to keep a group traveling in the same direction is for someone to be the lead paddler up front and for everyone else to follow. The heading for the lead can be a compass bearing, a visible point of land, hugging the coast, or whatever is called for at that particular location.

So while the lead is following the heading, no one else is. Instead, they are following the lead. There is a big difference between the two. Everyone following a compass heading, GPS track or line of sight route will spread the group out, whereas everyone following the lead will keep together.

Speed

In any group someone will be the fastest and someone will be the slowest. This is true even among a group of well trained athletic kayakers. Soon their various paddling speeds will spread them out over a distance.

But once again, everyone may arrive in the same place, perhaps even within a few minutes of each other, but by spreading out, everyone is essentially paddling alone without the resources and safety margin offered by the group.

For a group to stay together, the speed has to be controlled, and that can be done only from the front, because the slowest paddler in the back can’t go any faster.

Whomever the group is following up front has to look back frequently to check on each paddler, especially the one farthest back. If you are the lead and someone is falling behind, your speed is too fast, and if all of the paddlers are right behind your stern, your speed is too slow.

Essentially, the lead paddler has the responsibility of the sweep, making sure no one is left behind. While a sweep paddler is most commonly used in the back of the group to help any stragglers, I have found using a sweep just invites the faster paddlers to leave the slower ones behind. I learned this lesson the hard way when I was assigned to sweep from the back and was left behind towing another paddler.

The rest of the group was far ahead with no idea of what was happening, and I had no one to share the work of towing. The lead has to control the speed of the group based on his or her observations of the slowest paddler.

Rotating Shifts Up Front

To maximize everyone’s participation, I like to have each paddler take a shift up front to steer the heading and control the speed for the group. With everyone knowing they’ll take a turn as the lead, they will be more likely to cooperate as a group.

The length of the shifts depends on the number of people in the group and the length of the outing. For example, if there are six paddlers in the group and the paddle is four hours long, everyone will get a forty-minute lead shift. The more paddlers who can share the lead, the easier it is for everyone.

Steering the heading and controlling the speed is hard work, and after a lead shift, it’s nice to sink back into the group, relax, and follow the next lead.

Tips

To set the example for frequently looking back to check on everyone and controlling the speed, I like to take the first lead shift. It’s best to have paddlers new at being the lead take an early shift before they are tired and save the more experienced leads for later in the day when everyone is tired and conditions on the water may be worse than they were at the start.

You may want to give the slower paddlers additional lead shifts to let them slow the speed down even more if necessary. Remarkably, the slower paddlers tend to paddle faster when they are the lead, so it’s also a good way to help keep them moving.

When you are the lead paddler, don’t forget to look back frequently to check on everyone. It’s important to emphasize looking back to see each and every paddler, even if it takes looking over both shoulders, because you shouldn’t assume that everyone is right behind you if you look back and see someone. Sure, one paddler may be right behind you, but the rest of the group could be left behind.

The frequency with which you should look back to check on everyone and the distance you should allow between yourself and the last paddler depend on a variety of factors.

The greater the risk of the group getting separated, the more often you should look back and the less distance you should allow between yourself and the last paddler.

For example, in thick fog I’ll typically look back to check on everyone at least every couple of minutes to keep everyone close together and not let the last paddler get back any farther than 25 yards. On a clear, calm day with everyone paddling well, looking back to check on everyone may be necessary only once every ten minutes, and to give the group some space, the last paddler can be back as far as 50 yards. Whatever the conditions, everyone should always be in voice range so anyone can stop the group if necessary.

If you are supposed to be following the lead, avoid what I call steering from behind, which is paddling far to one side to try to draw the group in your direction.

If you find yourself doing this, you are probably focusing on the heading rather than following the lead. Also avoid creeping up alongside the lead to try to get him or her to increase the speed.

An unspoken sort of race often develops with the lead trying to stay ahead of you, and the group will get stretched out. You don’t want someone doing these same things to you during your shift up front, so stay in the area behind the lead, who should be left free to concentrate on steering the heading and controlling the speed for the group.

Following these procedures takes practice on everyone’s part, but the time invested in practicing is well spent, because it doesn’t take long for most paddlers to get the hang of the procedures and become an effective member of the group.

It will always be necessary for someone to keep things in check or the group will fall apart. As the person who has organized the group, I take that responsibility.

Occasionally you will have to remind someone to follow the procedures. Usually it’s the lead getting too far ahead of the last paddler or someone paddling far to one side to try to draw the group in their direction. Most of the time, they don’t even realize they are doing it.

Breaks

It can be frustrating for a group to have to wait frequently for individuals randomly taking breaks on the water. Regularly scheduled breaks keep everyone moving and stopping at the same time.

The schedule I found that works best for groups is a five- to ten-minute break to drink, eat and relieve oneself at the top of each hour, and around a one-minute break for a quick drink at the bottom of each hour. But anyone can call for additional breaks if necessary.

For example, someone may not be able to wait until the next break to adjust some gear. No one starts paddling again until everyone is ready.

These regularly scheduled breaks may seem regimented, but on a long paddle it is good for everyone to know when the next break is going to be.

They provide something to look forward to, divide the paddle into more psychologically and physically manageable intervals, and keep everyone well fueled and hydrated. But sometimes flexibility is necessary with the breaks.

My groups have often taken breaks early or late to take advantage of a protective cove to get out of the wind and not lose ground while we were stopped.

With the group stopped, breaks are a great time for everyone to check on each other’s well-being. Just one paddler having difficulty can reduce a group’s effectiveness and progress on the water. It’s better to identify and resolve problems earlier rather than later.

For example, it would be much better to spend a few minutes early on helping someone adjust the trim of their load to avoid weathercocking than end up towing later because of a sore shoulder. Speak up about any problems you may have. If someone looks like they are having difficulty, they may be reluctant to bring it up, so you should ask how they are doing and offer to help.

Decision Making

When it comes to decision making for a group, diplomacy is usually the best policy. For example, if ferrying is necessary because of wind or current, a conversation about it usually results in agreement for the best angle for the heading and makes it a group decision, rather than one paddler being proven right or wrong.

That conversation could also be about who is the best paddler to lead and to adjust the ferry angle as needed. Whatever the decision, including the group in it will usually result in more cooperation, not to mention take advantage of the combined brainpower of the group.

You should also decide when staying and working together as a group isn’t necessary. Nothing is worse than a bunch of procedures implemented for no good reason. I usually reserve the procedures for crossings and difficult conditions, when everyone benefits from the safety of the group.

Someone not feeling confident or having a sore shoulder are other good reasons, among many, to stay and work together. But if the coast is calm and everyone feels good about it, we often agree to meet again at a certain time and place. Especially on multiday trips, there are times when we all like to have a break from the group and do our own thing.

One of the most important decisions in sea kayaking is choosing paddling partners. A group operates better when everyone is familiar paddling with each other, paddles at about the same speed, shares the goals for the trip, and most importantly, agrees to stay and work together as a group.

Everyone should express their expectations early, well before meeting on the water. Anytime I organize a trip, I explain my procedures for staying and working together to make sure everyone is fine with them. Fortunately, most of my friends like the procedures, because they make things easier for everyone.

But occasionally there has been someone who doesn’t like them and ends up disrupting or even endangering the group by acting independently. I’d recommend avoiding paddling with people like this, because they place their own interests above those of the group.

Despite the proven effectiveness of these procedures, sometimes I wonder if I’m imposing them on my friends. Then occasionally I hear they’ve used them on their own trips.

Once you experience a system that works well keeping everyone staying and working together, it’s hard to go back to the stress, discord and risk of a splintered group. The procedures really make paddling in a group safer, easier and more enjoyable for everyone.

Paddle Float Rescue with a Kayak

I just recently talked with a sea kayaker in Chicago who described an incident at Cape Fear in North Carolina. Garrett showed me some photographs of a rough sea and proudly explained how he had paddled right out through all the breakers and then sat marking time, punching through each wave as it came.

He was fine until he turned toward shore, when a wave unbalanced him, and he capsized and failed his roll in the rental kayak he was using. “I rigged up my paddle float and fitted the paddle beneath the bungies behind the cockpit, but every time a wave hit me, the paddle sheared around alongside the kayak like a pair of scissors closing and I capsized again.

After three unsuccessful attempts, I realized that it was just not going to work.” At that point, he decided he was wasting his time trying to climb back in, and that he had better swim for shore. His account made me think about self-rescues, about the dependence of many paddlers on equipment rather than on paddling skills and their reliance on self-rescue rather than group rescue. I see so many kayakers carrying an inflatable paddle float on their deck alongside a stirrup bilge pump. But I wonder how many of those paddlers have practiced in the kinds of waters they would capsize in? How many others, like Garrett, believe that self-rescue is not possible in rough water?

What is a paddle float?

The paddle float is a buoyant accessory that fits onto a paddle blade to create an outrigger for additional stability during reentry. Many sea kayakers in the U.S. carry them on deck.

I had a look at what different paddlers were carrying. The most common paddle float is an inflatable mitten that pulls over the paddle blade. In effect, this is a double envelope that squeezes tightly onto your blade when you inflate it. A short tube for oral inflation is fitted with a mechanism for closing the tube, either by twisting or by pushing in, depending on the style. The bag itself is normally either a waterproof nylon or vinyl.

The nylon is more durable but more expensive. Also featured on these paddle floats are eyelets by which you can attach the float to your paddle or to your deck. Some have a nylon strap already fitted for this. Floats with two air bags are better than one.

The first paddle float I bought to try, years ago, split one day when I was fitting the blade into the envelope, and since it had only one air chamber, it was rendered useless. The other popular choice is a float made of minicell foam fitting. Most of the foam floats I saw were homemade.

They are more bulky to carry and store, but unlike inflatable paddle floats they cannot split. And because they don’t require inflation, they’re quicker to use. You can even use them for a paddle float roll without having to bail out. Some manufacturers supply paddle floats, either foam or inflatable, that do double duty as seat backs.

Choosing a float and preparing it for use

You need to consider the size and shape of your paddle blade when purchasing a float. Not only must your blade fit into the pocket provided-and some pockets I tested are too narrow for broad blades-but the float must stay attached when in use.

Check that your float fits your paddle blade and inflate it (if required). The float should be securely attached to the blade. It is essential that the float is fastened by means of a strap or line around the throat of the blade. Otherwise it will probably be pulled off in waves, so modify your float if necessary with a short line and quick-release clip.

When paddling, secure your float somewhere on your kayak where it can easily be reached. Deck elastics alone are not adequate in surf conditions unless the float is additionally tethered. Storage behind the seat is fine, as long as the float is fastened in.

When you need to use it, you will be out of your kayak anyway so access will be easy. You may decide that straps across the rear deck or bungies to hold the paddle in position during the self-rescue are a good idea, but if you choose bungies, bear in mind what happened to Garrett: the connection between the paddle and the kayak may not be as positive as it needs to be in rough water.

Also be aware that any rescue that relies on particular deck fittings on your kayak might not be appropriate if you paddle a rental or borrowed kayak.

The self-rescue

Now for the paddle float self-rescue. You will need to hang onto your kayak, either by threading an arm beneath a fixed deck line or by hooking a leg into the cockpit. First secure your paddle float to the blade. Inflate at least one of the air bags and make sure that the valve is closed.

Probably the most awkward stage in setting up for a self-rescue in choppy water is fitting the float onto the paddle blade. Inflatable floats show a tendency to cling closed when wet, making it difficult to slip the blade inside, and this, combined with the jolting of the water, can make this stage of the procedure time-consuming.

Hold the paddle shaft across the rear deck immediately behind the cockpit coaming so that the end of the paddle with the float extends right out past you onto the water at right angles to the gunwale. You should be in the water aft of the paddle.

This works fairly well with a kayak with a flat back deck but is less secure with a curved deck. Some paddlers I spoke to like to have straps on the back deck to hold the paddle in position, making a fixed outrigger of the paddle float, but others prefer to grasp the paddle against the back of the cockpit, which makes it easier to retrieve the paddle after reentry.

Kick your legs to the surface and slide yourself facedown across the stern deck, pushing the kayak down beneath your chest. Quickly hook your feet over the paddle so that part of your weight is supported by the paddle float. Lie facedown on the rear deck with your head toward the stern and lift one foot at a time from the paddle into your cockpit.

At this point you should still be pinning the paddle to the deck, with the hand grasping around the cockpit coaming and paddle shaft. Keep your weight shifted slightly to the paddle float side of the kayak. Move your outside hand (the hand away from the paddle float) to the side the float is on and reach around your back with the other hand to grip the paddle on the outside. Keep some weight on the paddle float and swivel toward the float into your seat. Keeping the float on the water for stability, lift the other paddle blade over your head and reposition it across your lap.

Now you can press the paddle shaft down against both sides of the cockpit to maintain stability while you bail. The easiest way seems to be to use your elbows to pin the shaft beneath the front of your PFD. Although a foot-operated bilge pump provides for hands-free bailing, and even a deck-mounted pump leaves one hand free for holding the paddle for balance, in the U.S. a hand pump requiring both hands to operate appears to be the style most commonly carried. Bailing in rough conditions is futile anyway until the spray skirt is replaced, but attaching the skirt to the coaming requires two hands and there is a fair chance that the conditions that led to the initial capsize will overturn you again.

The final stage is to remove and stow the paddle float-a difficult task in rough water because you’re trying to brace and handle the float at the same time. An alternative rescue that works well with a large cockpit is to slide across the rear deck as before but swivel facedown, head toward the bow, and straddle the deck with legs wide in the water to either side of the kayak.

Extend your paddle for support, drop your butt into your seat and bring your legs in one at a time. You can use this same method with a small cockpit, but it is a lot more difficult because you will have to sit on the back deck, in an unstable position, in order to slide both feet into the cockpit.

Use your paddle with float as a stabilizer by gripping it tightly across both sides of the cockpit, keeping some of your weight on the float for balance. It is likely you’ll have to hold the shaft in the crook of one elbow and brace, so that your other hand is free to help you slide in.

What to do in rougher conditions

Enter your kayak from the upwind side. Trailing the drifting kayak will help you keep your legs high. If you try to reenter from the downwind side, your legs will end up beneath the hull as it blows toward you.

Once you have reentered the kayak, you will need to continue to brace on the upwind side, into oncoming waves for security. Make your movements swift but smooth. The fewer waves that hit you while you are getting back into the cockpit, the greater your chance of success.

Some paddlers advocate partly filling a rescue float with water so that it cannot easily fly up into the air when the kayak lurches in the waves and throws your weight to the side of the kayak not supported by the paddle float.

On trips this means that the paddle float can double as an extra fresh water carrier. It won’t be as compact to stow, but the weight certainly makes the float a little more stable in choppy water. I recently set up a self-rescue scenario with a group of competent paddlers on calm water.

Those paddlers choosing a reentry and roll were upright within fifteen seconds, at which point none of those using a float had finished fastening their floats to their blades. The quickest paddle float rescues on that occasion ran almost two minutes (in calm conditions), not including removing the float, bailing or replacing the spray skirt.

The same paddlers accomplished assisted rescues in less than a minute, including emptying the kayak and replacing the spray skirt. The paddle float rescue, even when it works, keeps the paddler in the water for a significantly longer time than the other methods.

To sum up

Paddle floats are a useful aid to the solo paddler who capsizes and fails to roll, but in most situations where this might happen should the paddler really be paddling solo?

When paddling with others, the float rescue is a poor substitute for an assisted rescue. If you trust the float rescue to save your life while paddling alone, you’d be foolish to venture out in conditions in which your self-rescue is untested or unreliable.

Practice your self-rescues regularly and always check that your paddle float is in working order before you go.

The only paddlers that I found who could show me a quick and effective float rescue were those who had practiced it a lot. The main limitation to this kind of self-rescues your own skill.

What one person can do with a paddle float, another can find impossible. You will have your own limits. Garrett exceeded his limits at Cape Fear.

As a footnote

What do I consider the most effective self-rescue using a paddle float? My vote goes to the reentry and roll. And as a back up for Eskimo rolling, not as a substitute for it.

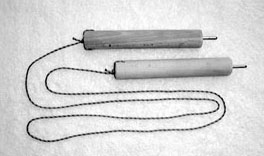
While the paddle float was devised as a way to improvise an outrigger for self-rescue, its best use, in my opinion, is as an aid to a reentry and roll. Once the rudimentary principles of a roll are mastered, a reentry and roll with a paddle float can offer a reliable self-rescue, even though rolling without the float might still be elusive.

For a reentry, flip the kayak upright, float yourself alongside the kayak facing the bow, and grasp the paddle against the far side of your cockpit so that it extends out at right angles past you with the float as far from the side as possible. Grip the near side of your cockpit with your other hand. Lie back in the water. Hold your breath and swing your feet into the cockpit between your hands. Still gripping both sides of the cockpit, wriggle yourself into your seat, and with your feet on the foot braces, grip firmly with your knees.

Now grasp the paddle shaft with both hands and gently pull down against the buoyancy of the paddle float until your head reaches the surface and you can breathe and see what you are doing.

Relax now in this position. Finish your roll by pulling down on the paddle with the hand closest to the paddle float, pushing your head down toward the water and flicking with your hips to right the kayak. When the kayak is upright, bring your head inboard close over the deck. Maintain your balance with the aid of the paddle float by gripping it tightly across the cockpit coaming.

As with the previous paddle float self-rescue, in windy conditions or in waves or surf, enter from the side the waves are approaching from so that you are bracing on the correct side once you are upright.

If you practice the reentry and roll with a paddle float and find it straightforward, try deflating the float a little. The less buoyancy you need in the float, the more efficient your hip flick is becoming. Ultimately you might aim to be able to self-rescue without a float, but then you can still carry the float as a back-up in case you need it sometime.

Of course practicing a roll with a paddle float is a good way of gaining confidence for rolling without a float. It is also an excellent way to improve your hip flick until it is almost effortless.

Use the float for practicing paddle braces until you can brace with confidence and can progress to bracing without a float with no fear of failure. Regularly using a paddle float increases your familiarity with it and helps you gauge its advantages and limitations for yourself.

To improve your sense of balance, try reentering without the paddle float, going through all the moves on calm water. Then rehearse with your float in varying conditions until you know what you are capable of with a float rescue.

Technique: Surfing in Sea Kayaks

Summer’s almost over in the northern hemisphere, which implies one great thing for us sea-bound shinanagan-seekers: Autumn waves are near!
Fall is a favored season among surf destinations across the globe, and particularly on the North American Pacific Coast,  for its mixed bag of lingering summer south swells and incoming winter north and northwest swells. The combination compliments a variety of the world’s coastlines with the year’s most consistent collection of waves and supporting weather conditions, providing an array of surfing communities with a few months of prime-time paddling.
Touch up on your surf technique with this article by Gregg Berman from our June 2011 issue. Get more info on sea kayak surfing and all aspects of sea kayaking by checking out Sea Kayaker magazines‘s online article archives, ordering a back issue, or subscribing today!

Surfing Ocean Waves with Touring Kayaks

Surfing ocean waves as they rise and fall toward shore can be a peaceful commune with nature or an adrenaline-filled rush and a test and testament of our paddling technique. Surfing can provide bursts of cardiovascular exercise and bring hours of smiles and mind-numbing good fun. The surf zone is a place that we often fear and avoid while touring an exposed coast, but some knowledge of wave dynamics along with a few basic techniques will enable us to find as much pleasure there as we do when cruising along the coast.

REACHING THE LINEUP—SURFING SHOREBREAK LONG-BOAT STYLE

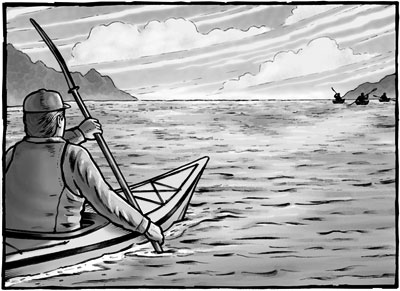
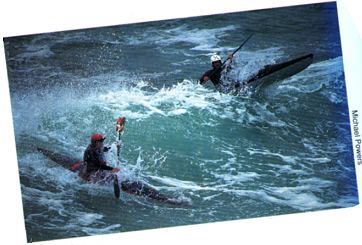
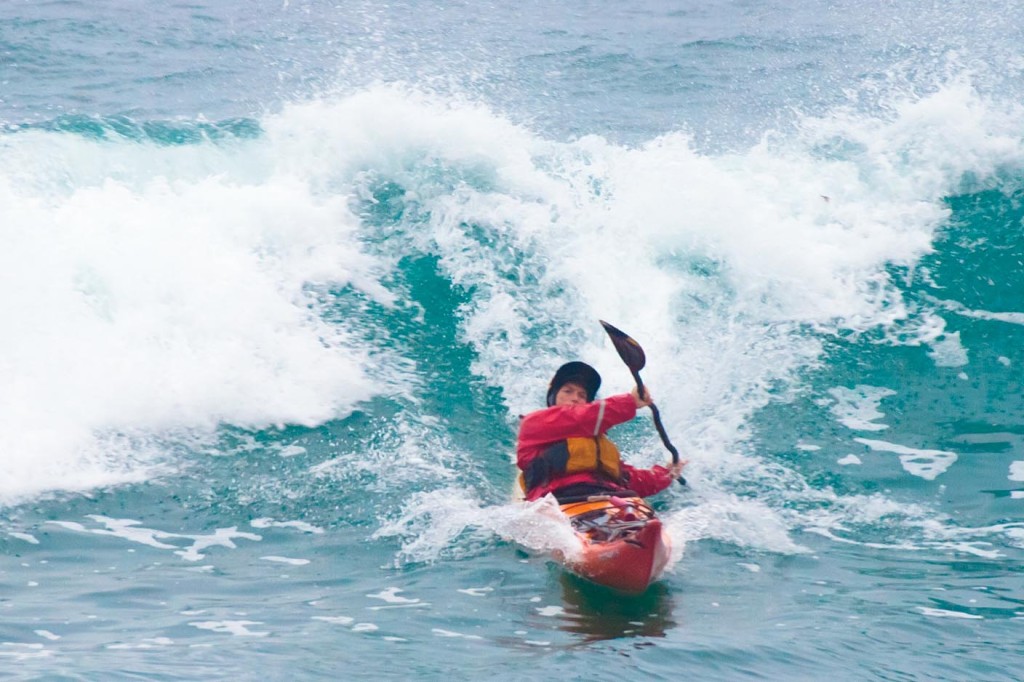
Waves with shallow faces, such as the one pictured here, are better for sea kayak surfing than waves with steep, hollow faces.

There are a variety of kayaks that can be used in the surf including whitewater boats and models built specifically for surfing, but we’ll confine our discussion to surfing with sea kayaks. In stand-up or board surfing there are long boards and short boards, with each craft being more or less suitable for different types of waves.

The same applies to kayak surfing (known to some as butt surfing). Touring kayaks are known as “long boats” in surf parlance, and whitewater or surf-specific kayaks are “short boats.” Each is suited for different conditions. In general, a touring kayak will have more difficulty on steep waves because of the tendency for its long bow to plow under ahead of the wave, typically resulting in a wipeout or at least an out-of-control broach.

When it comes to catching more gently sloping or faster moving ocean swell, a touring kayak with its greater hull speed will have a definite advantage over the slower-moving short boats. It is these more gently sloping waves that you’ll want to seek out as you begin your education in the surf.

SAFETY FIRST

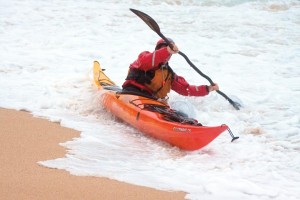
Most kayaking accidents happen at the juncture of land and sea–right next to the surf

Most kayaking accidents happen at the juncture of land and sea—right next to the surf—while getting in and out of the boat. Simple things like knowing how to enter and exit the kayak while waves are sweeping up and down the beach can make your session go much smoother.

If you haven’t been in the surf before, go with experienced friends or, better yet, take a class or two. “Surf zone” classes teach the skills that will safely take you from the beach, through the surf and back again. “Surf” classes teach the techniques of riding the waves once you’re out there. You should have all the typical kayak safety gear, but be careful how it’s stowed.

Make sure you have everything cleared off your deck or else very securely fastened. The same applies to anything in your cockpit; nothing should be loose. You don’t want a yard sale of your gear strewn about when a wave cleans your deck or gets the better of you and you go for a swim. Dress properly for your local water temperature and wear an appropriate surf helmet.

A helmet not only protects your head from collisions with rocks or sand but also from other surfers who might collide with you. Of course maintaining a wide berth in the surf zone to avoid collisions is best. You’re piloting a big, heavy craft so avoid areas highly populated with swimmers.

Wherever you find good waves you’re likely to find other surfers, and it is important to mind your manners. (Click here for a link to Sea Kayaker’s article on surfing ettiquette)

When playing in surf you can count on getting knocked over. You should have self-rescue skills that you can execute reliably in rough water as well as some friends who are skilled at helping you reenter your boat.

Better yet, you should perfect a good combat roll. Bailing out in the break zone makes recovery from a capsize exponentially more difficult than having a dependable roll.

SCOUTING A LOCATION SPILLING VS. DUMPING

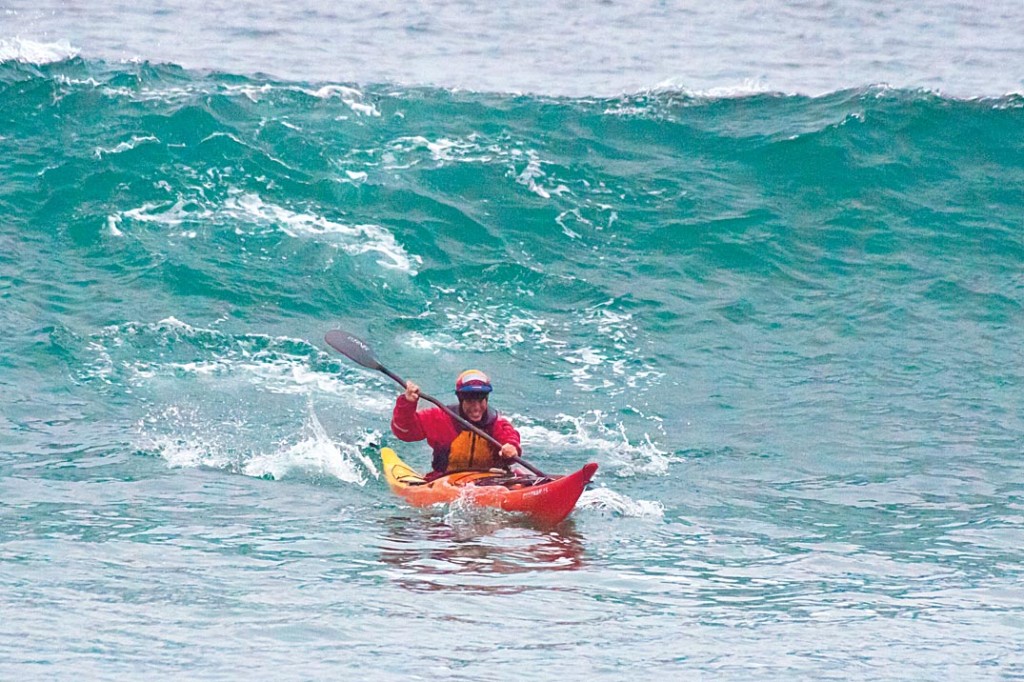
When scouting for waves, look for smooth, open faces from longer period swells that break down the line rather than closing out all at once.

While the local wind can certainly create ridable waves, they’re often a bit sloppy and not well formed. The best ocean surfing waves are smooth, glassy affairs created by storms thousands of miles away. So where can you find the conditions to create the best waves for long-boat surfing?

While every beach has waves, not all beaches are created equal. In terms of safety, a sand beach, when available, is certainly safer than one of gravel or rock. Examine the beaches in your area closely. Even with a sand beach there may be hazards to avoid, such as large submerged rocks just off shore. Also note the steepness of the beach. Waves forming over gently sloping beaches release their energy over a longer period.

They’ll rise gradually so when they start to break they have some foam forming just at the top then gently “spilling” down the face. Contrast this with steep, “dumping” beaches where the wave quickly peaks up over an abruptly shoaling bottom, curls over itself and explodes, releasing its energy all at once. Although most beaches are a mix between the two extremes, for your first forays, finding a beach more on the spilling side of the continuum instead of the dumping side will help speed your learning curve as well as your enjoyment.

Keep in mind, the shape of a beach and the waves you find there can be dramatically different with the changes in tidal height, so become familiar with the various dynamics of your chosen surf spots.

If you happen to be fortunate enough to live near an offshore reef break that has spilling waves, that’s even better still. On reef breaks the waves crest over the reef then tumble across deeper water before they reach shore, so if you get tumbled you’re not as likely to hit the bottom as you might be if you get rolled in a beach break.

Also on reef breaks it’s much less work to get back to the lineup after each ride. Instead of punching out through the surf, you can just paddle around it. The downside of a reef break is that it can be a very long, arduous swim to shore if you should come out of your boat.

Your roll should be solid, but swimming is a common thing as you learn and should be expected and even enjoyed. It simply means you’re pushing at the boundaries of your skill level. As your surfing improves, your ability to roll is likely to improve as well.

DROPPING IN

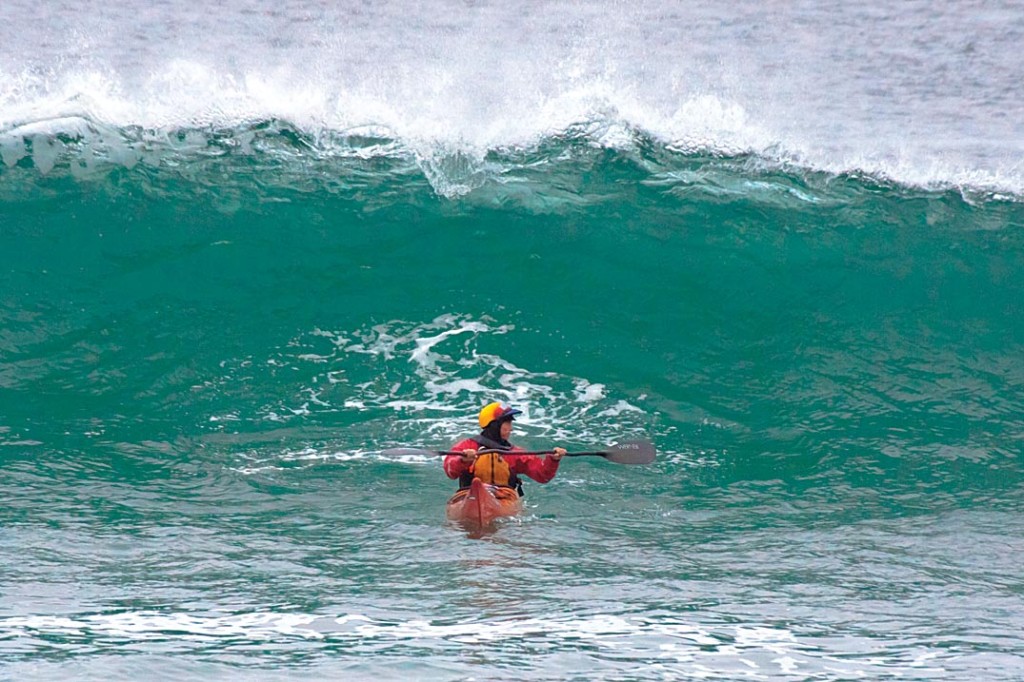
Under the wave’s lip, perpendicular to the face, is not the ideal position for a sea kayaker. Surfers call this being “too deep.”

Riding waves is about the joy of being pushed along by the water and need not involve big surf. As your comfort level grows, you may find enjoyment on larger and larger waves.

To start though, you can have the most fun with waves on the smaller side of the scale. A wave height of a few feet is all you need. Catching shorebreak waves is all about timing the swell and finding the sweet spot known as the “lineup” where the wave is at the perfect shape and height to “drop in” for a ride.

Even for the faster sea kayaks, a wave still needs to reach a certain steepness to provide propulsion. If you’re too far to the outside of the lineup the wave might not have steepened enough and will simply roll under you. But you don’t want the wave to be too steep either. Too far to the inside and it may break over you or have steepened to the point that your ride ends before it begins when the wave shoves your bow immediately underwater.

If this happens, your bow will slow precipitously while your stern continues to be pushed forward at the speed of the wave. You’ll broach at the very least or perhaps do an endo where your stern gets lifted straight up over your bow. Either can actually be fun when you choose to do it, but definitely not what you’re looking for if you want to catch the wave.

With time, practice and watching others, you’ll get a better idea of just where to find the sweet spot during your surf session. When you do find that spot, you can remember exactly where it is by lining up objects on shore to assess your position.

Once there, keep an eye on the ocean behind you to get a feel for those lumps of water coming your way. But don’t just look behind you. Follow the trajectory of each wave until it makes it through the impact zone. You want to have a sense of what those small mounds in deep water will turn into as they pass you and make their way to shore. In this way you can assess early what is too small, too large or just the right wave for that perfect ride.

Paddle to gain momentum and try to catch the wave with an open face before it breaks.

Once you’ve figured out which waves you want, you’re going to need just the right burst of speed to catch the wave. If you don’t paddle fast enough to match the speed of the wave it may roll underneath you.

If you start paddling too fast and/or too early you might find yourself in the impact zone where the wave steepens precipitously before it reaches you. At that point you may have the wave breaking behind you or even on top of you instead of pushing you forward.

But if you time everything just right, as the wave continues to steepen behind you, your speed will increase simultaneously in correlation to the changing shape of the wave. With the right combination of body and paddle finesse which we’ll discuss later, you’ll surf gracefully down the face of the wave.

BODY POSITION AND PADDLE STROKES

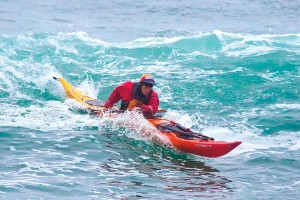
Leaning forward helps you regain position in front of the wave’s energy. Alternatively, leaning back helps shift your weight to keep the bow above water.

There are a few techniques to master that can greatly increase your ability to both catch a wave and then to stay on it once there. The first is body English or knowing when to lean forward or backward in response to the water dynamics.

If you’re trying to catch a wave and it looks like it might pass under you (your bow is hanging over the face rather than sliding down it), try leaning forward as much as you can while still paddling hard. That may be enough to allow you to drop down the face. If however, the face is steep and your bow starts to bury in the trough ahead of the wave, lie back as far as you can to keep the bow high in the water and thus prevent a broach.

Once you are up to speed and being carried along on the wave face, if you want to stay straight and surf ahead of the wave, you’ll need to continue leaning back while doing a stern rudder on one side or the other while edging up on the opposite side.

When you perform a stern rudder on either side, normally this would turn your kayak toward the side your paddle is on. But if your goal is to maintain a straight course downwave, you’ll need to drive your opposite knee up into the deck to edge up on that opposing side. On flat water this edging of the kayak would produce a turn toward the high side. But on the wave face these two equal but opposing forces acting in concert enable you to keep moving straight with the wave’s line of travel.

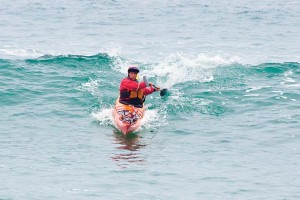
Edging away from the stern rudder is a good way to make gradually sweeping turns

Sea kayaks are not the best for carving turns on a wave, but if you find a gently sloping wave face you might be able to pull it off without broaching. To do this, you’re essentially performing a low brace turn.

Lean into your turn, thrust your paddle out as far as you can to the side and a little to the rear and you’ll carve your turn. Remember to keep a bend in your trailing elbow to protect your shoulder. If the face remains smooth, you may be able to switch your stern rudder to the other side and carve back to move in the other direction or just straighten out again.

More often than not though, in long boats you’ll find it difficult to straighten out again, and ruddering on the downwave side of the kayak is likely to capsize you if the kayak fails to turn in response to your rudder. In this case, now that you’re no longer perpendicular to the wave and surfing down, it may be possible to surf across (nearly parallel to) the face (as board surfers do) by keeping your blade on the upwave side and using a stern rudder, or very light pressure low and/or high braces.

It is more likely your options will be either to ride out the wave in a broach (Figure 8: remember to keep your elbows tucked into your sides as you brace into the wave), or to continue your low brace turn on the same upwave side to power off the back of the wave.

A high brace turn will accomplish that as well, and either is great for getting off the wave if you don’t want to ride it all the way to shore.

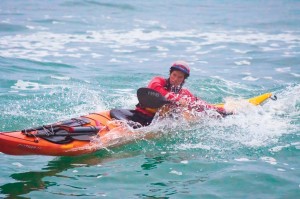
Low brace turns are good for either getting off the wave before shore or carving turns on gently sloping waves.
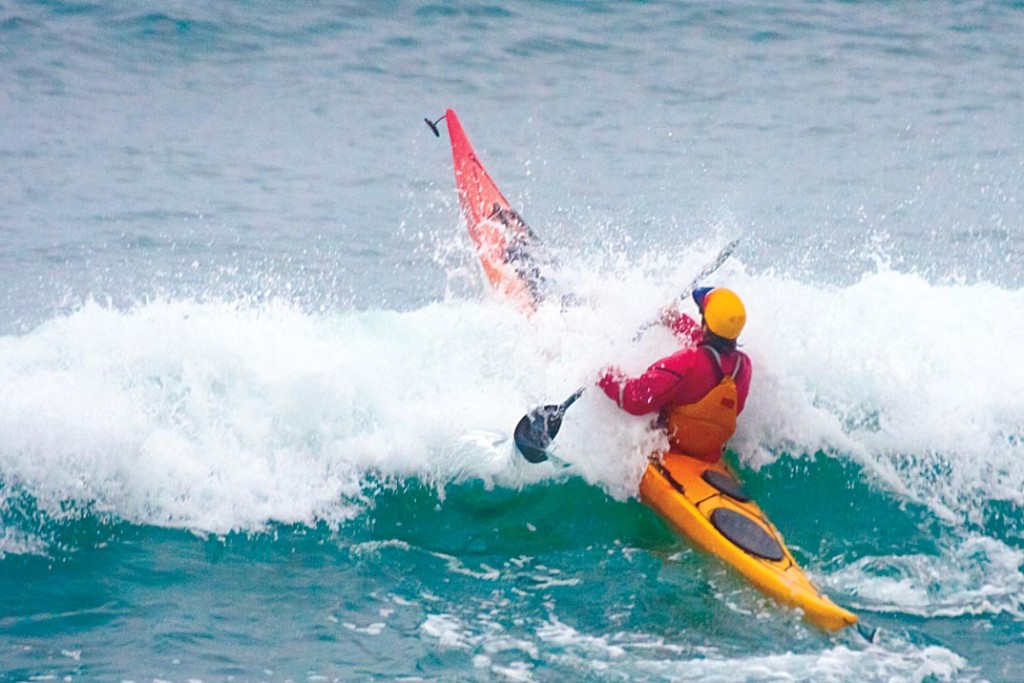
IN THE SOUP

If all that sounds too daunting to figure out initially, you can hold your surf session in the soup zone. This is the area closer to shore where the already broken waves have turned into lines of foam. These foam piles are not only very ridable, (Figure 10) they’re often the perfect place to hone your technique. Catching these broken waves requires the same sort of timing used for the unbroken ones but here you don’t have to worry about the possibility of the waves crashing on you.

Since much of the waves’ energy has already dissipated, the mental and physical demands on your timing and technique are much less. Even heading back out for the next ride is easier when you’re puching through foam instead of green water (Figure 11).

Once you’re comfortable riding the broken waves you’ll have acquired the timing to take on larger, more challenging green wave faces. If the waves out at the lineup appear to be beyond your current skill or comfort level, the soup zone can be lots of fun in its own right.

BOAT DESIGN, SKEGS AND RUDDERS

As you learn to ride ocean waves, you’ll discover that both the location of the lineup and the speed required to catch the wave are going to vary from day to day or even with varying tide cycles within the day. Different boat designs as well as your skill level and your comfort being in the surf zone will also affect your performance.

It takes a lot of trial and error to figure it all out, so have fun and don’t get discouraged if you aren’t catching all the waves you want to right away. While you can use any touring kayak to surf, there are features that improve a kayak’s efficiency in the surf. Touring kayaks tend to have a high length-to-width ratio, sharp vertical ends and a creased keel line, all features that help with tracking while making passages.

These same features tend to make the bows plow beneath the wave, resulting in endos and broaches. Some sea kayaks have features that keep the bow from diving under. A cockpit coaming that’s low at the back (combined with a seat-back that doesn’t extend above the coaming) will allow you to shift your weight back and keep the front end from “pearling” (diving for pearls).

A high-volume bow will also help keep the nose up. A kayak with a lot of rocker, the curvature from front to back, further aids in a high-nose attitude. Typically the more rocker the better when surfing. Combine that with a bottom that is more flattened than rounded or V-shaped and maneuverability on the wave is increased.

You may employ a skeg or a rudder for surfing wind waves, but they have limited application in the ocean surf where the energy unleashed by the waves is much greater.

Partially lowering a skeg may initially help keep you straight on the wave, but once you start to come off line, even a partially exposed blade will keep you from straightening out again and force you further into a broach. Even worse, having the skeg down may cause the boat to “trip” away from the wave where you’ll be “window shaded” or rolled over and over toward shore until the wave loses enough power for you to regain control.

Rudders used to great effect in maintaining a straight line on other types of waves are much less effective when surfing shore break in sea kayaks. Blades tend to get broken or bent. If your goal is to surf straight down the face running ahead of a wave, your best option is to hone your skills with the techniques of boat edging combined with stern rudders (using your paddle) and leave your rudder or skeg undeployed.

GETTING OUT THERE

If you find the idea of surfing appealing but you’re not near the ocean, you don’t feel you’re ready for the dynamics of swell produced ocean waves or you’re simply looking for a different sort of surf experience, you can get exhilarating rides on wind waves, boat wakes and tidal races.

When you are ready for surfing ocean waves, they can offer you peace and serenity as you slip swiftly forward on a gently sloping face or give you an adrenaline-fueled rush as you scream down a roaring wave, spray in your face.

Having the skills to ride these waves will also open up grand new vistas for where your kayaking adventures can take you. Regardless of which experience you seek, I wish you many long rides wherever you find them.

Now, get out there!