

Surfing Ocean Waves with Touring Kayaks
Surfing ocean waves as they rise and fall toward shore can be a peaceful commune with nature or an adrenaline-filled rush and a test and testament of our paddling technique. Surfing can provide bursts of cardiovascular exercise and bring hours of smiles and mind-numbing good fun. The surf zone is a place that we often fear and avoid while touring an exposed coast, but some knowledge of wave dynamics along with a few basic techniques will enable us to find as much pleasure there as we do when cruising along the coast.
REACHING THE LINEUP—SURFING SHOREBREAK LONG-BOAT STYLE
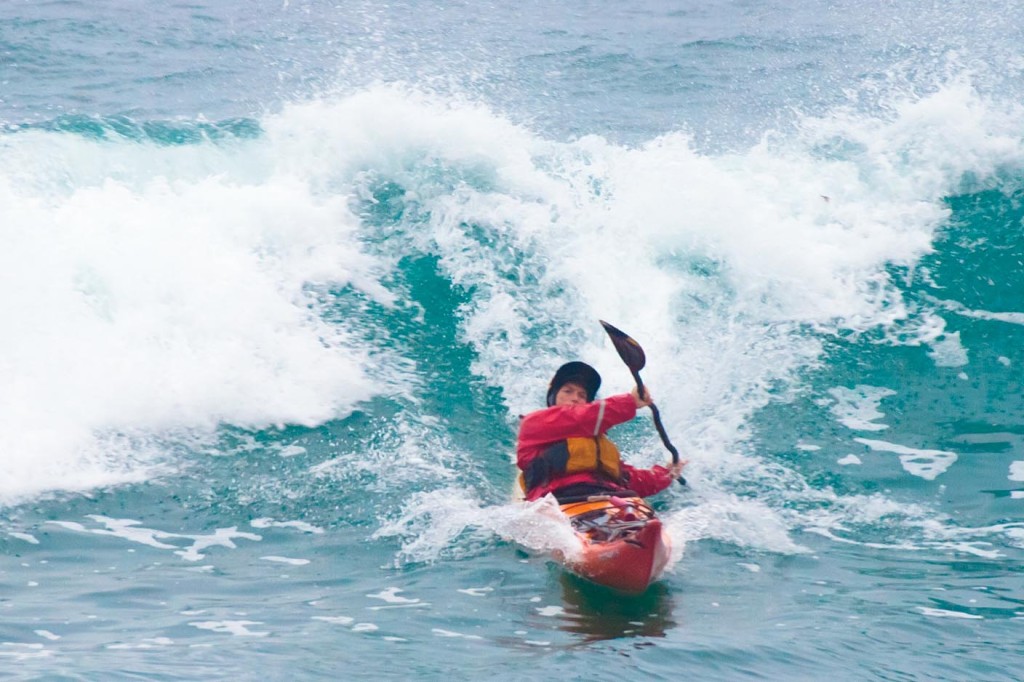 Waves with shallow faces, such as the one pictured here, are better for sea kayak surfing than waves with steep, hollow faces.
There are a variety of kayaks that can be used in the surf including whitewater boats and models built specifically for surfing, but we’ll confine our discussion to surfing with sea kayaks. In stand-up or board surfing there are long boards and short boards, with each craft being more or less suitable for different types of waves.
The same applies to kayak surfing (known to some as butt surfing). Touring kayaks are known as “long boats” in surf parlance, and whitewater or surf-specific kayaks are “short boats.” Each is suited for different conditions. In general, a touring kayak will have more difficulty on steep waves because of the tendency for its long bow to plow under ahead of the wave, typically resulting in a wipeout or at least an out-of-control broach.
When it comes to catching more gently sloping or faster moving ocean swell, a touring kayak with its greater hull speed will have a definite advantage over the slower-moving short boats. It is these more gently sloping waves that you’ll want to seek out as you begin your education in the surf.
SAFETY FIRST
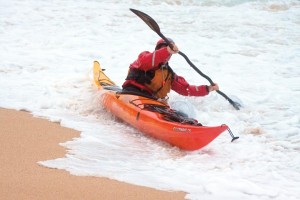 Most kayaking accidents happen at the juncture of land and sea–right next to the surf
Most kayaking accidents happen at the juncture of land and sea—right next to the surf—while getting in and out of the boat. Simple things like knowing how to enter and exit the kayak while waves are sweeping up and down the beach can make your session go much smoother.
If you haven’t been in the surf before, go with experienced friends or, better yet, take a class or two. “Surf zone” classes teach the skills that will safely take you from the beach, through the surf and back again. “Surf” classes teach the techniques of riding the waves once you’re out there. You should have all the typical kayak safety gear, but be careful how it’s stowed.
Make sure you have everything cleared off your deck or else very securely fastened. The same applies to anything in your cockpit; nothing should be loose. You don’t want a yard sale of your gear strewn about when a wave cleans your deck or gets the better of you and you go for a swim. Dress properly for your local water temperature and wear an appropriate surf helmet.
A helmet not only protects your head from collisions with rocks or sand but also from other surfers who might collide with you. Of course maintaining a wide berth in the surf zone to avoid collisions is best. You’re piloting a big, heavy craft so avoid areas highly populated with swimmers.
Wherever you find good waves you’re likely to find other surfers, and it is important to mind your manners. (Click here for a link to Sea Kayaker’s article on surfing ettiquette)
When playing in surf you can count on getting knocked over. You should have self-rescue skills that you can execute reliably in rough water as well as some friends who are skilled at helping you reenter your boat.
Better yet, you should perfect a good combat roll. Bailing out in the break zone makes recovery from a capsize exponentially more difficult than having a dependable roll.
SCOUTING A LOCATION SPILLING VS. DUMPING
 When scouting for waves, look for smooth, open faces from longer period swells that break down the line rather than closing out all at once.
While the local wind can certainly create ridable waves, they’re often a bit sloppy and not well formed. The best ocean surfing waves are smooth, glassy affairs created by storms thousands of miles away. So where can you find the conditions to create the best waves for long-boat surfing?
While every beach has waves, not all beaches are created equal. In terms of safety, a sand beach, when available, is certainly safer than one of gravel or rock. Examine the beaches in your area closely. Even with a sand beach there may be hazards to avoid, such as large submerged rocks just off shore. Also note the steepness of the beach. Waves forming over gently sloping beaches release their energy over a longer period.
They’ll rise gradually so when they start to break they have some foam forming just at the top then gently “spilling” down the face. Contrast this with steep, “dumping” beaches where the wave quickly peaks up over an abruptly shoaling bottom, curls over itself and explodes, releasing its energy all at once. Although most beaches are a mix between the two extremes, for your first forays, finding a beach more on the spilling side of the continuum instead of the dumping side will help speed your learning curve as well as your enjoyment.
Keep in mind, the shape of a beach and the waves you find there can be dramatically different with the changes in tidal height, so become familiar with the various dynamics of your chosen surf spots.
If you happen to be fortunate enough to live near an offshore reef break that has spilling waves, that’s even better still. On reef breaks the waves crest over the reef then tumble across deeper water before they reach shore, so if you get tumbled you’re not as likely to hit the bottom as you might be if you get rolled in a beach break.
Also on reef breaks it’s much less work to get back to the lineup after each ride. Instead of punching out through the surf, you can just paddle around it. The downside of a reef break is that it can be a very long, arduous swim to shore if you should come out of your boat.
Your roll should be solid, but swimming is a common thing as you learn and should be expected and even enjoyed. It simply means you’re pushing at the boundaries of your skill level. As your surfing improves, your ability to roll is likely to improve as well.
DROPPING IN
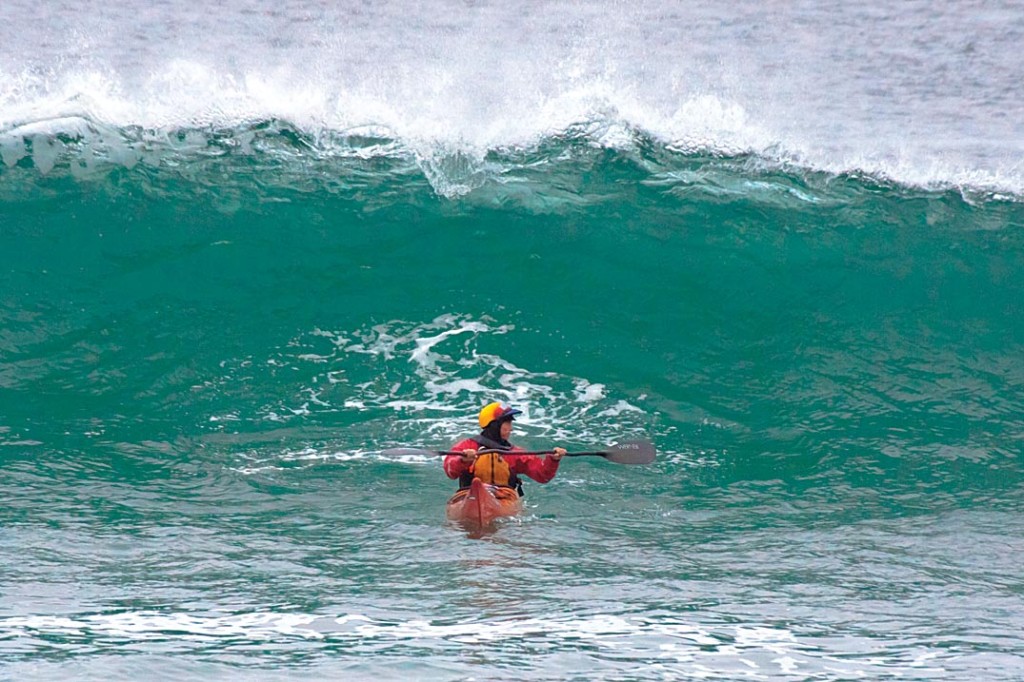 Under the wave’s lip, perpendicular to the face, is not the ideal position for a sea kayaker. Surfers call this being “too deep.”
Riding waves is about the joy of being pushed along by the water and need not involve big surf. As your comfort level grows, you may find enjoyment on larger and larger waves.
To start though, you can have the most fun with waves on the smaller side of the scale. A wave height of a few feet is all you need. Catching shorebreak waves is all about timing the swell and finding the sweet spot known as the “lineup” where the wave is at the perfect shape and height to “drop in” for a ride.
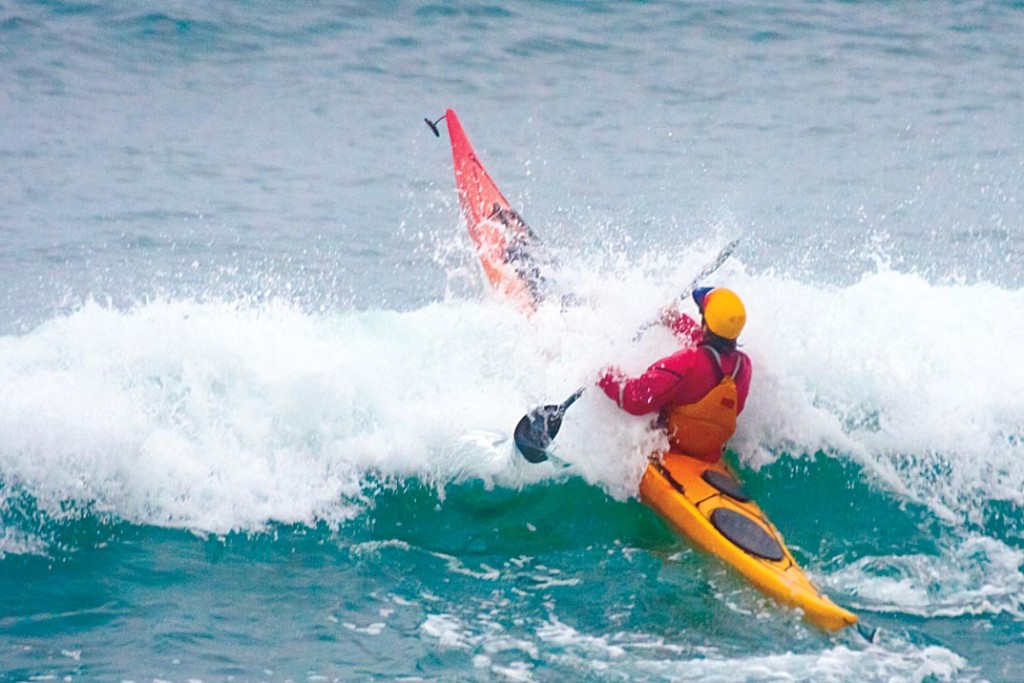
Even for the faster sea kayaks, a wave still needs to reach a certain steepness to provide propulsion. If you’re too far to the outside of the lineup the wave might not have steepened enough and will simply roll under you. But you don’t want the wave to be too steep either. Too far to the inside and it may break over you or have steepened to the point that your ride ends before it begins when the wave shoves your bow immediately underwater.
If this happens, your bow will slow precipitously while your stern continues to be pushed forward at the speed of the wave. You’ll broach at the very least or perhaps do an endo where your stern gets lifted straight up over your bow. Either can actually be fun when you choose to do it, but definitely not what you’re looking for if you want to catch the wave.
With time, practice and watching others, you’ll get a better idea of just where to find the sweet spot during your surf session. When you do find that spot, you can remember exactly where it is by lining up objects on shore to assess your position.
Once there, keep an eye on the ocean behind you to get a feel for those lumps of water coming your way. But don’t just look behind you. Follow the trajectory of each wave until it makes it through the impact zone. You want to have a sense of what those small mounds in deep water will turn into as they pass you and make their way to shore. In this way you can assess early what is too small, too large or just the right wave for that perfect ride.
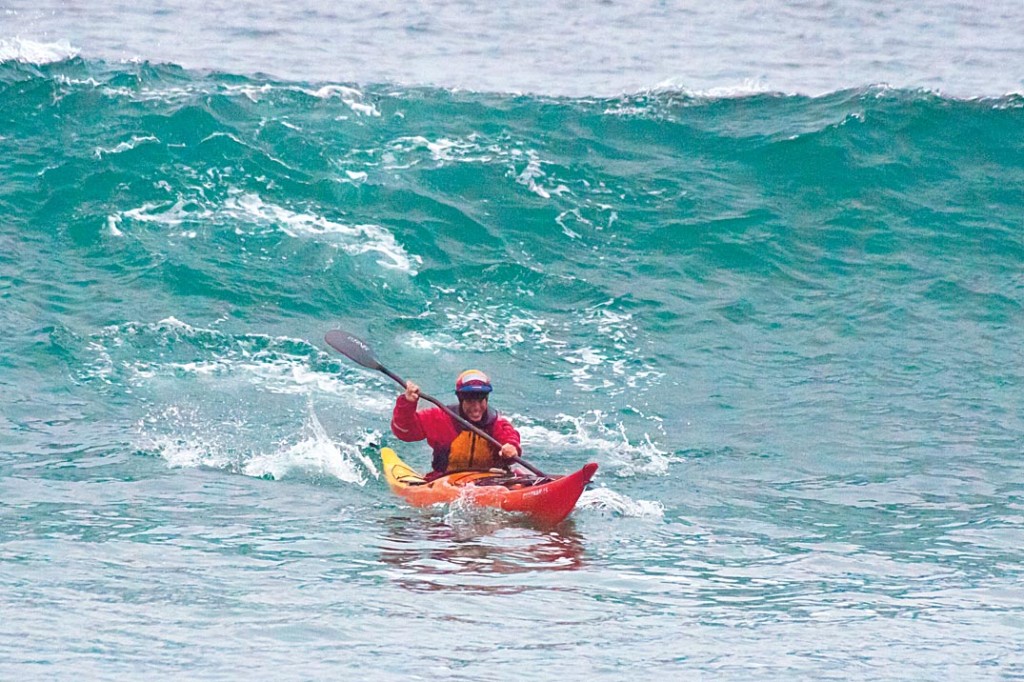
Paddle to gain momentum and try to catch the wave with an open face before it breaks.
Once you’ve figured out which waves you want, you’re going to need just the right burst of speed to catch the wave. If you don’t paddle fast enough to match the speed of the wave it may roll underneath you.
If you start paddling too fast and/or too early you might find yourself in the impact zone where the wave steepens precipitously before it reaches you. At that point you may have the wave breaking behind you or even on top of you instead of pushing you forward.
But if you time everything just right, as the wave continues to steepen behind you, your speed will increase simultaneously in correlation to the changing shape of the wave. With the right combination of body and paddle finesse which we’ll discuss later, you’ll surf gracefully down the face of the wave.
BODY POSITION AND PADDLE STROKES
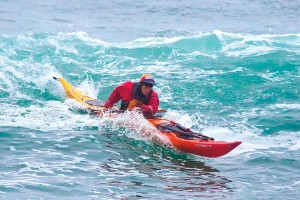 Leaning forward helps you regain position in front of the wave’s energy. Alternatively, leaning back helps shift your weight to keep the bow above water.
There are a few techniques to master that can greatly increase your ability to both catch a wave and then to stay on it once there. The first is body English or knowing when to lean forward or backward in response to the water dynamics.
If you’re trying to catch a wave and it looks like it might pass under you (your bow is hanging over the face rather than sliding down it), try leaning forward as much as you can while still paddling hard. That may be enough to allow you to drop down the face. If however, the face is steep and your bow starts to bury in the trough ahead of the wave, lie back as far as you can to keep the bow high in the water and thus prevent a broach.
Once you are up to speed and being carried along on the wave face, if you want to stay straight and surf ahead of the wave, you’ll need to continue leaning back while doing a stern rudder on one side or the other while edging up on the opposite side.
When you perform a stern rudder on either side, normally this would turn your kayak toward the side your paddle is on. But if your goal is to maintain a straight course downwave, you’ll need to drive your opposite knee up into the deck to edge up on that opposing side. On flat water this edging of the kayak would produce a turn toward the high side. But on the wave face these two equal but opposing forces acting in concert enable you to keep moving straight with the wave’s line of travel.
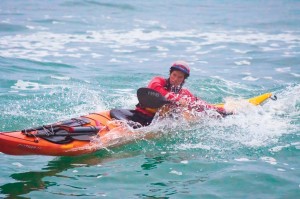
 Edging away from the stern rudder is a good way to make gradually sweeping turns
Sea kayaks are not the best for carving turns on a wave, but if you find a gently sloping wave face you might be able to pull it off without broaching. To do this, you’re essentially performing a low brace turn.
Lean into your turn, thrust your paddle out as far as you can to the side and a little to the rear and you’ll carve your turn. Remember to keep a bend in your trailing elbow to protect your shoulder. If the face remains smooth, you may be able to switch your stern rudder to the other side and carve back to move in the other direction or just straighten out again.
More often than not though, in long boats you’ll find it difficult to straighten out again, and ruddering on the downwave side of the kayak is likely to capsize you if the kayak fails to turn in response to your rudder. In this case, now that you’re no longer perpendicular to the wave and surfing down, it may be possible to surf across (nearly parallel to) the face (as board surfers do) by keeping your blade on the upwave side and using a stern rudder, or very light pressure low and/or high braces.
It is more likely your options will be either to ride out the wave in a broach (Figure 8: remember to keep your elbows tucked into your sides as you brace into the wave), or to continue your low brace turn on the same upwave side to power off the back of the wave.
A high brace turn will accomplish that as well, and either is great for getting off the wave if you don’t want to ride it all the way to shore.
 Low brace turns are good for either getting off the wave before shore or carving turns on gently sloping waves.
IN THE SOUP
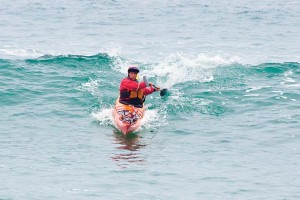
If all that sounds too daunting to figure out initially, you can hold your surf session in the soup zone. This is the area closer to shore where the already broken waves have turned into lines of foam. These foam piles are not only very ridable, (Figure 10) they’re often the perfect place to hone your technique. Catching these broken waves requires the same sort of timing used for the unbroken ones but here you don’t have to worry about the possibility of the waves crashing on you.
Since much of the waves’ energy has already dissipated, the mental and physical demands on your timing and technique are much less. Even heading back out for the next ride is easier when you’re puching through foam instead of green water (Figure 11).
Once you’re comfortable riding the broken waves you’ll have acquired the timing to take on larger, more challenging green wave faces. If the waves out at the lineup appear to be beyond your current skill or comfort level, the soup zone can be lots of fun in its own right.
BOAT DESIGN, SKEGS AND RUDDERS
As you learn to ride ocean waves, you’ll discover that both the location of the lineup and the speed required to catch the wave are going to vary from day to day or even with varying tide cycles within the day. Different boat designs as well as your skill level and your comfort being in the surf zone will also affect your performance.
It takes a lot of trial and error to figure it all out, so have fun and don’t get discouraged if you aren’t catching all the waves you want to right away. While you can use any touring kayak to surf, there are features that improve a kayak’s efficiency in the surf. Touring kayaks tend to have a high length-to-width ratio, sharp vertical ends and a creased keel line, all features that help with tracking while making passages.
These same features tend to make the bows plow beneath the wave, resulting in endos and broaches. Some sea kayaks have features that keep the bow from diving under. A cockpit coaming that’s low at the back (combined with a seat-back that doesn’t extend above the coaming) will allow you to shift your weight back and keep the front end from “pearling” (diving for pearls).
A high-volume bow will also help keep the nose up. A kayak with a lot of rocker, the curvature from front to back, further aids in a high-nose attitude. Typically the more rocker the better when surfing. Combine that with a bottom that is more flattened than rounded or V-shaped and maneuverability on the wave is increased.
You may employ a skeg or a rudder for surfing wind waves, but they have limited application in the ocean surf where the energy unleashed by the waves is much greater.
Partially lowering a skeg may initially help keep you straight on the wave, but once you start to come off line, even a partially exposed blade will keep you from straightening out again and force you further into a broach. Even worse, having the skeg down may cause the boat to “trip” away from the wave where you’ll be “window shaded” or rolled over and over toward shore until the wave loses enough power for you to regain control.
Rudders used to great effect in maintaining a straight line on other types of waves are much less effective when surfing shore break in sea kayaks. Blades tend to get broken or bent. If your goal is to surf straight down the face running ahead of a wave, your best option is to hone your skills with the techniques of boat edging combined with stern rudders (using your paddle) and leave your rudder or skeg undeployed.
GETTING OUT THERE
If you find the idea of surfing appealing but you’re not near the ocean, you don’t feel you’re ready for the dynamics of swell produced ocean waves or you’re simply looking for a different sort of surf experience, you can get exhilarating rides on wind waves, boat wakes and tidal races.
When you are ready for surfing ocean waves, they can offer you peace and serenity as you slip swiftly forward on a gently sloping face or give you an adrenaline-fueled rush as you scream down a roaring wave, spray in your face.
Having the skills to ride these waves will also open up grand new vistas for where your kayaking adventures can take you. Regardless of which experience you seek, I wish you many long rides wherever you find them.
 Now, get out there!