Technique: Surfing in Sea Kayaks

Summer’s almost over in the northern hemisphere, which implies one great thing for us sea-bound shinanagan-seekers: Autumn waves are near!
Fall is a favored season among surf destinations across the globe, and particularly on the North American Pacific Coast,  for its mixed bag of lingering summer south swells and incoming winter north and northwest swells. The combination compliments a variety of the world’s coastlines with the year’s most consistent collection of waves and supporting weather conditions, providing an array of surfing communities with a few months of prime-time paddling.
Touch up on your surf technique with this article by Gregg Berman from our June 2011 issue. Get more info on sea kayak surfing and all aspects of sea kayaking by checking out Sea Kayaker magazines‘s online article archives, ordering a back issue, or subscribing today!

Surfing Ocean Waves with Touring Kayaks

Surfing ocean waves as they rise and fall toward shore can be a peaceful commune with nature or an adrenaline-filled rush and a test and testament of our paddling technique. Surfing can provide bursts of cardiovascular exercise and bring hours of smiles and mind-numbing good fun. The surf zone is a place that we often fear and avoid while touring an exposed coast, but some knowledge of wave dynamics along with a few basic techniques will enable us to find as much pleasure there as we do when cruising along the coast.

REACHING THE LINEUP—SURFING SHOREBREAK LONG-BOAT STYLE
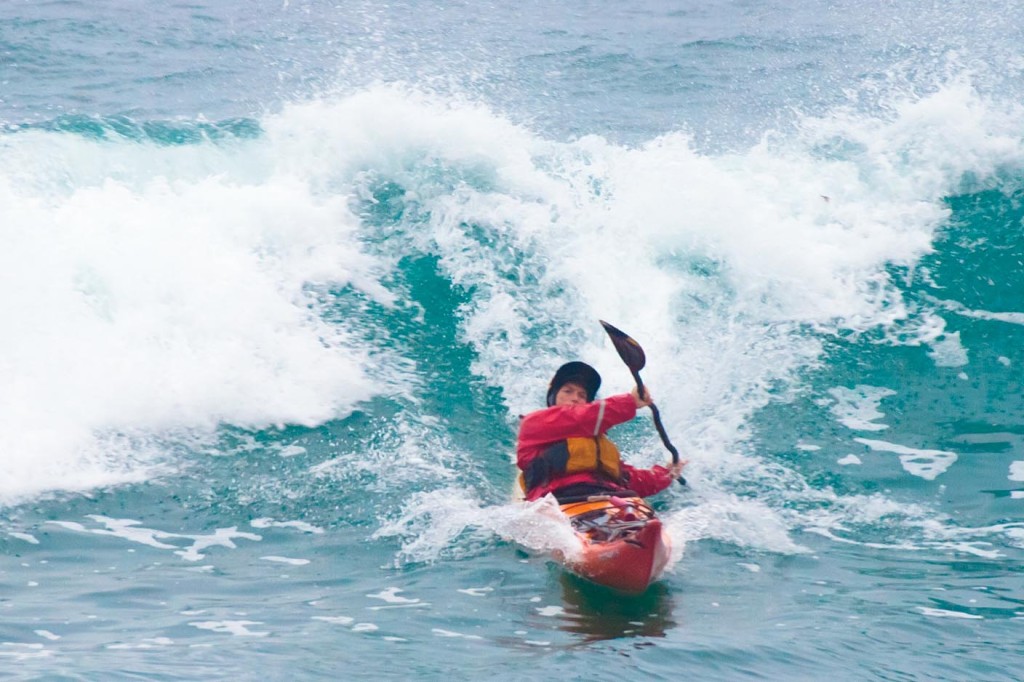
Waves with shallow faces, such as the one pictured here, are better for sea kayak surfing than waves with steep, hollow faces.

There are a variety of kayaks that can be used in the surf including whitewater boats and models built specifically for surfing, but we’ll confine our discussion to surfing with sea kayaks. In stand-up or board surfing there are long boards and short boards, with each craft being more or less suitable for different types of waves.

The same applies to kayak surfing (known to some as butt surfing). Touring kayaks are known as “long boats” in surf parlance, and whitewater or surf-specific kayaks are “short boats.” Each is suited for different conditions. In general, a touring kayak will have more difficulty on steep waves because of the tendency for its long bow to plow under ahead of the wave, typically resulting in a wipeout or at least an out-of-control broach.

When it comes to catching more gently sloping or faster moving ocean swell, a touring kayak with its greater hull speed will have a definite advantage over the slower-moving short boats. It is these more gently sloping waves that you’ll want to seek out as you begin your education in the surf.

SAFETY FIRST
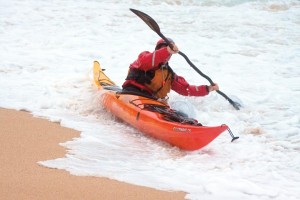
Most kayaking accidents happen at the juncture of land and sea–right next to the surf

Most kayaking accidents happen at the juncture of land and sea—right next to the surf—while getting in and out of the boat. Simple things like knowing how to enter and exit the kayak while waves are sweeping up and down the beach can make your session go much smoother.

If you haven’t been in the surf before, go with experienced friends or, better yet, take a class or two. “Surf zone” classes teach the skills that will safely take you from the beach, through the surf and back again. “Surf” classes teach the techniques of riding the waves once you’re out there. You should have all the typical kayak safety gear, but be careful how it’s stowed.

Make sure you have everything cleared off your deck or else very securely fastened. The same applies to anything in your cockpit; nothing should be loose. You don’t want a yard sale of your gear strewn about when a wave cleans your deck or gets the better of you and you go for a swim. Dress properly for your local water temperature and wear an appropriate surf helmet.

A helmet not only protects your head from collisions with rocks or sand but also from other surfers who might collide with you. Of course maintaining a wide berth in the surf zone to avoid collisions is best. You’re piloting a big, heavy craft so avoid areas highly populated with swimmers.

Wherever you find good waves you’re likely to find other surfers, and it is important to mind your manners. (Click here for a link to Sea Kayaker’s article on surfing ettiquette)

When playing in surf you can count on getting knocked over. You should have self-rescue skills that you can execute reliably in rough water as well as some friends who are skilled at helping you reenter your boat.

Better yet, you should perfect a good combat roll. Bailing out in the break zone makes recovery from a capsize exponentially more difficult than having a dependable roll.

SCOUTING A LOCATION SPILLING VS. DUMPING
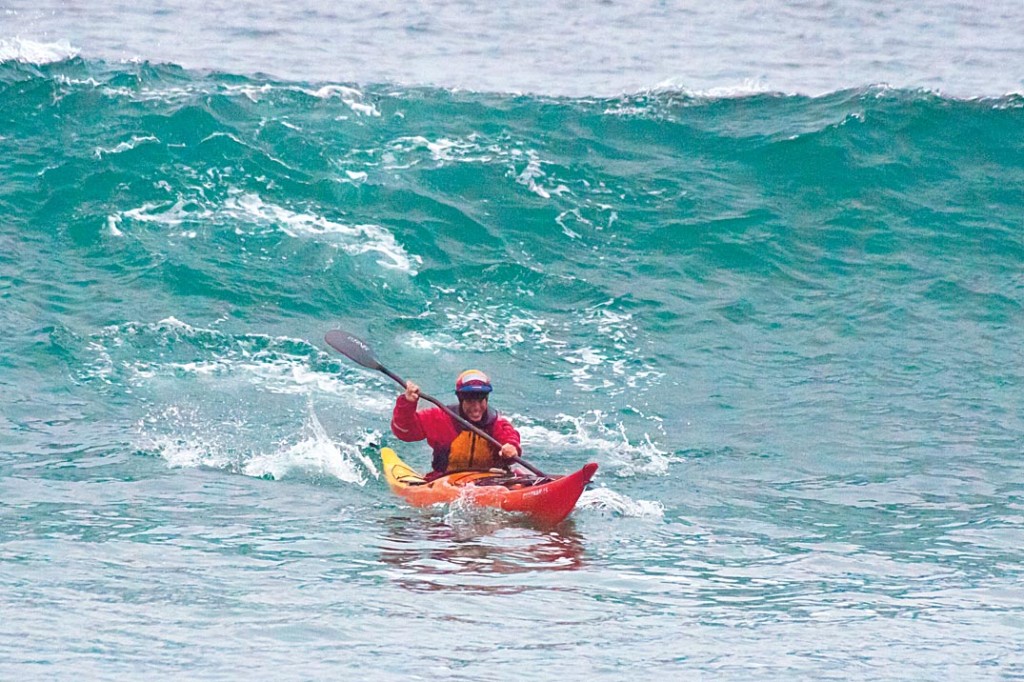
When scouting for waves, look for smooth, open faces from longer period swells that break down the line rather than closing out all at once.

While the local wind can certainly create ridable waves, they’re often a bit sloppy and not well formed. The best ocean surfing waves are smooth, glassy affairs created by storms thousands of miles away. So where can you find the conditions to create the best waves for long-boat surfing?

While every beach has waves, not all beaches are created equal. In terms of safety, a sand beach, when available, is certainly safer than one of gravel or rock. Examine the beaches in your area closely. Even with a sand beach there may be hazards to avoid, such as large submerged rocks just off shore. Also note the steepness of the beach. Waves forming over gently sloping beaches release their energy over a longer period.

They’ll rise gradually so when they start to break they have some foam forming just at the top then gently “spilling” down the face. Contrast this with steep, “dumping” beaches where the wave quickly peaks up over an abruptly shoaling bottom, curls over itself and explodes, releasing its energy all at once. Although most beaches are a mix between the two extremes, for your first forays, finding a beach more on the spilling side of the continuum instead of the dumping side will help speed your learning curve as well as your enjoyment.

Keep in mind, the shape of a beach and the waves you find there can be dramatically different with the changes in tidal height, so become familiar with the various dynamics of your chosen surf spots.

If you happen to be fortunate enough to live near an offshore reef break that has spilling waves, that’s even better still. On reef breaks the waves crest over the reef then tumble across deeper water before they reach shore, so if you get tumbled you’re not as likely to hit the bottom as you might be if you get rolled in a beach break.

Also on reef breaks it’s much less work to get back to the lineup after each ride. Instead of punching out through the surf, you can just paddle around it. The downside of a reef break is that it can be a very long, arduous swim to shore if you should come out of your boat.

Your roll should be solid, but swimming is a common thing as you learn and should be expected and even enjoyed. It simply means you’re pushing at the boundaries of your skill level. As your surfing improves, your ability to roll is likely to improve as well.

DROPPING IN
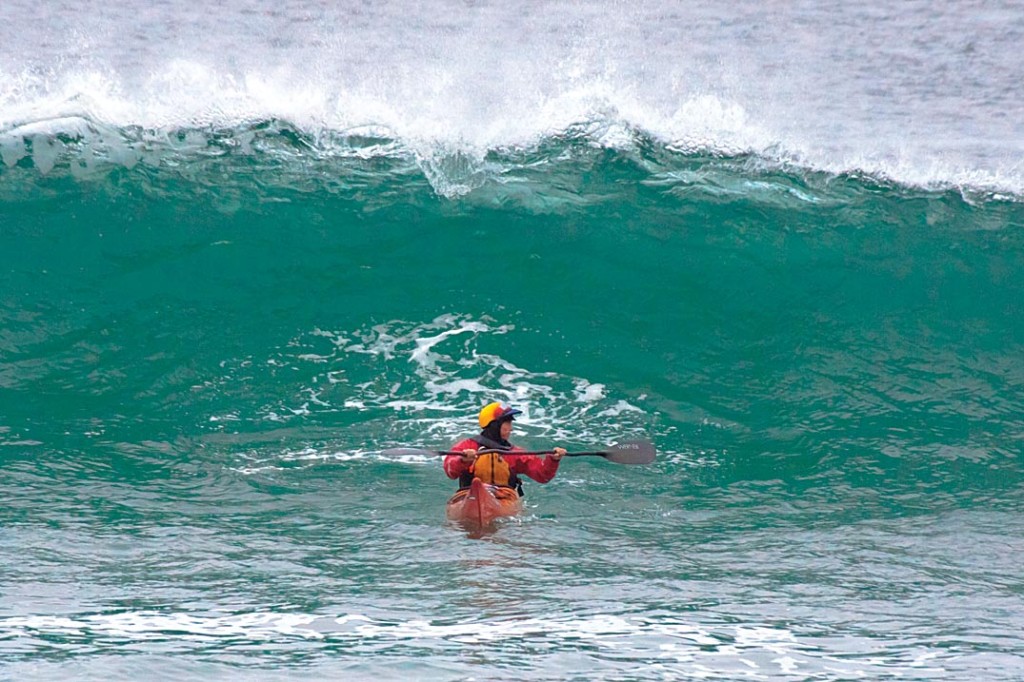
Under the wave’s lip, perpendicular to the face, is not the ideal position for a sea kayaker. Surfers call this being “too deep.”

Riding waves is about the joy of being pushed along by the water and need not involve big surf. As your comfort level grows, you may find enjoyment on larger and larger waves.

To start though, you can have the most fun with waves on the smaller side of the scale. A wave height of a few feet is all you need. Catching shorebreak waves is all about timing the swell and finding the sweet spot known as the “lineup” where the wave is at the perfect shape and height to “drop in” for a ride.

Even for the faster sea kayaks, a wave still needs to reach a certain steepness to provide propulsion. If you’re too far to the outside of the lineup the wave might not have steepened enough and will simply roll under you. But you don’t want the wave to be too steep either. Too far to the inside and it may break over you or have steepened to the point that your ride ends before it begins when the wave shoves your bow immediately underwater.

If this happens, your bow will slow precipitously while your stern continues to be pushed forward at the speed of the wave. You’ll broach at the very least or perhaps do an endo where your stern gets lifted straight up over your bow. Either can actually be fun when you choose to do it, but definitely not what you’re looking for if you want to catch the wave.

With time, practice and watching others, you’ll get a better idea of just where to find the sweet spot during your surf session. When you do find that spot, you can remember exactly where it is by lining up objects on shore to assess your position.

Once there, keep an eye on the ocean behind you to get a feel for those lumps of water coming your way. But don’t just look behind you. Follow the trajectory of each wave until it makes it through the impact zone. You want to have a sense of what those small mounds in deep water will turn into as they pass you and make their way to shore. In this way you can assess early what is too small, too large or just the right wave for that perfect ride.

Paddle to gain momentum and try to catch the wave with an open face before it breaks.

Once you’ve figured out which waves you want, you’re going to need just the right burst of speed to catch the wave. If you don’t paddle fast enough to match the speed of the wave it may roll underneath you.

If you start paddling too fast and/or too early you might find yourself in the impact zone where the wave steepens precipitously before it reaches you. At that point you may have the wave breaking behind you or even on top of you instead of pushing you forward.

But if you time everything just right, as the wave continues to steepen behind you, your speed will increase simultaneously in correlation to the changing shape of the wave. With the right combination of body and paddle finesse which we’ll discuss later, you’ll surf gracefully down the face of the wave.

BODY POSITION AND PADDLE STROKES
Leaning forward helps you regain position in front of the wave’s energy. Alternatively, leaning back helps shift your weight to keep the bow above water.

There are a few techniques to master that can greatly increase your ability to both catch a wave and then to stay on it once there. The first is body English or knowing when to lean forward or backward in response to the water dynamics.

If you’re trying to catch a wave and it looks like it might pass under you (your bow is hanging over the face rather than sliding down it), try leaning forward as much as you can while still paddling hard. That may be enough to allow you to drop down the face. If however, the face is steep and your bow starts to bury in the trough ahead of the wave, lie back as far as you can to keep the bow high in the water and thus prevent a broach.

Once you are up to speed and being carried along on the wave face, if you want to stay straight and surf ahead of the wave, you’ll need to continue leaning back while doing a stern rudder on one side or the other while edging up on the opposite side.

When you perform a stern rudder on either side, normally this would turn your kayak toward the side your paddle is on. But if your goal is to maintain a straight course downwave, you’ll need to drive your opposite knee up into the deck to edge up on that opposing side. On flat water this edging of the kayak would produce a turn toward the high side. But on the wave face these two equal but opposing forces acting in concert enable you to keep moving straight with the wave’s line of travel.
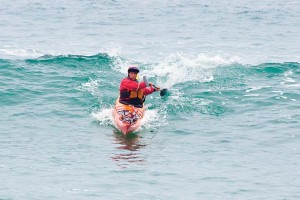
Edging away from the stern rudder is a good way to make gradually sweeping turns

Sea kayaks are not the best for carving turns on a wave, but if you find a gently sloping wave face you might be able to pull it off without broaching. To do this, you’re essentially performing a low brace turn.

Lean into your turn, thrust your paddle out as far as you can to the side and a little to the rear and you’ll carve your turn. Remember to keep a bend in your trailing elbow to protect your shoulder. If the face remains smooth, you may be able to switch your stern rudder to the other side and carve back to move in the other direction or just straighten out again.

More often than not though, in long boats you’ll find it difficult to straighten out again, and ruddering on the downwave side of the kayak is likely to capsize you if the kayak fails to turn in response to your rudder. In this case, now that you’re no longer perpendicular to the wave and surfing down, it may be possible to surf across (nearly parallel to) the face (as board surfers do) by keeping your blade on the upwave side and using a stern rudder, or very light pressure low and/or high braces.

It is more likely your options will be either to ride out the wave in a broach (Figure 8: remember to keep your elbows tucked into your sides as you brace into the wave), or to continue your low brace turn on the same upwave side to power off the back of the wave.

A high brace turn will accomplish that as well, and either is great for getting off the wave if you don’t want to ride it all the way to shore.
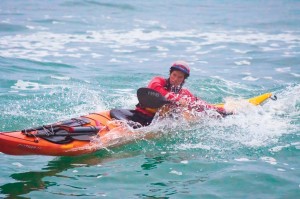
Low brace turns are good for either getting off the wave before shore or carving turns on gently sloping waves.

IN THE SOUP

If all that sounds too daunting to figure out initially, you can hold your surf session in the soup zone. This is the area closer to shore where the already broken waves have turned into lines of foam. These foam piles are not only very ridable, (Figure 10) they’re often the perfect place to hone your technique. Catching these broken waves requires the same sort of timing used for the unbroken ones but here you don’t have to worry about the possibility of the waves crashing on you.

Since much of the waves’ energy has already dissipated, the mental and physical demands on your timing and technique are much less. Even heading back out for the next ride is easier when you’re puching through foam instead of green water (Figure 11).

Once you’re comfortable riding the broken waves you’ll have acquired the timing to take on larger, more challenging green wave faces. If the waves out at the lineup appear to be beyond your current skill or comfort level, the soup zone can be lots of fun in its own right.

BOAT DESIGN, SKEGS AND RUDDERS

As you learn to ride ocean waves, you’ll discover that both the location of the lineup and the speed required to catch the wave are going to vary from day to day or even with varying tide cycles within the day. Different boat designs as well as your skill level and your comfort being in the surf zone will also affect your performance.

It takes a lot of trial and error to figure it all out, so have fun and don’t get discouraged if you aren’t catching all the waves you want to right away. While you can use any touring kayak to surf, there are features that improve a kayak’s efficiency in the surf. Touring kayaks tend to have a high length-to-width ratio, sharp vertical ends and a creased keel line, all features that help with tracking while making passages.

These same features tend to make the bows plow beneath the wave, resulting in endos and broaches. Some sea kayaks have features that keep the bow from diving under. A cockpit coaming that’s low at the back (combined with a seat-back that doesn’t extend above the coaming) will allow you to shift your weight back and keep the front end from “pearling” (diving for pearls).

A high-volume bow will also help keep the nose up. A kayak with a lot of rocker, the curvature from front to back, further aids in a high-nose attitude. Typically the more rocker the better when surfing. Combine that with a bottom that is more flattened than rounded or V-shaped and maneuverability on the wave is increased.

You may employ a skeg or a rudder for surfing wind waves, but they have limited application in the ocean surf where the energy unleashed by the waves is much greater.

Partially lowering a skeg may initially help keep you straight on the wave, but once you start to come off line, even a partially exposed blade will keep you from straightening out again and force you further into a broach. Even worse, having the skeg down may cause the boat to “trip” away from the wave where you’ll be “window shaded” or rolled over and over toward shore until the wave loses enough power for you to regain control.

Rudders used to great effect in maintaining a straight line on other types of waves are much less effective when surfing shore break in sea kayaks. Blades tend to get broken or bent. If your goal is to surf straight down the face running ahead of a wave, your best option is to hone your skills with the techniques of boat edging combined with stern rudders (using your paddle) and leave your rudder or skeg undeployed.

GETTING OUT THERE

If you find the idea of surfing appealing but you’re not near the ocean, you don’t feel you’re ready for the dynamics of swell produced ocean waves or you’re simply looking for a different sort of surf experience, you can get exhilarating rides on wind waves, boat wakes and tidal races.

When you are ready for surfing ocean waves, they can offer you peace and serenity as you slip swiftly forward on a gently sloping face or give you an adrenaline-fueled rush as you scream down a roaring wave, spray in your face.

Having the skills to ride these waves will also open up grand new vistas for where your kayaking adventures can take you. Regardless of which experience you seek, I wish you many long rides wherever you find them.
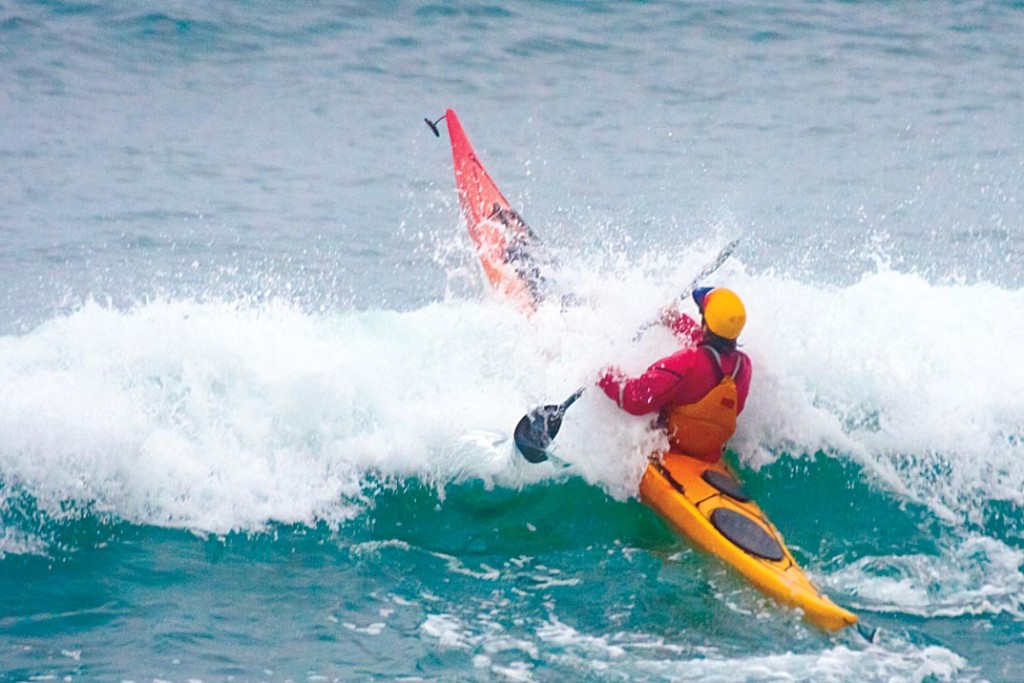
Now, get out there!

Ride ‘Em Cowboy: Making Your Scramble Recovery More than a Pool Trick

“The scramble is pretty much useless outside of a swimming pool,” an instructor we’ll call Andy (names are changed here to respect privacy) stated flatly to the group of seven other instructors who stood on the beach, dripping in drysuits after our rescue practice session.

Beyond the protection of our little cove, the open Pacific slam-danced in the afternoon wind—20 knots from the northwest—a confusion of steep, five-foot wind waves constantly bouncing off the cliffs and back into the fray. To my surprise, one of the other instructors, Mark, nodded in agreement with Andy, while the other four just looked confused.

“What are you talking about?” one of the four, Bryan, asked. I just smiled and kept my mouth shut for a change, realizing that this was one battle I wasn’t going to have to fight. We had just finished rough-water recovery practice as part of a Level 5 American Canoe Association instructor training course, a context that turns out to be relevant, as will become clear shortly.

In the confusion of whitecaps and waves, a variety of self- and assisted recoveries had been tried, and it was impossible to keep track of who had done what. As one of the instructor trainers facilitating the course, I stepped in and asked only for a show of hands for who had completed a scramble.

Four hands shot up. The only hands that didn’t, I noted, were Andy’s and Mark’s. Now it was their turn to look surprised.

This pooh-poohing of the cowboy scramble as a viable rough-water recovery for sea kayakers seems to be a fairly common refrain among many skilled paddlers. In another recent class a group of intermediate kayakers looking to improve their rough-water recovery skills looked surprised that we’d be “wasting time,” as one put it, working on scrambles.

He even showed me the page in a popular instructional manual where the scramble is dismissed as useless in rough seas. I told my students that the practice would be “good for improving your balance, even if it doesn’t end up working out for you in rough water,” and they all agreed to try.

As we landed after class, I ran into a paddling acquaintance who’d just finished his weekly trip along a stretch of exposed cliffs. After asking what kind of class I’d been teaching, he quipped, “Of course those are all basically ‘placebo rescues.’

I mean, they’re like, pretty useless in the kind of stuff you and I like to paddle in. Unless you happen to dump in flat water and miss your roll for some reason, everything except a reenter and roll is basically a pool trick.”

I merely shrugged and said, “We were just out there practicing cowboy scrambles, but it really wasn’t all that rough; only a few whitecaps.” Actually it had been blowing a steady 15 knots for several hours, so it was whitecapping continuously with one to three feet of steep chop, conditions that would be moderate to fairly challenging depending on your skill set.

“Really?” he said, a bit surprised.

“Yeah, after a little practice in the harbor this morning,” I added, “pretty much everyone in class was able to pull off at least one cowboy out there.” While I’d be the first to agree that it really wasn’t all that rough, it certainly weren’t no swimming pool neither.

Theory of Pooh and the Secret to a Successful Scramble

My theory about why many skilled paddlers don’t consider the cowboy scramble a viable rough-water technique is based on several observations. First, I’ve noticed that those dismissing the scramble generally have learned how to roll and/or how to reenter and roll.

Second, pretty much none of them have yet learned how to scramble in anything but flat water, if that. Those who’ve spent maybe 20 minutes, at most, trying the scramble in rough water conclude too quickly that the scramble is ineffective.

No one expects to learn how to roll effectively after 20 minutes of practice. But I’ve seen that most of those who dedicate as much time in the scramble as they do in rolling will find it useful and effective in rough water. It just takes practice.

Most students get the hang of it in much less time than it took them to learn to roll. And many paddlers who haven’t had much luck learning to roll find the scramble an easier, albeit less efficient, means of capsize recovery.

Tips for Cowboys and Girls: Keys to an effective learning progression

A few tips and techniques can make a difference. Practice each step separately in the shallows first, much the same way you’d practice the pieces of a roll, working on hip snaps, sculling and other exercises in the swimming pool before trying to put the whole complex skill together.

After you’re comfortable with the pieces, practice the whole thing starting in about two feet of water in a calm area, so you can cheat if you need to, before gradually moving into deeper water.

It is important to spend some time hanging out on your back deck. Once you’ve spent 10 to 20 minutes to as much as an hour getting comfortable balancing, bracing and paddling on the back deck, you’ll probably have more luck putting the whole technique together (see sidebar: 4 HOURS TO SCRAMBLE SUCCESS, page 45).

Step-by-Step Scramble

Bow Lift Drain I like to start by getting most of the water out of the cockpit so I don’t have to pump as much out once I get back aboard. The bow lift is a nifty trick but it can be challenging to master.

You can skip this part until you are comfortable with the rest of the rescue. The basic idea is to lift your bow to drain some or all of the water from the cockpit before reentry.

Simply grab the bow of your capsized kayak and reach for the sky. OK, so this is harder than it sounds. A lot of people just end up getting their heads pushed under water. It sometimes helps to twist the kayak sideways first to break the seal at the cockpit, then immediately lift the bow with one hand (I use my stronger, right arm) while sculling with the other hand and simultaneously doing the eggbeater kick (described below).

In one quick motion, punch the bow skyward, and as your kayak reaches its apex, spin it so it lands upright. Rough seas actually help this, if you can time the waves right. To keep from losing my paddle, I corral/put it on my right shoulder when I lift to keep it between my arm and my ear. Some paddlers like to put the shaft on their opposite shoulder and pull down on the blade face with the free hand to create some lift.

Mounting the Horse: Plan A

For many, the hardest part of the scramble is lunging onto the aft deck without pulling their kayak on top of them. Rather than trying to pull your body up onto the boat, try to push the boat down and pull it under your body.

It’s a subtle but important difference. With your paddle held perpendicular across the back of the cockpit with one hand, grip both the paddle and the coaming behind the seat; the other hand will be about shoulder-width away on the back deck.

Kick your feet to the surface to get your body nearly horizontal and then quickly lunge across the deck, pushing down on your back deck and pulling it underneath you while still kicking. Some have better luck if they bob their kayak up and down a couple times first to get a rhythm going before the final lunge.

The idea is to try to land with your belly across the back deck. If you only get your chest on deck, you’ll probably end up pulling the boat over on top of you.

Mounting the Horse: Plan B

If you have trouble getting on the deck just aft of your cockpit, try farther back where the kayak is narrower and lower, or even climbing in directly over the stern. A rudder won’t help, but with a little practice you’ll likely figure out how to negotiate it without losing your ability to procreate.

Some people hold their spray skirt grab loop in their teeth to keep it from getting in the way or getting tangled in the rudder. The farther back you go, the easier it tends to be to climb on deck, but the more you’ll have to scramble to reach the cockpit, so once you develop your Plan B routine, work your way forward until you can lunge aboard by the cockpit.

Balancing on your Belly Button

Once on the back deck, you want to move smoothly, avoiding jerky motions, and keep your weight—centered on your belly button—on the midline of the boat.

This may feel off balance, but if you start to fall face-first over the far side, you can arch your back for balance. Spin your legs slowly around behind you, kicking your feet gently on the water for balance, until you can straddle the back deck.

Keep Your Feet in the Stirrups

As the name Cowboy/girl suggests, you want to straddle your kayak as you would a horse. It’s important to keep your feet down deep in the water, more or less where the stirrups of a saddle would be. One common mistake that’ll screw up a scramble faster than rotten eggs is holding your feet straight out behind you, like a surfer lying on a surfboard.

Use an Eggbeater

Your feet are your main stabilizers, so in addition to keeping them down, keep them gently kicking and sculling for balance. Water polo goalies use a circular sculling motion called an “eggbeater” kick, and with practice can lift their bodies out of the water nearly to the waist. A less aggressive eggbeater is all you need to keep your scrambles sunny-side up.

Use Your Paddle to Brace

The best place for your paddle is in your hands, across your deck, facedown, ready to brace. Some books and videos show the paddle in the cockpit or under the front deck bungees. While a paddle in the hand might not offer much support, it is better than nothing. Unfeathered blades will have a slight advantage.

Inchworm Crawl

With feet down beating eggs and paddle in hands, lean forward onto your forearms. Like an inchworm, slide your elbows forward and scootch your bottom forward to follow. Repeat as necessary until your butt is clear of the seat-back.

Drop and Brace

Set yourself up with your paddle blade facedown, ready for a high brace on your strong side. Moving slowly here will create wobble, which is difficult to control, so drop your butt into the seat in one smooth, quick motion, while simultaneously slapping a high brace with your paddle for balance.

This is the crux move, especially in rough conditions. As you drop into your seat, turn your high brace into a sculling brace for continued support. If you have good balance you won’t need the support of the paddle in calm water, but practice bracing anyway; it is essential for success in rougher seas.

Feet In…or Not

Once your rear is down in the seat, you’ll be much more stable. Use a sculling brace on one side for support while you work your opposite leg into the cockpit and find your foot brace.

Lying back on the deck and sculling on the opposite side leaves more room to lift your knee. To create even more room and additional support, use an extended paddle position on your brace, holding the end of the blade with your inside hand.

If you are in a tide rip, surf zone or rock garden with calmer water and/or paddling partners nearby, one option is to paddle with your feet dangling out until you reach more favorable conditions.

This may also be the required option for those with cockpits too small to get their legs in without sitting up on the back deck first, an extremely unstable position in rough water.

I will be the first to admit that the cowboy scramble has its limitations, as do all recovery techniques, especially for certain kayaks—those with small cockpits, for example—and certain body types. Stocky men tend to have more trouble with balance. Big and/or tall types in general typically require up to twice the practice time as smaller, more agile students, and, like with the roll, a few students may never get there.

But I’m 6’3″ and recently taught a student who was 6’6″ some tricks that allowed him to be successful after only an hour or two of practice.

Paddlers who lack the flexibility, agility and/or upper-body strength to access their back decks during a paddle-float recovery without using a sling, will first need to develop those abilities before attempting to scramble. But I’ve found that the main thing most students lack in being successful is a little bit of coaching and a few hours of practice.

Epilogue

By the end of the instructor course, neither Andy nor Mark passed his Level 5 instructor exam that weekend. Although talented teachers and strong rough-water paddlers with fairly reliable rolls, both are stocky, middle-aged men with limited flexibility.

However, after a couple months of practicing in the pool and at sea, both were eventually able to master the scramble in “rough water.” While both still prefer a reenter and roll as their first choice of reentry after missing a roll, because of their body type, they both agree that the amount of water that enters the kayak is one of the disadvantages of that technique.

They may be back in their boat faster, but it is a boat full of water, whereas those able to learn the quick “bow lift” method to drain their kayaks prior to a scramble, can be back in their kayaks, skirt on, ready to paddle without needing to pump in about 30 seconds (see link to “30-Second Scramble” video below).

Even without the bow lift, the fact that a scramble generally requires a lot less pumping afterward can make it almost as fast as a reenter and roll if you consider the time it takes to get the water out. It also begs the question: If you missed your roll in the first place, why is it suddenly going to work now?

And if you’re going to take the time to do a paddle-float reenter and roll, then any time advantage is long gone. The Scramble may not be the best first choice for some paddlers, but over the years I’ve been able to teach hundreds of intermediate and advanced students to scramble quickly in moderate to rough seas. And having both techniques in your reentry arsenal gives you more options than either one alone.

See a video of the author using this technique under the Golden Gate Bridge.

Roger Schumann is the author of Sea Kayak Rescue and Sea Kayaking Guide to Central and Northern California. An ACA Instructor Trainer, he leads classes and tours in Baja and teaches courses in marine natural history at Prescott College.

4 Hours to Scramble Success

Current sports learning research suggests that it is often better to practice new skills in small bits than to struggle through in big chunks. Doing two or three sets of ten to twenty minutes of practice, in other words, interspersed with some regular paddling, would probably be more beneficial than practicing for an hour straight.

Expect to struggle at times (it is what we teachers call “learning”), but stop if you start to get too frustrated. It is supposed to be fun. Also, turning the corners of your mouth up equally on each side helps your balance! The scramble might not work for you, but don’t write it off as a mere “pool trick” until you’ve put in a few hours of practice. At the very least, you improve your balance and bracing. And you might surprise yourself with how well you can get it to work in rough water.

20 minutes to one hour of Back-Deck Balancing Practice

Start by getting comfortable balancing on your back deck, so that when you get there in the context of a scramble, it won’t feel so foreign. Start in a foot or two of water. You want the water to be deep enough for you to float with your feet off the bottom, but shallow enough so you can stand up if you start to lose your balance.

Straddle your back deck immediately behind your cockpit, sit down and lift your feet off the bottom. Spend one to five minutes practicing a combination of high braces, low braces and sculling braces. It is assumed here that you are already somewhat comfortable with basic bracing techniques.

Next, try paddling gently forward using a “braced” forward stroke, with the blade slapping the water at about a 45-degree angle for support. It is okay to wobble and fine to fall, especially at first.

But stick with it for five minutes or so, and you will notice a marked improvement in balance and comfort. Be sure that you don’t rely on balance alone: Use this braced-stroke technique even if your balance is good and you don’t really need to use it. The idea is for the technique to become reflexive, so your brace will work in rough water.

Forward-backward

Once you are able to paddle 20 to 30 strokes forward with feet lifted but without falling off your back deck, try going backward, again using a braced-stroke technique, this time slapping the back of your blade for support. Get to where you feel comfortable paddling 10 strokes forward and 10 strokes backward, then 20 each. Now you’re ready for spins.

Braced Spin Turns

Alternating a combination of braced forward and reverse sweep strokes, spin your kayak 180 degrees, paddle forward 10 strokes and spin back in the other direction. Practice using your eggbeater kick to help spin. Once you can link four of these spins in a row, you are ready for the next step.

The Next Step: Raising your feet

To really get comfortable balancing on the back deck, practice lifting your toes out of the water in front of you, with your legs straight. You’ll notice a sudden decrease in balance. You can always drop your feet back down into the water when you need to.

Now repeat all of the above exercises until you can do them with your toes in the air. The idea is to force yourself to use your braced-stroke technique (which will also make you feel more comfortable in rough water, in general) instead of just your balance.

Scramble Launch: 30 minutes to 1 hour

Practice launching and landing using the scramble method. To figure out how to get your feet in and out of the cockpit, straddle your cockpit with your boat on shore and sit down in the seat with your feet still on the ground, then fold your legs into the cockpit, one leg in at a time while using your paddle as a brace. (If your cockpit is too small, see below.)

Next, put your kayak in a foot or so of water, where it won’t touch bottom, and straddle the cockpit over the seat. Get your paddle in high-brace position, power-face down. Sit down all the way into the seat while simultaneously slapping a high brace on your strong side.

Again, practice this even if your balance is good enough that you don’t need it, in order to build reflexive bracing skills for rough water. Turn your high brace into a sculling brace while you work your feet into the cockpit. Using an extended paddle position—holding the end of the blade—can add a very powerful tool to your arsenal.

To get out of the cockpit, reverse the steps. Scull on one side while you work your feet out of the cockpit, straddle your cockpit and then stand up in the shallows. Launch and land this way whenever you can for the next month or two until it becomes second nature.

You’ll find that it not only builds your scramble recovery skills, but it is a quicker, easier way to get in and out of your kayak once you get used to it. Having the kayak afloat as you get in and out of it will also reduce the wear and tear caused by launching and landing while aground.

Tricks for small cockpits and long or inflexible legs

If your legs are too long to get into your cockpit, here are a few tricks that might help. I’m 6’3″ and to get my knees to clear the coaming, I need to raise my butt up off the seat a couple inches and lie back on the deck in most standard-sized cockpits.

Practice this first on dry land to work out the bugs before moving to the shallows. Some students find that they also need to reach down with one hand to guide their foot into the cockpit; the trick here is to practice doing a sculling brace with one hand (see photo page 43) while grabbing the ankle with the other. Awkward for most people at first, one-handed sculling is not as hard as it looks.

Put the shaft of your off-side blade on your shoulder behind your head and use your neck as a fulcrum. Add an extra 10-20 minutes of practice time for this. If you just can’t get your feet in your cockpit, practice paddling around with your feet dangling on either side.

You might not be able to complete a full scramble, but you might be able to scramble far enough to quickly paddle out of a dicey situation.

How to Unscramble: 1-2 Hours

An “unscramble” is basically a scramble in reverse, and it’s great practice for dialing in your scramble. In shallow water, practice sculling while you take your feet out of your kayak like you would for a scramble landing. With your feet in the water, put your paddle across your lap, put your hands behind you on the coaming, and push yourself out of the seat onto the back deck.

Quickly grab your paddle and start bracing, ideally before you fall in. The first time you practice this, have someone hold your bow to give you a little extra support while you work out the balance points. This might take 10 or 20 repetitions, so don’t expect instant success.

If you’ve spent some time with the back deck balance drills listed above, you should feel pretty comfortable on your back deck by now.

Continue unscrambling. Lean forward onto your elbows, and inch backward onto the back deck. Now lie down, center your belly button and spin your legs off to one side of your kayak, without losing your balance or touching bottom (but it is there if you need it).

Then spin back to the straddle position on your back deck, sit up and take a few strokes with your paddle, then lie belly-down again and spin both legs out to one side. Repeat this motion a few times until you can do it three times in a row without support or touching bottom. Then scramble all the way back until you drop your butt into the cockpit, but not your feet, and unscramble all the way back to the legs-to-the-side position.

The next steps are to take this scramble/unscramble into waist-deep water until you can do the entire sequence three times without falling or touching bottom. Then take it into deep water. From your perch on the back deck, paddle around and do some spins.

It is a great way to stretch your legs between landings on long passages. Continue to unscramble until you are in the water next to your kayak, then scramble back in. When you can do this in calm water, you are ready for some virtual rough water. Back in waist-deep water, have a friend bounce your bow up and down gently while you repeat the scramble-unscramble sequence a few times.

You’re looking for a little challenge but not so much bounce that you fall in. As you figure out how to compensate for the bouncing, your partner can start to bounce harder. After this you can try it in some choppy seas with a partner at your bow to help stabilize you at first, eventually weaning off of any support and moving into increasingly rougher seas.

Most paddlers get tired after two or three repetitions and performance starts to nose-dive. Take a rest if this starts to happen and try again later or another day. Flailing continually in rough water doesn’t really teach you anything except frustration, so back off to a level of challenge where you are successful.              –R.S.

Technique: How to use a Towline with a Kayak


A cow-tail can be clipped directly to the bow of a kayak that needs a quick tow to move to safety.

I like to get the most out of my kayaking gear; all pieces of my kayaking gear are under constant scrutiny.

Less is better, smaller is better, simple is better, and function is paramount. The one piece of gear that may have provided the greatest opportunity for scrutiny is my towline.

A towline is a fundamental piece of safety gear. You can use a towline to assist a tired or injured paddlers and keep them moving with the group. With a towline you can help a struggling paddler keep on course when strong winds or current make directional control difficult.

In many circumstances, a tow can prevent a more severe incident from occurring. In calm water most tow lines will work fairly well, but no one can guarantee calm water at all times. Used near surf, in breaking waves near rocks, or in strong current, towlines can still be useful but the risk of entanglement makes them particularly dangerous. It is often the case, though, that rough conditions make a tow an urgent necessity.

Using towlines in rough conditions is deceptively difficult and proper training and practice are necessary. Well-designed gear helps make using a towline easier and safer to use.

Complex design

A towline needs to meet several demanding and sometimes contradictory requirements. It must be unobtrusive but be close at hand, enclosed but easy to open. In use, it has to attach easily and come off easily, but remain secure under difficult conditions.

It should be of simple design but adaptable to various modes of use. It should be strong yet just a little elastic, it must be quick to deploy in a short tether and in a long towline. It must release reliably when the user is capsized and the line is under tension. It must be usable with cold wet hands and with gloves on.

We will need a few pieces of good gear to make a proper towing system that meet all these demands without getting complicated, awkward or bulky. I start with a standard whitewater quick-release rescue belt and cow-tail available at most whitewater paddling gear outlets. This simple unobtrusive setup is excellent for short-tows over a short distance. To tow an unstable or distressed kayaker, a push-tow (also called a toggle-tow or a rafted-tow) can be used.

The cow tail is a piece of nylon tubing with a shock cord threaded through it. It has a carabiner on one end and a ring for a quick-release belt on the other.

Coming alongside the distressed kayaker, quickly clip the cow-tail onto the forward deck lines or bow carry toggle. With the cow-tail attached to the bow, and the kayaks in a bow-to-stern orientation, you can push the victim’s boat. Paddling forward causes the kayaks to move together and the victim can take comfort, leaning on the rescue kayak for stability.

This push-tow is very effective-maneuvering and making good forward speed is surprisingly easy. If the kayak you are pushing has a rudder or skeg it should be retracted in most cases. If you are having difficulty keeping a steady course in wind or waves, dropping your skeg or rudder is likely to help.

For longer towing chores, a floating tow line is clipped into the cow-tail to provide more separation between the kayaks.

To retrieve a loose kayak or to provide a quick tow to a stable paddler, you can clip the cow-tail onto deck lines or the bow toggle and proceed with both kayaks facing the same direction. The bow of the boat you are towing in this manner will be just aft of you and is not likely to interfere with paddling.

In turbulent water, the bow of the kayak you are trying to get a towline on may be bouncing up and down a couple of feet or more, so you have to be careful not to get hit in the face or speared in the ribs. While busy paying attention to your own stability and safety, you must be sure of clipping into the tow in a proper manner.

To clip into a kayak on your right side, the cow-tail must lead from your back and directly away to the right. To clip into a kayak on your left, the cow-tail must lead from your back and away to the left. A common error is to inadvertently cross the cow-tail across your stomach. If the line crosses your stomach the towing tension will be off-center, the cow-tail will have a very short working length and the quick-release will be compromised.

This is an easy error to commit, but an easy one to avoid. When working on your off side, pass the cow-tail behind your back before clipping into a kayak.

As with any safety and rescue gear or techniques, plenty of practice in rough but controlled conditions is essential.

If your PFD does not have belt loops already built in, you can sew some on or incorporate loops between the PFD’s side cinches. (Permanently altering a PFD may revoke the Coast Guard approval.)

The belt loops will stop the belt from rotating around your body and keep the buckle in place, easy to find, and quick to release. Incorporated with the PFD, the belt and cow-tail are always with you, never forgotten, and always close at hand. When integrated into the design of the PFD, the strain on the tow-belt is spread out across the lower part of your chest.

An independent tow-belt that rests around your waist below your PFD doesn’t take advantage of the padding and comfort your PFD can provide. The safety and reliability of a rescue belt with a cow-tail has been proven through a long history of demanding use for whitewater rescue.

Making a towline: Tie a loop in one end using an overhead knot. When the cow-tail is clipped into the towline, a lark’s-head knot keeps the loop in place and prevents it from coming free if part of the loop gets pulled againest th egate of the carabiner.

The other end of a towline is tied to a marine-grade carabiner using an anchor hitch. A seized version of the hitch is shown here.

Alternate uses.

During rescues or other occasions when you need both hands free, the cow-tail is a convenient paddle-park for one or more paddles. Run the carabiner once completely around the paddles and then clip it onto the cow-tail to make a loop that will cinch tight around the paddle shafts.

While doing a paddle-float reentry on a windy day, it can be awkward to hold onto the kayak and paddle and inflate a paddle float at the same time. The cow-tail can be clipped onto perimeter deck-lines to keep you and your kayak together.

When the weather is rough, you will need a longer towline to prevent kayaks from colliding into one another. This is particularly important when towing in following seas where the kayak being towedcan ride a wave and collide with or overtake the lead kayak.

A longer towline is also more practical when towing for more than just a few minutes: the lead kayak has its full maneuverability and it won’t bump and wear against the kayak it is towing. For a long towline I use 25 feet of 1/4″ diameter floating braided line.

Tie a loop in one end and tie a marine-grade carabiner on the other end. Clip the carabiner into the loop on the opposite end and stuff the line into a small belt bag or deck bag; leave a small piece of the loop sticking out. If you are stowing the line in a bag attached to your towing belt, make sure the bag is attached to the buckle end of the belt. This will assure that the bag will not interfere with the D-ring which will slip easily off the other end of the belt.

There are one-piece towlines that are sewn or tied directly to the belt without the advantage of the easy separation of the D-ring from the belt. (It is preferable to use a belt held in belt loops.

When strung through belt-loops the tongue of the belt will run free, releasing the D-ring and leaving the belt and bag attached to the PFD. If the whole belt and bag is released, it may foul up and catch on rudders, spare paddles and other gear on the back deck.

Some PFDs have towing -belt loops already sewn in place (right). If your PFD does not have belt loops you can sew a pice of nylon webbing into a loop and add two lines of stitching to create two openings (left).

The openings are large enough to slip over th ecinch-strap buckles at the side of most PFDs and center opening holds the towing belt (center).

To deploy a long towline, pull the loop of the line out of its bag; you will have both ends of the towline in hand. Clip the cow-tail carabiner to the loop; you are now ready to go.

Before proceeding into a rough water rescue, you can also pull all the line out of the bag, and stuff it under deck bungies or just stuff it under your PFD. Once again, deploy the towline properly to the right or left above; avoid crossing the towline in front of your body.

Unclip the towline carabiner from the loop and clip it to the bow toggle or forward deck line of the kayak you intend to tow.

Keep your back deck as uncluttered as possible, as long towlines will snag under the edges of a spare paddle, on rudders, or other gear on the back deck. The farther back the line becomes snagged the more difficult it will be for you to execute the tow: If the line is snagged well aft it will prevent you from turning. The towline must pivot from the center of your kayak for you to retain your kayak’s maneuverability.

A cow-tail is a useful and reliable piece of safety and rescue equipment that can be incorporated with a long towline to make a safe and multipurpose towing system. Well designed and properly deployed, a towline is a great help keeping hampered kayakers out of harm’s way or rescuing a victim from a dangerous situation.

Shipwrecked in Ujung Kulon (Kayaking SE Asia)

In late January 2000, my buddy Dave Stibbe and I set out on a paddling adventure in Southeast Asia.

Our starting point was Phuket, on the north end of Thailand’s west coast. Our planned finish was Bali, Indonesia-2,800 kilometres away. We had a three-month window to complete our trip, and agreed beforehand to just go with the flow. We were equipped with a reliable folding double kayak and two cases of Spam, so we were feeling pretty confident.

Each of us had a wealth of experience: I had paddled 9,000 kilometres across Canada in 1995, and Dave had 18 years of experience as a guide in the outdoors. We had already spent several weeks on dry-land adventures, after which we had paddled the 300-kilometre Thai coast and the whitewater Selangor River in Malaysia.
While I was on the river, I had come down with a nasty systemic blood infection through a cut on my elbow, and we had spent a couple of weeks in the Malay capital of Kuala Lumpur, waiting for me to get out of the hospital. A bit of surgery and ’round-the-clock IV drip antibiotics cleared it up.

From there, we traveled inland through Sumatra and Java, eventually ending up in the city of Jakarta. After a few days in the crazy, bustling city of 17 million, we were ready to head out onto the water again for some peace and quiet, and a little adventure. We made plans to paddle 1,200 kilometres of the Indian Ocean along the exposed south coast of Java, to Bali.
This would be the last leg of our journey.

From Jakarta, Dave and I traveled by bus and ojeck (mini-bus) to the fishing village of Sumur, on the west coast of Java. We settled into a basic losmen (guesthouse) for the night; it catered to local Indonesians, and was the only place in town for us to stay.

A single dim light bulb hung in our musty room that was furnished with two worn cots. A well outside provided water. The central toilet was a hole in the ground that you squatted over and flushed by scooping water into it from a basin. Par for the course and all we could expect for $2.50 U.S. per night (for both of us). Because of tumultuous national politics over the past couple of years, Indonesia has been in a tourism slump.

The proprietor of the losmen told us (with help from our phrasebook) that we were the first “white people” to stay there this year. In the morning, Dave and I carried our gear down the dusty dirt road that served as Sumur’s main street. We passed by food stands overflowing with bananas, coconuts, papayas, cigarettes and shiny cellophane-wrapped treats. People sat in front of their simple wooden and corrugated tin shacks, smiling and saying, “Hallo, mister!” to us as we passed by.
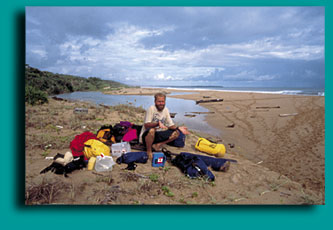
“Hallo, mister” is the one English phrase that every Indonesian man, woman, and child seems to know and use quite liberally. Two hundred yards from the losmen, the road ended at a beach lined with a dozen fishing boats. They ranged from 15 to 25 feet long, with rotted planked hulls, rusty diesel-powered outboards or inboards and black oil-stained wooden decks. A small, covered captain’s cockpit popped up at the front before their deep, upswept bows.

A few puffy clouds lounged in the backotherwise brilliant blue sky. With an entourage of a couple of dozen villagers in tow, we picked an open spot between two of the boats and set about our construction project. Dave began stashing our gear in dry bags while I assembled the kayak.

Word travels fast in a small town like Sumur, so a hundred or so of the locals crowded in tight to see the kayak take shape, giving me only inches of breathing room. When I accidentally poked some of the kids with kayak frame parts, the villagers laughed. They followed my every move, pointing and giggling as if they were watching a major sporting event. “Ooohs” and “aaahs” reverberated throughout the audience as our kayak steadily came into shape.

Gentle one-foot rollers splashed against the Hypalon hull of the kayak. Ujung Kulon National Park is made up of 800 square kilometers of roadless wilderness on a peninsula on the southwest tip of Java. It was declared a World Heritage Site in 1991, and achieved its park status in 1992. It’s bordered by wave-thrashed volcanic cliffs and jungle-covered volcanoes to the west; alligator and crocodile-rich swamps and mangroves to the north; endless uninhabited stretches of surf-pounded beach to the south; and unique flora and fauna-including endangered Javan rhinos and leopards-in the jungle of the east.

We followed the east coast of Selamat Datang Bay for 15 kilometres until our lunch stop. Turquoise waters lapped gently onto the golden-sand shores of the bay. Children played in the shallows, and fishermen casting hand nets pulled in the shimmering, struggling bounty of the Indian Ocean. We had lunch beside the bleached wooden skeleton of a fishing vessel on the beach, and looked west, across to the park.

The middle of the bay was far less protected than the shore; whitecaps danced on the water all the way across. After lunch, we crossed over the bay through one-meter swells, the ocean spray coating our boat and bodies as the sun sparkled off the ocean and the wind rippled across the water.

We arrived at Peucang Island at five in the evening after a 30-kilometre day, and set up camp at a ranger station, the only spot clear of swamp and mangrove in this low-lying area of the park. We erected our tent in a rough grass field sprinkled with coconut trees.

A simple wooden structure with a map of the park posted by the doorway served as the ranger’s cabin, while an empty, three-room motel-style plywood building stood across from it at the other end of the field. Launching the next morning, we paddled in heavy monsoon rains and wind, in swells up to three metres high. There was no place to land on this flat, northern-exposed, rock-rimmed swamp for 20 kilometres.

Broken volcanic rock blocked any chance of landing. We ate lunch while paddling, and arrived at 6:00 p.m. at Handoelum Island, soaked to the bone. Over a hearty Spam-and-noodle dinner, Dave and I shared our concerns about the relatively slow speed of the kayak and its open design-with no bulkheads, and a canoe-style spray deck-on big Indian Ocean water.

Our main concern was how the kayak would handle during the really big surf landings that we would have to tackle on the exposed south coast of Java. The following morning, March 22, we tied all of our gear into the kayak and headed southwest. We planned to paddle 25 kilometers around the notorious Gedeh and Gehakalok points.

Between these two points are 12 kilometres of 50- to 200-meter cliffs that drop off from the emerald-forest-covered volcanic peaks on the western tip of Ujung Kulon. Exposed to the full might of the open Indian Ocean, this section has laid claim to many a fishing boat. Quiet, focused, and a bit nervous, we ventured into the chaos around Gedeh Point.

Massive, house-sized swells (five to eight metres high) crashed into the cliff faces with incredible force. The resulting rebound waves came back and smashed into the incoming rollers. We were being hit from both sides with these giant colliding waves, making for tricky paddling. The ocean’s color transformed from turquoise to a dark blue, indicating a change to deep water and open-ocean conditions.

The kayak remained stable as we moved away from the point. As we crested a swell, we spotted a tanker out on the open water, then it disappeared as we entered the canyon-like trough of the wave. After we rounded Gehekalok Point, we were getting quite used to the roller coaster ride through the swells, and had lunch aboard the kayak.

Nearby, the ocean was hammering a small rock island, shooting 10-metre vertical sprays of water. Only 20 metres from the action, I pulled the camera out from under the deck for a shot, when both Dave and I heard a loud roar coming from behind us. We turned to see a steep six- to seven-metre rogue wave breaking and heading for us. Up to this point, the swells had been clean, but in that instant, in the trough of the wave that created the break, I spotted a shallow reef.

Dave shouted, “Put the camera away! Put the camera away! Paddle! Paddle! Paddle!” I hurriedly jammed the camera under the deck and paddled like mad. Pumped full of adrenaline, we made that kayak move as never before, narrowly evading the oncoming wave that would have crushed us against the lava cliffs. We were instantly filled with pure joy and elation; we laughed giddily, and whooped in relief at escaping the close call. We aimed toward Cibandowah Beach, a deserted 18-kilometre stretch of white sand rimmed by dark, low-lying jungle.

It was late afternoon and we had to land somewhere along this shore, since beyond the beach was another long stretch of rocky cliffs. We were ushered into shore by six- and seven-meter swells, indicating that the shore break would be nothing to sneeze at.

As we approached, the waves along the shore were popping straight up like rooster tails when they hit the beach. This meant it was a steep beach with a short, abrupt surf zone. Time to check out how the old kayak, and we, would do in some seriously trashy water.

Within 40 meters of shore, the break was big, steep, fast and powerful. I scanned up and down the barren coastline, but the story was the same everywhere. I was ready to go for it. As we entered the surf zone, I knew we were in trouble. The first couple of five- and six-metre rollers steepened and broke just after passing under us. The next big roller approached and opened its gaping mouth at us. I shouted, “We’re going down!” “Not yet!” Dave replied. We balanced precariously on its tip as it broke. Looking down the face of the wave, I gauged the distance to be roughly that of a two-story building. It didn’t take us and, in the brief reprieve, we glimpsed a stretch of flat water leading to the shore.

We paddled hard for land, trying to work through the strong suck-back off the beach before the next wave hit. Unfortunately, it was to no avail. A six-metre roller came quickly behind us and grabbed us. For a split second, it held the kayak completely vertical before body slamming us face-first into the surf. Our 600- pound kayak (with us and our gear) was tossed like a toothpick.

Underwater, I was violently jettisoned out of the kayak by the force of the blow. I popped up to be hit by yet another wave that shot me in toward shore.

I swam after our capsized kayak and grabbed it, then fought to get the water-filled boat to shore. I noticed immediately that its hull buckled sickeningly in the center.

After struggling with the strong ebb and flow of the surf zone, I got the boat partly on shore. I turned to see Dave knee-deep in the shallows, thrashing around, trying to collect the smaller “yard-sale” items that had not been tied into the boat. He flashed a smile at me, indicating that he was OK. I helped him, and we eventually got everything high and dry.

The casualties: two lost pairs of  sunglasses-and our kayak. I inspected our craft and found that the two main center ribs, the side supports, the coaming, all of the bow pieces, the metal rudder fitting and the rudder were broken clean through: eleven parts in all completely trashed. About half of the frame was broken, and impossible for us to field repair.
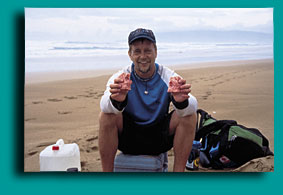
It would be unthinkable to paddle the kayak in this condition, especially on the Indian Ocean. It would act like a slinky for a while, until it broke apart due to stress on the unbroken frame parts. We were in the only uninhabited, roadless area of Java, in the farthest corner of Ujung Kulon. The water had destroyed our map; we had only a macro map of Java to go by.

From my memory of the ranger maps and our macro map, we figured that we had at least 40 wilderness kilometres to cover with all of our gear to get to the first inhabited village. Dave and I packed our soaked gear and kayak into our two large duffel bags, the kayak skin bag, the frame bag, the rib bag, Dave’s backpack, and my large camera case. In all, we estimated the bags to be in the neighborhood of 300 pounds. I felt pretty good, actually.

This castaway gig was pretty cool. We were by ourselves in the wilderness, and had a mission: To get ourselves and our stuff out under our own power through unpredictable and unknown terrain. True adventure never really starts until you mess up really badly.

We fulfilled that criterion. After shuffling the gear about ten minutes down the beach, we set up our tent on top of a sand dune. It was getting dark, and a thin band of orange was the only light remaining on the horizon. On one side of our perch, we peered down into a firefly-lit, swampy jungle; on the other, we could see and hear the vastness and power of the surf that had crushed us. Our stove was soaked, but I dried it out and managed to get it going. It clogged up after a few minutes, so I took it apart to clean it.

With almost everything still wet, and camping on a sand dune, I clogged the stove even more. The more I fiddled, the worse it got. Spam time, once more! After being gnawed on by no-see-ums during dinner, we went to bed tired, damp and full of spiced ham, knowing that we had a big day ahead of us.

The next day was humid and, fortunately, overcast, with intermittent monsoon rains rolling in off the ocean to cool us. I shuttled 60- to 100-pound loads for ten minutes at a time, eastward down the beach. I’d then run back for the second load and haul it to where the first one was. I wore sandals, while Dave trudged at his own pace, barefoot.
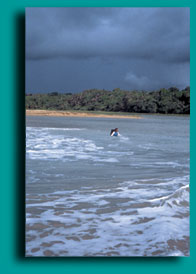
Dave likes the feel of sand on his bare feet and, despite my warning, thought he’d fare fine, even with the extra weight. “Uh, Dave, we’ve got a long way to go. You sure you want to go barefoot?” “I always walk barefoot in the sand. It feels good. Just like a foot massage.” “Suit yourself.” We needed to cover 15 kilometres along Cibandowah Beach before we entered the jungle. Once in the bush, we needed to find a trail that I recalled from the ranger map that led north to Selamat Datang Bay, where we had started.

Once at the bay, we would have to make our way up its eastern shore toward Sumur until we reached the village of Tamanjaya, where the first road out was. I cruised along in a Zen-like state, funneled forward along the beach by the ocean on my right side and the waving trees and vegetation of the jungle on my left. I thought of nothing much in particular except pushing forward. Black rain clouds rose off the ocean and soaked us, followed by a brief blaze of equatorial sun that dried us off.

We dodged between driftwood, discarded sandals, fishing nets, seaweed, shampoo bottles and anything else the sea had carried from far-off lands and deposited on the fine white sands of Ujung Kulon. I sang Village People and Abba songs to help keep myself occupied. We traveled seven kilometres in four hours, until we finally approached the Cikelesik River.

What we saw gave us pause: The river flowing out of the jungle was broad – about 20 metres wide, and the incoming tide rushed up the river like a rip. We had no choice. We forded the armpit-deep river with our heavy loads, digging our feet sideways into the sandy bottom to keep from being knocked over by the relentless force of the sea. My sandals sank deep into the sand as I strained to keep moving forward with my pack. After a prolonged struggle against the force of the flow, I finally emerged on the other side. As I turned around to check on Dave’s progress…..

I saw him lose his footing, and the surging ocean current swept him upstream into a lagoon next to the jungle.

I trudged up the channel toward the lagoon to offer my help. He struggled in the deep water to swim his pack to shore, swinging and splashing wildly with one arm, while keeping his other hand on the sinking  pack. Once he got near the edge of the lagoon, he found his feet and sloshed onto the beach with a sheepish grin on his face. We were relieved to have made it across, in whatever fashion. We later found out from some rangers that the Cikelesik is home to a good-sized population of saltwater crocodiles-some reaching up to three metres in length.
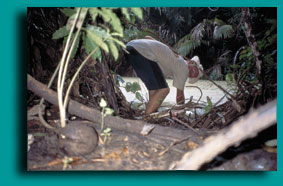
We needed to resupply our water, so I took out our water bottles and examined the brackish water. Unsure whether the water would be good, I sipped a mouthful, then disgustedly spit it out. We decided to follow the Cikelesik upstream through the jungle to see if we could find some fresh water higher up.

Grabbing our water container, we followed a crude trail into the dark bamboo, ficus and fern jungle. Water dripped off the funneling leaves of the tree ferns and cascaded like tiny waterfalls down to the muddy floor of the jungle. The still, muggy air of the tropical forest replaced the refreshing breeze off the ocean.

Betel nut trees, bamboo, bushes and vines grew in a dense thicket along the shore, hanging out over the river’s edge. We slipped and slid our way along the path, in and out of the trees and vines, our senses bombarded by everything around us.

After about 15 minutes of tramping, we came upon a small tributary. I walked down to the murky, still water and tasted it: more fresh than salt-good enough. As I stood knee-deep in the small river, slowly filling up the 10-litre container, raindrops peppered the still surface of the water.
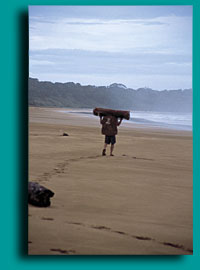
Once the brown water had filled up our jug, I waded out of the stream and we made our way back to the beach along the slick trail. By now it was pouring. By 4:00 p.m., we had hauled our gear for ten hours and gotten to the end of the beach. We still had a couple of more hours of light, and planned to go through the jungle across the bottom of Tereleng Peninsula into Karong Ranjong Bay to camp.

I had become well acquainted with my burden. On one load I carried the kayak knapsack-style skin bag that also contained the spray deck, seats and PFDs. On top of this I threw the long, narrow frame bag that also contained our paddles, pumps and sail. The total was about 100 pounds. I walked in a crucifix-like position with my hands spread out to the sides above my head to support the frame.

My other burden was a 60- to 70-pound duffel bag that I carried backpack-style, with unpadded straps. Dave, meanwhile, had gimped his arches from walking barefoot in the sand all day with heavy weight. He hobbled around like a wounded animal. We followed the tracks of the wild dogs, Javan rhinos, boars, and wild buffalo that had blazed a trail along the beach before us.

At the end of Cibandowah Beach, we looked for some sort of trailhead to take us through the jungle. A small brown patch stood out in the grasses on top of a rock shelf where the beach ended and the forest began. Tired of trudging in sand, we welcomed the change of scenery, and headed down the narrow, sloppy jungle path.
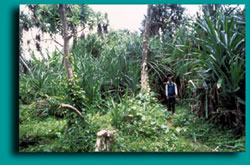
It led through ankle-deep mud and over and under fallen logs. Leaf monkeys and gibbons squawked and jumped in the canopy above as I passed in the approaching dusk. Biting flies and mosquitoes hammered me as I moved slowly along the trail.

I lathered on 95-percent Deet Muskol on my bare arms, legs, neck and face to keep the bugs at bay. Unfortunately, I was sweating so much, the bug-dope didn’t last long, and they came back again. I put on more Muskol again and again, but it was only effective for a brief time with each application, and I was bitten all over in between.

Near dusk, about three kilometres along the path, I came upon a bare patch of grass on top of a lava cliff overlooking the bay, and decided to make camp there. I dropped my bags and doubled back for my final load, telling Dave about the site as I passed by. On my way back with my last pack, I cheered Dave on as he made tracks for his last load.

Arriving at the camping spot thoroughly sweaty and grimy, I clambered down the cliff to a small beach, where I took a dip in the ocean. My shoulders had large, open wounds from the packs, and they stung as I submerged beneath the surface of the ocean.

I was spent. My head ached and my stomach felt queasy. I had pushed hard for 12 hours, and felt terrible. I had picked up some sort of bug, and had diarrhea. I walked slowly back to the campsite. Dave was sitting, gazing out at the ocean with a stunned stare. When I approached, he jumped and said “Whoa-It’s you . . . have I ever got a story for you!”

I sat on the rock beside him and he began telling me about his last half-hour. He had been walking down the trail focused on the ground, putting one foot in front of the other, when he heard a loud rustling in the bushes. Before he could react, a good-sized leopard sprang onto the trail only two metres in front of him.

His eyes and the wide, focused eyes of the predator met for a moment, then it leaped from his path and disappeared. He had gathered himself together, trying to still his pounding heart. Dave then moved on, figuring that the leopard had been more scared of him than he of it. Dusk was turning to dark, and everything went eerily quiet.

Dave flicked on his headlamp and continued on, following the beam of his light through the inky blackness. With his injured foot and large pack, he hobbled along like Quasimodo. After 15 minutes, Dave approached a dip in the trail and was about to step over a log when he heard a sound that sent shivers up his spine and made his hair stand on end. A deep, guttural growl rose from just off the trail, and Dave froze. The leopard was stalking him.

With his hobbling gait, he probably looked like a potential meal; predators always target the sick and the weak. Trying to control his panic, he walked the rest of the trail expecting the big cat to pounce on him at any moment. He arrived at camp relieved and a little shaken.

Dave’s been through a lot of experiences in his life as a guide and adventurer; it takes quite a jolt to get him unnerved. I listened to his story with astonishment but, with my intestines in knots, I felt too miserable to react. Adding a leopard to the mix was a bit too much for me to process, so I just discarded it.

I’d had lots of bear encounters in my past, and I didn’t worry about large mammals too much. I was more worried about severe dehydration, since I couldn’t keep food and water in me for more than a few minutes. Exhausted, we decided to turn in for the night.

The mosquitoes were already starting to come out. We pulled the tent out of the pack, but the tent poles weren’t with it. Exhausted and frustrated, we searched through everything until I realized that I had left the tent poles 18 kilometres back, at our beach site on the dune. With the mosquitoes out in full force in a renowned malaria zone, we couldn’t risk sleeping out. (The mosquito that carries malaria comes out to feed at night.) We improvised, and strung the fly up from some trees, then suspended the tent body from the fly.

We would need sticks to use as makeshift tent pegs. I walked off, searching the jungle’s edge with my headlamp for some sticks, when something caught my eye. Hundreds of fireflies were moving about like a pulsing galaxy in the blackness of the underbrush. Two of these flies were very large and still, lighting up only when I shone my headlamp at them.

As I continued to look at them, I slowly realized they weren’t fireflies at all, but the eyes of the leopard. I could make out the outline of his large head as he crouched perfectly still, gazing intently at me, only four metres away. In my tired, sickly state, it was more than I could deal with. I just shrugged, went back to the site, and told Dave, “Your leopard friend is back.” He mumbled something like “Great…just great,” and we both went to bed. What else was there to do? I spent the night popping Imodiums like candy, and jumping up to relieve my bowels outside the tent.

The Imodium hadn’t worked and, by morning, I was very dehydrated. One positive result of my diarrhea was that I had unintentionally made a circle of scent around our campsite that seemed to ward off any potentially threatening wildlife, including the leopard. We had treated all of our water and Dave was fine, so we figured I must have gotten sick testing for brackish water, even though I had always spit it out.

I went to my emergency kit for a dose of antibiotics, and within half an hour I could take in water and food again. Our day began with a six-kilometre jungle slog to the main beach in Karong Ranjong Bay. This time, I suited up in long pants, long-sleeved shirt, socks and running shoes, along with lots of bug dope. We were both quite weak from the day before.

Dave’s feet were killing him-he had serious tendonitis in one arch-and I was still dehydrated. The trail was similar to the previous day’s trail, and we made the beach in relatively good time. After trudging another two kilometres on the beach, we arrived at a grassy opening with a scattering of open-air shelters and a larger thatched-roof bungalow at the back. Dave and I turned to each other with blank, disbelieving faces, looked back at the opening, dropped our packs and walked side by side into the camp. As we neared the bungalow, a weather-worn sign spelled out in dull yellow letters, “Karong Ranjong Ranger Station.”
Three men stepped out of the darkness of the front door and walked to meet us. All had black, tousled hair, dark skin and gleaming smiles. The slim, moustached man in the centre wore a beige ranger’s shirt, shorts, and flip-flops on his feet; the other two simply wore ragged T-shirts and shorts with bare feet. Machetes hung from belts at their sides.

In broken English, the point man with the facial hair introduced himself as Arnasan, and his two friends as Hutbi and Tegbuh. They were the park rangers for this sector of Ujung Kulon.

Arnasan immediately invited us in and offered us tea and a much-needed lunch of ikan goreng (fried fish), rice and greens. (A few days of pure Spam and oatmeal builds up your taste for other food-any other food.) Arnasan spoke a bit of English, and gave us excellent information on which trails would best get us to Tamanjaya.

The rangers get here on foot as well; Arnasan said boats just don’t land along this stretch of ocean. They take a day to hike in from Tamanjaya and spend a month at a stretch here, doing one seven-day walk-about during that time. For dinner, we had Spam fried over the rangers’ fire, along with some rice and noodles they offered us. Even though I wanted to rest, I hiked the kayak pack partway down our next day’s trail, to give us a head start for the morning. Using our phrasebook, we chatted with the rangers into the night.
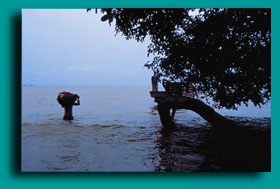
All of the rangers had contracted malaria at least once. Armed with machetes and rifles, their main job is to protect the wildlife here-especially the Javan Rhino-from poachers. There are only 60 left in the world, all of them in Ujung Kulon. I was so dehydrated that I drank 15 glasses of water and five cups of tea, and still couldn’t pee but, thankfully, my diarrhea was gone. We went to bed feeling a lot better than the day before. The next morning, the rangers offered to help us with our load but, after carrying a couple of our packs for about 20 metres, they decided we’d best do it ourselves.

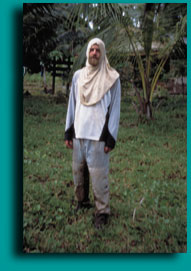
They were a diminutive trio-the rangers, like most Indonesian men, stood between 5′ and 5′ 5″. Carrying packs close to their own body weight didn’t sit well with them. Offering them a hearty terima kasih (thank you), we set to our task. Our day’s trail would take us four kilometres, to Selamat Datang Bay. The route ran through a swamp, so I prepared the battle gear. I wrapped my head in a smelly, Muskol- and dirt-soaked T-shirt, with only my face peering out of the shirt sleeve (an old tree-planting trick).

The only parts of my body that were exposed were my hands and face, which were liberally covered with Muskol. We sloshed in a monsoon rain downpour through ankle- and knee-deep mud and water, accompanied by a cloud of mosquitoes and biting flies. The duffel-bag straps ripped my shoulder scabs open for a second straight day.

My skin dissolved from the bug dope. Birds were chattering, monkeys screeching; lush ferns and palms glistened with the new rain and humid jungle heat. The jungle opened up a little, and we began to see open sky through the cracks in the foliage ahead of us.

We pushed on through, and arrived at the southern tip of Selamat Datang Bay. Mangrove trees, fallen logs and bushes crowded the shoreline with open water beyond. There was no sign of civilization save for a fishing boat moored 50 metres off shore. We stumbled over the raised roots of the mangroves into waist-deep water, and flagged it down. Its old diesel engine fired up and the boat smoked and sputtered its way to within ten metres of us. The boat’s sole occupant was a young man who appeared to be more than a little curious as to what we were up to. Having a better grasp of Bahasa Indonesia (the native tongue) than Dave, I negotiated a price of 50,000 rupiah (US $7) for him to take us to Tamanjaya, a half-hour boat ride away.
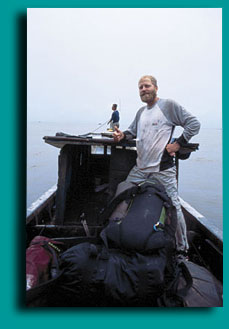
We waded our load of gear out to his boat, heaved it up, pulled ourselves onto the deck, and were off. Ujung Kulon was not such a bad place to be. We had explored it by kayak and by foot over six days, and saw a total of five people, all of them locals or rangers. If our kayak hadn’t broken up on its shores, we never would have had the full range of experience that, in retrospect, I will cherish.
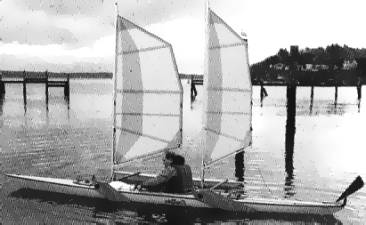
Sometimes suffering is the only way to achieve such experience. If I get malaria because of it, I’m sure the suffering will continue. Afterword: With only three weeks left and no way to repair the kayak, we headed to Bali via bus. There, we rented a couple of bikes for a buck a day, and did a weeklong lap of the island. After that, we hiked up a couple of volcanoes and learned to surf.

Back to Life (The Nature after an Oil Spill)

When I heard that Perry Island’s shoreline had been smothered in Exxon’s crude oil, it was as if a family member had passed away. That was 20 years ago. Since 1985, nearly half my life, I have been teaching kayaking in the Sound, observing its natural history, admiring its beauty and studying its ecology.

I find solace in the routine of returning to its landscape and abundant natural life. The familiar smells of the spruce-lined shores, the ubiquitous sea otters and seeing “Bent Fin,” the social male of the resident AB pod of orcas, cemented my love of the place.

Kayaking there is like revisiting a dear friend and catching up on what has changed, what has stayed the same. In March of 1989, the Exxon Valdez spilled around 11 million gallons of oil into the Sound and polluted a little over a thousand miles of shoreline. I wondered if the Sound could ever recover. http://www.eoearth.org/article/Exxon_Valdez_oil_spill

The hardest news of all to hear was that Day Care Cove had been hit. I had been there many times and loved its granite shores and the abundance of sea otters, harbor seals and pups that gave the Cove its name. All of us who knew the Sound wanted to do something, anything.

Kelly Weaverling, one of the original kayak guides in the Sound, organized a program on Perry to watch the cleanup conducted by Exxon’s contractors. It seemed like a good idea, so that May my friend Dori and I paddled the 45 miles from Whittier to help Kelly. When we arrived at Day Care, we found the Cove’s once emerald water and shore covered in a black layer of oily goo. It created a stench that smelled like the exhaust coming from an old truck burning motor oil.

The fumes overpowered all of our senses, and gave us instant headaches. Death, even if made evident only by the absence of life, was omnipresent. The once plentiful sea otters and harbor seals, the pigeon guillemots and murrelets were gone. Above the tide line, Perry Island was seemingly the same beautiful place we had known for years: the soaring peaks, the beautiful old growth forest and the plunging waterfalls. But its white granite shores were now black. Like an empty, burned-out house, it was no longer a home.

We landed on a small beach, avoiding the oil as best we could. Like Klister ski wax, it stuck to our boots, spread to our pants and into our hair. The activity of the cleanup was everywhere. The cleanup crews created trails and camps, and left trash strewn across the landscape. We spent a restless night camping next to the Cove, and in the morning we were plagued with headaches and nausea.

Sickened by the sight and smells, the next day we fled from Perry in spite of a late spring storm moving in over the water. Typical of storms in the Sound, it started slowly, with winds shifting from the south to southeast. After leaving the Cove’s protection, we paddled around the south end of Perry and across Perry Passage on the way back to Whittier.

Normally I do not make this four-mile crossing when a southeasterly is blowing—the 20-plus-mile fetch can build waves to 10 feet or more. However, the storm was a mild one and escaping the toxins on Perry seemed more important than the known risks of kayaking through familiar yet stormy waters. We made the crossing safely, and as we paddled back to Whittier I wondered if the Sound would heal.

Despite my heartrending experience in May, I was drawn back to the Sound as if to an old friend in need. That summer I returned to Perry Island, teaching kayaking to a group from the National Outdoor Leadership School. We hiked across the island to see Day Care Cove. Proving that beauty is relative, my students thought the cove was amazing. One student commented, “Beats the Chicago boat harbor!”

I was impressed that the oil was apparently all but gone from the beach after multiple cleanings. Yet oily sheens on the water, the kind you’d see if someone had spilled several gallons of gasoline, were evidence that some of the millions of gallons of oil that covered the Sound just a few months before was still present. Day Care Cove had regained its beauty, but to me, without its wildlife, it was just an empty shell.

I returned almost every year for the next 10 years. Each trip had a familiar routine: camping at Meares Point, looking for the return of intertidal life and sea lions, and anxiously paddling into Day Care wondering if the otters had returned. Initially, the shore and sea were bare and devoid of life. After the first year, barnacles began to appear as small white specks looking like dandruff on the grey-colored slate rocks.

Rockweed—a brown algae—covered the Sound’s intertidal zones. A couple of years after the spill, seastars and sea urchins appeared. Year after year, the shore slowly came back to life. Eventually sea lions returned and the occasional otter and harbor seal popped up in the Cove. Even the damage to the land done by the cleanup crews—the trash, trails and camps—was gradually being swallowed up by the Sound’s temperate rainforest.

The Sound appeared to be healing, the winter storms washing the beaches clean one wave at a time. In fact, despite the tremendous human effort to clean the Sound, most scientists concluded that the Sound’s winter storms did just as good a job ridding the beaches of oil as did the cleanup crews. But for every hopeful sign I saw, I also knew that oil still lurked beneath the surface. I could easily find it by digging a foot or two into most oiled beaches. Many of the damaged species, like marbled murrelets and the AB pod of orcas, were not recovering. The Sound had changed and I doubted if it could ever fully recover.

Exxon settled its civil and criminal legal cases with the state and federal governments by creating a trust fund to be used to study damaged resources and help the Sound heal. Hundreds of millions of dollars have been spent studying species like sea otters, harlequin ducks and orcas, and buying easements and land to preserve habitat critical for nesting birds and salmon. Ironically, some of the money from the criminal settlement was also used to build infrastructure to encourage tourism.

According to a study done by myself and Dr. Chris Monz of Utah State University, the improved access to the Sound has been detrimental to the area in more ways than the spill. A new road to Whittier brought more powerboats, kayakers and personal watercraft. Though the oil spill affected only a portion of the Sound’s beaches and waters, the increased tourism affects most all of the Sound.

For instance, after looking for five years this past summer we found our first invasive plant species, Pineapple Weed, on a Black-Legged Kittiwake rookery near Valdez. My and Dr. Monz’s study showed that the influx of people and boats also may be having an impact on species like harlequin ducks that are struggling to rebound to their pre-spill numbers. The recreational users of the Sound, though a welcome addition to local economies, also made it feel more crowded. It seemed like the final blow to the Sound’s wilderness. With each passing year, it was harder for me to imagine the Sound ever being close to its pre-spill natural wonder that attracted me to it in the first place.

A few years ago, almost 17 years post-spill, I had all but given up on the Sound. Some species like the murrelets, harlequin ducks and some pods of orcas still had not recovered, and I was disappointed by the influx of people and boats. I planned a sort of goodbye tour.

I’d spend a few years seeing all the Sound that I could and visit my favorite places. For two years I paddled every month of the year there, even in the middle of winter. I had spent most of the past summer studying recreational impacts. I thought that after revisiting 500 miles of shore and more than 200 campsites, including Day Care Cove, I would move on to wilder places.

Yet, surprisingly, while kayaking that summer it all came back. Everywhere I went I saw a place that seemed to have recovered to what I remembered prior to the spill. I saw few people but lots of otters, sea lions and waterfowl. Each day, paddling by waterfall-draped cliffs and seeing sea otters munching on shellfish, I began to feel my old connection to the Sound returning. The empty solitude of the fjords filled with the sounds of booming, calving glaciers. Paddling the east coast of Perry Island, I noticed that sea lions covered the rocks. In Day Care Cove I saw harbor seals, sea otters and harlequin ducks.

In the years since the grounding of the Exxon Valdez, I may have changed too. A couple of decades older now, I have slowed down. I’ve lost friends to avalanches, heart attacks and cancer. I’ve also seen babies born, grow up and graduate from college. I’ve come to find beauty in nature’s resilience.

I know that oil still lurks in the beaches of Prince William Sound, slowly releasing toxic hydrocarbons. I know that the improved access continues to lower the chances of my finding solitude and quiet there. Still, for everything I’ve seen that has discouraged me, the slow pace of the kayak has allowed me to see much of the beauty and vitality that attracted me to the Sound when I first kayaked there in 1985. At some point in this past summer I realized that I would be kayaking in Prince William Sound the rest of my life.

I could have given up on the Sound, but its recovery made me hopeful. I truly cared about the place and I could not give up on it any more than I could give up on a good friend. When a friend has a difficult time, we help them through it as best we can. We can do the same for the places we care about by Leave-No-Trace camping, volunteering to clean trash from beaches, or supporting causes that preserve wilderness and wildlife habitat. I’ve done that for the Sound. It deserved no less from me.

Heel Hook Self-Rescue

A common problem new paddlers have is a lack of upper body strength. Teaching basic skills I often come across people in my classes who need a solid self-rescue but are unable to execute a paddle-float outrigger reentry because they can’t lunge from the water onto the back deck of their kayak. After a good season of paddling most will develop this strength, but as beginners, when they really need it, students need an alternative.

Traditionally, the solution to this situation is to use a sling. Although a sling provides a step, relieving the victim of a need for the upper body’s strength, deploying a sling takes extra time and creates the hazard of getting tangled upon reentry. Slings, if not used correctly, are also notorious for breaking paddles, leaving the victim up a creek. As an alternative, my students and I worked out a modification of the paddle-float rescue using a heel hook technique more commonly used in assisted rescues.

Although this hybrid rescue is not the be-all and end-all, it is fast and more efficient than a sling. For many of my students it has proven a reliable solution without creating the potential entanglement issues or paddle breakage associated with slings. Because this method puts more weight on the paddle-float outrigger, it is best suited to inflatable paddle floats. Foam floats may not have enough buoyancy to be effective. For students who weigh over 230 pounds, I’ve found it necessary to inflate both sides of a double-chambered paddle float.

As you do with the usual paddle-float rescue, leave the kayak upside down after your wet exit and hold on to it by putting both feet in the cockpit. While floating on your back, attach the float to the paddle and inflate it.

Roll your kayak upright and insert the paddle blade opposite the float under the deck lines behind the cockpit. Be sure the blade is firmly held under the lines on both sides of the deck and that the paddle shaft is at a 90-degree angle to the kayak.

Place yourself in front of the paddle shaft chest up, and hook your elbows over the shaft behind you. With the hand that’s over the deck, grip the shaft and closest attachment point. While you’re in this stable position next to the cockpit you can keep your torso out of the water and give yourself a chance to regain composure and think.

Kick both feet to the surface until they’re pointing toward the bow. Place your outside leg into the cockpit. Reach across with your outside hand and grab the back deck lines or cockpit coaming. Stretch your cockpit leg and body as straight as possible and roll yourself chest down onto the deck. Keeping stretched out will keep your weight low and let your powerful torso and thigh muscles do most of the work of getting you on deck.

Focus on the float and keep the majority of your weight on the outrigger side of the kayak as you rotate into the seat to your paddling position.

Depending on how it is attached and how far back the paddle float is, either pump out with the float still attached and then recover the paddle, or recover the paddle first and position the shaft under the bottom of your PFD so you can pump out while leaning your body weight on the float. When you are ready to paddle, remove the paddle float, deflate and stow it.

Variations and Adjustments

This method relies upon your kayak’s deck lines so you need to make sure that they are in good shape—neither frayed nor weathered. Every boat seems to have a different configuration of lines and bungees, requiring each paddler to make slight modifications on how they insert and recover the paddle.

Although we have attempted to modify the technique to work without using deck lines, gripping the shaft against the coaming with this body position takes a great deal of hand strength and actually locates the victim too close to the cockpit, making it difficult to insert the outer leg and extend the leg and body into position.

In my years as an instructor I’ve strived to help students achieve self-reliance. This method may not be for everyone but it has helped many get closer to that goal.

Not Your Average Afternoon (Kayaking to Todos Santos Island, Mexico)

October 31 began beautiful and sunny down here at my Punta Banda hacienda, about twenty minutes south of Ensenada, Mexico, and I thought I’d take a good kayak outing to Todos Santos Island about ten miles away.

I told my girlfriend, Mary, where I was going by email, and left about 10 a.m. I thought I could do the round-trip in four or five hours. The seas started out calm enough, and in my old-style high-volume riverboat I had with me my spray skirt, whitewater paddle, wetsuit, sunglasses, visor and a little water bottle, just in case. I even put some sunscreen on.

I don’t usually bother with a PFD because I love to swim in my wetsuit. It provides plenty of buoyancy to keep me afloat. There was so much big, beautiful water out there, I had girlfriend issues and other stuff to think about, and I needed some time with me and the big guy upstairs, to sing, pray, figure things out—you get the picture.

A steady, nonstop nine-mile pull from the mainland, taking a little over two hours, brought me within a mile of the island. The wind started to kick up. Ferociously. Five-foot rollers with the occasional eight- to ten-footer—no big deal for a whitewater kayaker, except that the wind and current I was now fighting was not letting me make any forward progress.

Of course I was sealed in my boat with the neoprene spray skirt, which was supposed to be keeping all the water out. Well, it was a little worn and with all the wind and water spray it seemed to be opening up around my waist just enough for a trickle, which became a steady flow, to get inside my boat. I was suddenly up past my ankles in water.

Now this was not that unusual of a development, but the sad thing was that I was not making any forward progress at all, and this was a high-performance kayak with an expert paddler—as I like to think of myself—at the helm. Egos get us into all kinds of trouble, as I was about to find out.

Soon the water was up to my knees and the boat, with an additional few hundred pounds of water inside, was responding sluggishly. If I leaned over too far one way or another, it wanted to help me complete the circle, or at least the first half of it. Suddenly, I was paddling as hard as I could, still not close enough to the island to get in the lee and what I hoped would be calmer water. I paddled as hard as I could.

Every time I stopped to rest, even a little, I would lose all the ground I had gained, and the wind blew on— steadily. I couldn’t go back for nine miles or I might wind up farther away from any land when my boat filled up completely, and I knew that would be bad. The wind-driven spray was working its way under and through my spray skirt, and there was nothing I could do about it. Drip, trickle, drip, trickle.

This went on for another three hours, and I was paddling as hard as I could just to stay in place. It was killing me that the island was getting no closer. My arms and shoulders and back were screaming, but I dared not stop. I couldn’t chance opening my spray skirt to bail a little because wave after wave was washing over my deck and I couldn’t risk having the kayak fill all the way up.

The waves and whitewater action were taking my full attention every moment, and I couldn’t even let go of my paddle with one hand. I dreaded the thought of going into the water, so I paddled on as long as I could—bracing, adjusting and reacting to a kayak full of hundreds of pounds of water, floating barely above the surface. This really sucked.

I have not bailed out of a kayak in years and can usually roll and weather any kind of conditions, unless I have a boat full of water, that is. I’ve flown my kayak to Cabo and Hawaii, caught mako sharks off of it and surfed it in Encinitas for 25 years.

I have taught and guided river, ocean and surf kayaking for literally thousands of people. I am comfortable floating around offshore, at night, you name it, but I have never been in a boat full of water stuck offshore with a howling 40 mph (35 knot, 64 kph) wind before, that’s for sure. I was praying a lot and using all the whitewater skills I had just to stay upright.

Finally, a complex combination of waves hit me in the front and the side simultaneously and that was it. I was over. No point in rolling, the boat was full. Out of my boat swimming.

Damn. I quickly went to the stern and looped the webbing sling around my wrist. I was almost relieved at being able to stretch my body out a little for a change and take a rest, of a sort. I floated there as I weighed my options. I knew I should stay with the boat. It was bright red and stood the best chance of being seen from a distance. Dressed in my black neoprene wetsuit I looked like an injured seal, a notion I tried not to think about too much.

I worked at every combination of bailing out the boat, convinced that I could get back in the kayak if I could get the water out. As I splashed and splashed with my cupped hands at the water inside the boat, I thought about the old fisherman’s trick of slinging a bailer full of water over the surface of the sea, mimicking a school of excited bait fish, to attract the bigger predator fish, even sharks. I tried to put that thought out of my mind as well.

Even if I had to climb back inside upside down under water and roll back up, I was ready to go for it, but wave after wave was splashing over me and the boat, so this idea was hopeless. I was no longer a kayaker. I was a swimmer.

The sun was out, the water wasn’t too darn cold, and I like to swim in the open ocean, so I had that going for me anyway.

I was really tired from the effort I’d put into paddling, and I was still about a mile from the island. I got kind of a sidestroke and frog-kick thing going and pushed the boat in front of me;

I kept it upside down to keep a bubble of air inside to help float it. It looked like I could actually make some headway. I didn’t want to lose my paddle, of course, and experimented with holding it in various positions where it wouldn’t create any drag. I just kept kicking and pushing, kicking and pushing, switching sides as fatigue set in. The island didn’t look like it was getting closer. At all.

Even when I went into the water I had already given thanks for all of the blessings in my life and the people I have loved and the experiences I have had, and did some hard-core should-I-live-through-this contracting with the man upstairs. Now that I was slogging along completely alone in a big, empty ocean, the conversation deepened.

It seemed that only a little time had passed when a fishing trawler came close by, and I screamed and waved my paddle for all I was worth. But it kept on driving, sadly, unbelievably.

My scrambling forays up onto the back of the overturned kayak to rest and get warm were coming closer together while I was having serious conversations with myself, not believing that I was going to go out this way.

I tried a kind of paddleboard technique of lying down to swim my upside down boat, but my arms were absolutely dead, and my feet fluttered in such a spastic fashion that I was sure it would attract sharks. One little bite would do me in for sure.

My pushing and kicking were actually having just the tiniest bit of effectiveness, but I was still very far off from Todos Santos Island and it looked like, at this rate, it would take me until about eleven at night to get there. I started to think about being out when the sun went down.

I knew after the first hour in the water that I was already getting hypothermic: my dexterity was going, my breathing was rapid and my thinking was a little desperate. That’s not to mention my screaming muscles. I had been in the water for three hours now.

The one big decision I had left was whether to abandon the boat and try to swim for it. I knew I could swim the distance of a mile on a good day, even if I had to float on my back and kick, but the idea was not exactly a reassuring one. What if the current just carried me away from the island? I knew that if I abandoned my boat no one would see me at all and then I might not make it. The current and wind still hadn’t slowed down. Blowing like stink out of the west. Nonstop. All day.

I was getting really, really tired and it took every bit of mental control I had to keep myself together. I have been in plenty of hairball situations before, but this one was sapping my energy fast. It was something I was not in control of, and I was getting really cold. Things were looking bleak, but I refused to give in. I just kept pushing and kicking. It helped to have something to do, to have a goal.

Suddenly a giant tug appeared behind me. It was pulling a garbage barge from Ensenada and it looked like…YES, HE SAW ME! He took forever to maneuver to a position where he could get close enough to present the side of his big tug to me. I was still pulling my boat along and swimming for all I was worth, which was not much at this point.

The wind was not through with me yet, however, and it pushed him away from me faster than I could catch him by swimming. To say this was discouraging is to put it extremely mildly. I still had a chance to swim for the huge, long barge he was towing though, and I could see guys on deck scrambling around trying to manage the gigantic cable between the two massive craft. They didn’t want it to be the first thing that I reached. If it suddenly went taut or I got tangled in a loop while I was near it, the result could be fatal.

I had to make a decision. It took me about a millisecond. I told myself there was no way I was going to miss that barge, so I left my kayak and paddle behind and set out with the strongest stroke I had left to catch that barge! Being a giant boxy thing, it stuck out in the wind even more than the tug and it moved away even faster. Now I was literally up the creek without a paddle, or a boat, and really, really, really tired.

Now the tug had straightened out its trajectory and was moving away from me. It couldn’t be, I thought. It was leaving. NO! I yelled, I screamed. I used some expletives about the code of the sea or some such thing, but off it went. I just could not believe it. This was going to be it for me now, I was sure.

My kayak had not drifted too far away and somehow I was able to get back to it with some effort and to scramble and sprawl my huffing and puffing frozen, tired body over it once more. OK. I was still alive. The paddle was nearby and I grabbed it too, thinking I had my signaling device back, but I knew there would be no more swimming for me. It was getting later, I had now drifted farther from the island than where I started and I was “running on fumes” at best.

Just then, out of nowhere, came one of the biggest bow-smashing, rooster-tailing high-performance watercraft I have ever seen. It was about 60 feet long, and most of it was low to the water. There were a bunch of uniformed guys on deck. They were Mexican Marines! The tug must have made a Mayday call for me and left me only because they knew I’d soon be rescued. The Marines’ vessel had a cockpit way up front that looked like a stealth fighter, and these boys could drive. Their high-performance machine was built for catching drug runners or whatever else the mighty Pacific threw at them. I was saved.

It was unbelievably scary to be alongside a big boat rising up about 15 feet and then smashing down in each huge roller. The crew threw me a rope and I was able to grab it without letting go of my boat and paddle. They hauled my kayak on deck, took my paddle and pulled me aboard.

I was now quite hypothermic and my body was working hard to compensate for a very low core temperature and abnormal metabolism. My vital signs were all screwed up; my breathing was rapid and my heart was racing.

Thank God this vessel had a warm and cozy inside where they blanketed me up and we tried to converse in my terrible Spanglish. Between chattering teeth I told them to drop me at the Punta Banda boat ramp where I’d left my truck—I would be OK to swim to shore.

They insisted that I go back to Ensenada for a medical screening and I was certainly in no condition to argue with that. I had been running on pure adrenaline for six hours, with three of that in the water, and I was starting to come down. I felt pain everywhere and was a little nauseated and light-headed.

It took about 18 minutes to cover the 12 miles back to their Navy base where I managed to clamber with some assistance up onto the side of a cruiser—a good-sized Navy ship—that the Marines had tied up alongside, and then onto land on the other side. They loaded me into an ambulance for a short ride to their ER, where I was stripped down and heated up with hot blankets, heat lamps and about six nurses working on me. It took my core a good hour to return to some semblance of normal temperature.

The nurses kept jamming a thermometer under my arm and then pulling it out again. I don’t know what my actual core temperature was, but each time they read the thermometer they seemed to get more excited about getting me more blankets and heat lamps. The lamps felt really good. I drank some tea and hot chocolate and tried to massage the aches out of my really sore chest, arms and shoulders. I had definitely used up one of my nine lives on this little outing.

I didn’t have a nickel on me, of course, but no one asked me for any kind of payment either. “We’re the Navy,” they explained. It turned out this group was the most highly trained maritime rescue group in all of Mexico. My prayers had been answered by the best of the best. They not only had a high-tech fleet, complete with helicopters and rescue swimmers, but they regularly respond to emergencies as far as Tijuana to the north and 120 miles to the south of Ensenada.

LESSONS LEARNED

Now I’m not what you call a “normal” paddler. I got hooked on paddling large-volume plastic roto-molded riverboats when the company I was guiding for on the Green and Colorado Rivers let me take some boats home to my San Diego beachfront house in the early ’80s. I quickly discovered how to surf and was literally out there every day, right alongside the board surfers and loving it.

I have been paddling in the ocean for more than 25 years, comfortable in El Niño 15-footers, competing in the Bay-to-Bay 21-mile race we have here in San Diego, and exploring every river channel, estuary, marina and whatever is happening on the water, all in this same type of kayak, which, on balance, tracks as well as most sea kayaks out there.

I regularly do endos and paddle spins, surf backwards, paddle up to the sportfishing party boats miles offshore, and go out with a fish finder and gear to catch all kinds of fish— including mako sharks—a story for some other time. I have used my kayak as a dinghy for my sportfishing boat on solo trips on the Sea of Cortez.

At an annual parade of lights in San Diego Harbor I illuminate my kayak with glow sticks and do a 15-foot drop off the end of the pier into the drink. To say I am comfortable in my kayak is pretty accurate. And yet, I found myself in an unexpected situation. It’s obvious that I should have told someone, other than my girlfriend by email, that I was going to the island, but for me ten miles is no big deal, and I like going solo. I like the peacefulness and experiencing nature at its most pure. It’s essentially a private experience.

I often go as a kind of meditation and I rarely tell anyone. I have soloed big mountains and big rock walls for days at a time and come back with a sense of accomplishment and a feeling of being the expanded man. All that time alone in contemplation is great for the soul, or at least it feels like that to me.

It would have been a simple thing to paddle with someone else and do a simple rescue and dump the water out, but there really isn’t another serious paddler for a hundred miles down here. If there were, I would probably be paddling with him or her already.

Frankly, there is no one down here who could have done much about it if I had gone missing anyway. I knew that and, as the saying goes, “You pays your money and you takes your chances.”

What about the PFD?

Let me tell you about that. You see, I am comfortable rolling. Very. The PFD messes up my act underwater, upside down, and when I’m up top it is just one more piece of gear that either chafes or rides up or just makes me hot. When I do wear one—mostly I use a trimmed down PFD when I’m fishing—it’s mainly for the pockets.

My wetsuit gives me great flotation and is almost a vehicle in itself. I regularly jump in the ocean and drift and swim for a mile or two in it. I know it won’t keep my face out of the water if I am unconscious, but the Type III PFDs that most kayakers use aren’t designed to float wearer’s face up either. The lack of a PFD didn’t figure much in this situation.

I am not saying don’t bring one, just giving you some insight into my personal thinking here. I’m sure it was my wetsuit that kept me alive. It is a full-sleeved, full-legged wetsuit. I don’t care who you are, three hours in the water is a long time. I would put on a full wetsuit before a PFD anytime.

I think of it as a survival suit, and, remember, I paddle the relatively warm waters of Southern California. If you paddle colder waters up north, you should be paying attention and get the neoprene hood too.

Once we’re past the surf down here in Southern California, and even more so in Baja, it’s usually just pretty darn nice so we are quite spoiled. We generally paddle warm and dry. On this particular day I was literally thinking that I wouldn’t even get my hair wet.

My kayak has 5-inch-thick foam columns inside, front and back. They stop the boat from oil canning when a few thousand pounds of water crash down on it in the big surf and they keep it floating when it is filled with water. They were the only reason I was able to paddle a boat full of water for three hours, and they kept the kayak afloat when I climbed up on it as it floated there upside down.

But it’s not enough for built-in flotation just to keep a boat from sinking—it has to keep it capable of being paddled effectively. Without float bags, my kayak could take on a considerable amount of water, enough to make it extremely slow and vulnerable to capsize.

If I’d had float bags, I wouldn’t have been so bogged down by a load of water, rolling might have been an option when I got knocked over and I would have been able to stay aboard where I was less exposed to the chilling effects of the water.

As far as techie gear like a PLB (Personal Locator Beacon) goes, well, prices are coming down so if you can afford it, why not? The current models are compact enough to fit in a PFD or paddle jacket pocket. The PLB signal is picked up by satellite and relayed to a mission control center and then to the local rescue authorities.

I have a VHF radio on my fishing boat, but my experience with having electrical devices aboard my kayak has generally resulted in batteries shorting out, short equipment life and more hassle, and let’s not forget the expense. I hadn’t looked into the more recent waterproof handheld models; I had never been interested in electronics until now.

My solution has always been this: When in trouble, paddle out of it. That didn’t work this time.

I like to go lightweight and fast, and don’t carry much of anything if I can help it. Just to give you a concept of what I’m talking about here, this is how I launched that day: I backed my pickup truck up to within about 25 feet of the water on a rocky beach next to a slippery old cement boat ramp.

I untied the one rope holding the boat in the pickup bed. I had the boat on the ground and was inside with spray skirt attached and paddle in hand in less than 45 seconds. With a gorilla push start I was doing a slide down the boat ramp (see, plastic boats do make sense sometimes) and splashed into the water, already moving, not stopping in this case, until about nine miles later. That’s just me.

I regularly laugh at all the sea-kayaker fishermen who buy literally thousands of dollars of stuff, from electric bait tanks to pedal-driven kayaks, who have to use wheels to get all of it to the water. My whole boat is light enough to carry it on my shoulder for quite a ways

Bottom line, I don’t really want to carry a lot of extra stuff. What I can tell you is this: I go out there several days a week, year-round, so I get very lean with my gear. Every area is different, every paddler is different. This is just me. And in Baja and Southern California, the ethic is a little different perhaps because the weather is so mild and forgiving.

Now the weather on this particular day was different, unexpected and unpredictable. I am also a paraglider pilot with about 1,000 hours, and I’m very tuned in to wind and direction and developing fronts, different types of clouds—you name it.

This particular blow actually ripped the roofs off of houses down here and knocked out power lines—and it was not forecast. It was just my luck to be out there that day.

Normally I can bail quite effectively with a sponge and get most of the water out, but in this case I couldn’t even let go of my paddle with one hand, and I dared not open up my spray skirt, something you don’t normally think about.

Statistically, if you paddle a lot, things will happen to you. It is these unforeseen incidents that are the “statistical outliers” that we need to be prepared for, as I found out.

The smaller version of aerial flares commonly carried by kayakers wouldn’t have fared too well in the wind, and wouldn’t have been all that visible in the daytime anyway.

I think a smoke signal would have been useful. Anyone who spends a lot of time on the sea will tell you that you can see smoke for miles. In my sportfishing boat I am regularly 50 miles or more offshore, and whenever you see the horizon interrupted by smoke, it definitely gets your attention. I will be looking for some from now on. I also find myself newly curious about shark repellent.

Thinking about the potential of being “benighted” out there, provided I hadn’t succumbed to hypothermia by then, one of those clip-on flashing strobes would have been great to make sure I could be seen by ships in the area who could easily have run me over and never known it.

I do give thanks to the Lord above that someone did see me out there and that I was rescued. As a climbing guide, kayak instructor and head of a ropes-course company, I have managed high levels of risk and made safety judgments for more than 200,000 of my clients. I’ve been in some scary situations before on personal adventures and expeditions, but I have to say that this was my closest call yet.

It is an amazing thing to watch your strength atrophy, your stamina degrade and your mental anguish get right to the very edge. And believe me, you never, ever, want to get that cold. I took a good measure of who I am and what I can take that day, and I now have a very accurate idea of where my own personal edge really is.

This incident was personally memorable and definitely up there with the intense experiences I’ve had in my life, even as a kayaking and climbing guide. In Yosemite I once saw a guy die in a climbing accident right in front of his girlfriend. After his body was taken away she decided to climb again that afternoon, to help her process the experience. It’s been two weeks for me. Maybe I need to go for a paddle tomorrow.

Coincidentally, I am working with some folks on our peninsula to organize a rescue group there. We do our own cliff-rescue training and have made plans with the Commandant of the Ensenada Naval search and rescue station to coordinate our efforts and training with them.

There are a surprising number of accidents and incidents on the Punta Banda peninsula, with everything from fishermen being swept off the rocks and boats sinking to cars over the side and the occasional tourist making a misstep along this beautiful, but exposed and potentially treacherous coastline.

As a rescue trainer I never thought I’d be a victim myself. It looks like some much needed rescue team coordination can come out of my experience, something I can use to benefit others who find themselves in perilous situations.

Bart Allen Berry is a professional climbing guide, kayaking instructor, ropes-course and corporate trainer who has been living and working part time in Mexico for the past eight years.

With a corporate ropes course and training center on the Baja coast north of Ensenada, Bart leads regular team-building and leadership trainings for the Baja Norte Maquiladora industry. You can contact him by email at [email protected]

A Note from the Editor:

Bart’s story comes on the heels of a discussion of experienced kayakers who find themselves unprepared for the conditions they encounter.

Eskimo 19 Harpoon TR by Easy Rider Canoe and Kayak Co.

Harpoon TR Design Statement: I well remember how much I enjoyed the easy glide of an Olympic flatwater racing kayak. These memories and the growing popularity of long-distance races triggered the design of the Harpoon TR (T for touring, R for racing).
The design intent for the TR included the following criteria: to provide a kayak for the paddling purist who appreciates the speed and efficiency of a competition-caliber hull; the seaworthiness, stability, and cargo capacity for extended trips; and generous bow and stern cargo hatches for loading bulky gear. And, as with all my other designs, elegant lines and good looks were of equal importance.

The TR shares the same gene pool of all the other Easy Rider CR™ kayaks. It incorporates special deck moldings to take advantage of Easy Rider’s innovative outrigger, catamaran and high-performance airfoil sailing options.
To enhance the open water safety in adverse conditions, the TR can be used with our highly refined paddle-float rescue system or the Instant Outrigger™ Safety System, or it can be paddled with a removable safety outrigger.

Peter Kaupat


Reviewers:
VS 5′ 2″, 160-pound female. Day trip in light winds.
GL 5′ 11″, 165-pound male. Day trips, paddling in calm conditions. Sailing in winds to 10 knots.
TE 6’1″, 200-pound male. Several day trips in various conditions calm to 4 foot wind waves, winds from 0 to 20 knots.

Harpoon TR Reviews:

The manufacturer provided two Harpoon TRs: a fiberglass version fully outfitted for sailing (the subject of the review), and a light carbon-fiber model equipped to take an outrigger or catamaran with the other boat. The layup had an “excellent appearance” (GL). The outrigger poles are set in grooves in the deck and are secured with fiberglass fittings that bolt into a reinforced area of the deck.

While the grip on the coaming makes it manageable to carry solo, the TR’s 651/2 pound weight and 19-foot length takes some getting used to. Toggles on the end make an easy assisted carry.

The deck fittings include a number of cleats and molded-in features to accommodate the sails and the outrigger. There are bungies forward and aft of the cockpit but no accommodation for a spare paddle nor grab lines forward. On the aft deck the nylon cord rudder lines could be used to hang onto the boat. There is a stainless steel U-bolt for locking the boat.
The cockpit opening is “huge, easy to get in and out of” (GL) and “long enough to get in butt first then feet” (TE).

The “footwell is about at the limit for taking size 12 shoes” (TE). The cockpit is fairly deep, providing freeboard for sailing but making the boat more difficult to roll (GL). The molded fiberglass seat is comfortable and has a series of mounting holes to reposition the seat. The adjustable back rest has a padded cover and is “comfortable and provides good support for the lower back” (TE).

Ordinarily the curved fiberglass thigh braces are glued under the coaming to fit the customer’s leg length. The thigh braces installed at an “average” position worked well for the reviewers and with custom placement and padding would be comfortable and secure.

The foot braces and rudder pedals are molded of a single piece of fiberglass that bolts to a track along the keel line. For VS, whose feet are small enough to set her heel against the base of the pedal unit, the system “wasn’t mushy at all and provides nice support.”

“It doesn’t have as much stretch as I expected although the pedals will twist under high pressure” (TE). “The rudder turns the boat well, rides easily over obstructions, pulls up and deploys easily. My main concern is the vulnerable position it is in when pulled up. The rudder is easily removed for transport or surfing” (GL).

The TR has “very light initial stability but sound secondary stability. The initial feel is a bit tippy and may be disconcerting to a novice” (VS). “The stability was in keeping with the high-performance feel of its speed and turning ability. With an outrigger in place you can stand up in the cockpit with complete confidence” (TE).

The reviewers “preferred paddling without the rudder because the boat responded well to leaning” (GL). “When set on edge the stern swung around smartly, making tight maneuvering possible. Though not a stiff tracker, the TR held a straight course without needing to take corrective strokes” (TE).

Only TE had much wind to paddle in. He noticed a slight tendency to weathercock, but tracking held the boat on course without requiring strong corrective strokes. TE also noted that the high bow gave the TR a very dry ride since the bow climbed over most waves. GL thought the TR’s speed “was exceptional with the rudder up. There was a definite drag with the rudder down.” TE, using a knot meter in the carbon-fiber TR, recorded 47/8 knots at an exercise pace and hit a peak speed of 67/8 knots in a short sprint. With the outrigger on, he could hold 41/2 knots and sprint at 5 1/2 knots. VS agreed that the TR “moves out smartly and holds its speed well.” Only TE had wind waves to surf: “lots of speed to catch and ride waves.”
The TR has fiberglass bulkheads fore and aft, sealing off stowage space “adequate for a long trip” (GL). There is additional stowage space in both ends of the cockpit. Large hatches make loading and unloading easy. The masts and sails can be stowed inside through the hatches. The neoprene covers are protected by tethered fiberglass lids. After a half dozen rolls, GL reported that both compartments remained dry.

The TR was provided with two outrigger poles, two fully battened 24 sq.ft. sails (with zipper reefing) and an outrigger float. The leeboards pivot on the ends of the cross poles. The float is weighted with bags of lead shot to provide more resistance to the pressure of the sails lifting the float. “The sail rig and outrigger are pretty straightforward.

The fittings all seem stoutly made and up to the job” (TE). “The kayak certainly showed a nice turn of speed in light conditions, and it was very fun to sail. Once the leeboards and sails were trimmed for the course I wanted to hold, the kayak would hold the course without having to constantly work the rudder. [When] the wind died it was an easy matter to unrig the boat. [It ] was heavier to paddle with the outrigger in place, but still quite manageable” (VS). “With the float to windward, ballast (bags of lead shot) helps keep the float down. Gusts can bring it out of the water but the rig will roll slowly so a sudden capsize didn’t seem imminent. With the other kayak and partner in place of the float, we roared along, I would guess at in excess of 7 knots. We took on waves to 31/2 feet and winds to 20 miles per hour with ease” (TE).
“The TR is a respectable kayak. It has good speed, tracking and maneuverability.

What makes the Eskimo an extraordinary vessel are the outriggers and various configurations for sailing. As a solo cruiser the outrigger adds the security of great stability and the advantages of sailing, without being too slow to paddle. I’d definitely choose the TR for making distances well beyond my standard kayak paddling range” (TE).

“For a kayaker looking to expand his horizons, the compromises in a dual-purpose craft may well be acceptable, adding new dimensions to the sport” (GL). “Overall, the sail rig is a huge success. I fully expected the boat to be a set of unfortunate compromises, but it is a nice touring kayak and an entertaining, useful sailboat” (VS).


Designer Response

As a designer who puts all his know-how, talents and passion into every new design, I admittedly was a little skeptical and apprehensive about placing my new touring-tracer, the Harpoon TR, into the hands of Sea Kayaker’s test team. In the past, I viewed Sea Kayaker as a primarily purist kayaking magazine and therefore felt my multiuse approach ingrained in all my designs might not be appreciated. I feel Sea Kayaker did a great job in taking the TR through its paces. I consider their test report fair to the design and unbiased and honest to the readers.

We provided a lightweight all-graphite racing version as well as an expedition grade custom glass TR. This version shines with fast acceleration, rapid turning ability, and easy out-of the water handling, features demanded by performance -oriented racers for whom I designed the TR. By adding an outrigger a paddler can extend his training into water conditions which may be considered extreme for most paddlers.

All Easy Rider kayaks have the same large cockpit opening resulting in optimized cockpit comfort, easy foot rudder adjustment, and easy paddle-float reentry. Optional custom-fitted thigh braces will provide the tight fit desired for Eskimo roll practice.

All my kayaks have enhanced tracking, without losing the sporty rudder response necessary for high-performance sailing. Our rudder system, trimmable and self-centering, makes it easy to maintain directional control—important in turbulent waters, crosswinds and following seas. The small amount of drag introduced by the marine-grade aluminum rudder blade can be minimized by sharpening the leading edge with a file or by only partially submerging the blade.

Keep in mind that fast performance kayaks are only faster that the typical sea kayak in the 4.5 to 6+ knot racing speed range. In reviewing Sea Kayaker back issues, the TR is one of the fastest kayaks ever tested. In comparison with other fast sea kayak designs it stands out with nice initial and great final stability, especially when loaded with 100 pounds of of cargo.

I am very pleased the test report confirms my design goals and that it recognizes how much fun the addition of sailing option can add to the sport of kayaking.

Peter Kaupat


Options and Pricing

Designed: 1997
Standard Lay-up: Glass, Kevlar/graphite or all graphite with additional reinforcement for outriggers and sailing rigging as necessary.
Standard Features: Hatches, bulkheads, adjustable seat and back rest, rudder, custom installed thigh bracing, paddle park cleats, security eye, compass.
Options: Outrigger poles and floats, trampoline, sails, Instant Outrigger™ paddle-float rescue system, molded foam seat pad.
Approximate Weight: custom glass, 55 lbs.; Kevlar/graphite, 49 lbs.; all graphite, 40 lbs.
Price: custom glass $2800, Kevlar/graphite $3300, and all graphite $4200.

Kestrel Anemometer (Wind Speed Measurement Device)

The unit arrived without instructions; nevertheless, it took only a couple of minutes to figure out the sequence in pushing the two buttons to access current wind speed, maximum and average speeds, and to switch the display between miles per hour, kilometers per hour, meters per second, feet per minute and knots.

The Kestrel anemometer reads wind speeds up to 78 knots, a limit that, while somewhat lower than other anemometers, should be academic for any kayakers who aren’t trying out for a BCU instructor’s certificate.

Although not as compact as the tiny, lithium-powered Skywatch meter , the Kestrel offers many more functions, and has a replaceable battery. The lithium cell of the Skywatch is said to be good for thousands of readings; however, once it dies, the unit is trash. The Kestrel is fully waterproof, and floats as well; the slide-off outer case protects the impeller and display screen. Of course, I keep it in a waterproof pouch anyway.

While I like anemometers and use them often when I have one, I have a difficult time thinking of them as a necessary item of kayaking gear. I can’t imagine a situation in which I’d base a decision whether or not to paddle solely on the meter reading: if conditions looked too rough to go out but my anemometer said the wind was only blowing 20 knots, would I change my mind and launch anyway?

Heck no. However, it’s interesting to compare your gut-level feelings with a real number, and it’s fun to test your instinctual anemometer against the solid-state version—I pass well on lower wind speeds, but tend to exaggerate a bit past 40 knots. On a practical basis, you could use the averaging feature to confirm a sense that the breeze was increasing or decreasing over time.

The other situation when a wind meter might come in handy is if you’re with a group of gung-ho companions who are trying to goad you into launching when you feel like lounging on the beach. I found that, with hyperventilation and an all-out effort, I could blow through the Kestrel hard enough to register a 28-knot reading on the “maximum” function.

You could show this to your friends and attempt to convince them that conditions are just too marginal for safety—best to make another pot of coffee and get out the Thermaloungers. Be careful with this strategy, however— when I tried it on my wife, she asked why my face was so red.

Paddling the Pocomoke and Nassawango

On the west side of the Chesapeake Bay, as Captain John Smith famously wrote, “…were five Faire and delightfull navigable rivers” (the James, York, Rappahannock, Potomac and Patuxent ), but for a kayak, some of the best paddling is on the smaller rivers and tributaries that run down to the bay from the east in the dozens.

One of my favorite destinations is the Pocomoke River that flows into the bay from the Eastern Shore, and its most pristine tributary, Nassawango Creek. This area was not strange to John Smith, either, during his explorations of the area from 1608 to 1609.

“Passing along the coast, [we searched] every inlet and bay fit for harbors and habitations…The next day searching them for fresh water we could find none, the defect whereof forced us to follow the next eastern channel, which brought us to the river of Wighcocomoco [The Pocomoke].”

Coming to the Pocomoke from the Bay, as John Smith did, you’ll find the wide estuary of Pocomoke Sound is bounded on the north and west by the Maryland shore that now harbors the town of Crisfield. The south and east are bordered by the Virginia salt marshes and the fishing village of Saxis. The Pocomoke enters the sound at the northeast corner, meandering north and east to cross the Delmarva Peninsula from its source in the Great Cypress Swamp of Delaware.

The Pocomoke is the deepest river for its length in the United States. There are two towns along this stretch of the Pocomoke River: Pocomoke City is on the south bank of the river where the major north-south route (U.S. 13 Ocean Highway) crosses the river. Snow Hill is a smaller town at the head of navigation on the river where MD 12 comes south from Salisbury.

My kayak companions and I  do several trips to the Pocomoke each season, focusing on the sound and farther up the river.

Paddling Pocomoke Sound

When paddling Pocomoke Sound, we generally camp either in Maryland at Janes Island State Park, or in Virginia at a private campground called Tall Pines near Saxis. Janes Island State Park  has regular car camping sites, cabins, and primitive camping at three sites on a water trail through the marshes separated from the dry land by Daugherty Creek Canal.

You can reach another launch by driving to the ramp at the Cavalry Road bridge across Jenkins Creek, south of Crisfield. To get to Pocomoke Sound, paddle south on the canal past Crisfield on the Little Annemessex River, and either west and south out into Tangier Sound around Cedar Island Wildlife Management Area, or shortcut through the Broad Creek Cut-through and Ape Hole Creek. The latter is preferred if the wind is strong and particularly out of the north.

The entire north shore of Pocomoke Sound has excellent paddling and numerous creeks and inlets bordered by salt marsh. The area is exposed to westerly and southerly winds and develops substantial waves in the shallow confines of the sound with the long fetch from those winds.

If you stay at Janes Island, consider spending a day paddling the Big Annemessex River just north of Janes Island. The crossing from Janes to Mine Cove and Hazard Cove at the tip of the Fairmount State Wildlife Management Area is a treat on a fair day, and the dunes and lagoons in the tidal marsh are a great place for lunch, a swim and a snooze. Greenhead flies have a vicious bite and materialize wherever there is no breeze to keep them down.

Saxis

The southern shore of Pocomoke Sound is easiest to explore from a base near the fishing village of Saxis, on a marshy peninsula extending out into the bay and made up almost entirely of the Saxis Wildlife Management Area. You’ll find friendly car-camping accommodations at Tall Pines Harbor, on the inner arm of the sound near Holdens Creek.

The low-lying nature of the land has been made clear to us by the fact that more than once the tent campground we’ve used has disappeared beneath the waves! One time some returning kayakers paddled over their campsites to land, only realizing it when a Good Samaritan paddler told them where to find their salvaged tent and gear.

Good paddling destinations in this corner of the sound include the numerous small creeks, including Holdens Creek and Bullbegger Creek on the eastern shore of the sound, Pitts Creek on the Pocomoke River, just after the first meander, and Messongo Creek on the south of the peninsula on which Saxis is located.

While Crisfield to the north in Maryland depended on crabbing, oysters and fishing for its livelihood, the diminutive village of Saxis depended exclusively on fishing and now that much of the fishery is reduced, the village appears forlorn and abandoned.

A few fishermen and crabbers still go out, though more and more on a part-time basis. Fishing Creek and Back Creek form a shortcut through the peninsula at Saxis, but watch the tide since the creeks become very shallow and muddy when it is out.

You can launch off the beach at Tall Pines, but there are also ramps into Messongo Creek at the end of Hammock Road (Route 788), and into the Pocomoke at Shelltown on Williams Point Road.

Pocomoke River State Park and the Middle Pocomoke

Farther up the tidal Pocomoke, the Maryland Department of Natural Resources maintains Pocomoke River State Park, which has two locations, the Milburn area on the north bank of the river, and the Shad Landing area, about 4.5 miles farther upriver on the south bank.

Both have camping sites amid sheltering loblolly pines close to launch sites direct to the river, bathhouses with hot showers, and at Shad Landing, a laundry and camp store.

Shad and Milburn Landings have been our camping base for many of the trips on this stretch of the Pocomoke. A potluck feast is traditional with our group, and over the years we’ve vied to outdo each other’s culinary delights.

Ecologically, the Pocomoke is a transition zone between northern and southern hardwood riparian gallery forests, and is also one of the northernmost concentrations of bald cypress, whose “knees” push up around each trunk and become mini-ecosystems of their own with accumulated flotsam and small bushes taking root.

While much of the land above the incised banks of the river has been cleared and drained for corn, soybeans and wheat to feed the Delmarva’s poultry industry, paddling the black water of the Pocomoke’s shores feels more like being in the sweet bay magnolia, sweet gum, red maple, black gum and bald cypress swamps of the Carolinas or Georgia.

In the spring, understory shrubs blossom with wild azalea, fringed white orchids and purple blooms of pickerelweed. The area swarms with brightly colored warblers, mostly passing through, including the yellow and bluish green Prothonotary Warbler, who stays nearly all year. In the spring, harmless northern brown water snakes festoon the branches and hang over the water, soaking up the sun and keeping an eye out for watery prey.

When startled, they instinctively drop into the water, so spray skirts serve double duty.

I’d paddled this area for years, enjoying what I thought was a neglected remnant forest overlooked by the loggers who cleared the Eastern Shore. But when I visited the museum at Furnace Town, I was shocked to find that nearly all the forest had been cut and burned for charcoal to feed the bog iron foundry from 1831 until it closed in 1850.

Nassawango Creek now appears to be a tortuously winding creek, but in the 1840s it was channelized into a canal that moved ocean-going schooners to the furnace. One hundred sixty years later, Nature has regained her own.

Dividing Creek

This waterway enters the Pocomoke from the north about 4 miles downriver from Milburn Landing. On the paddle down to it, you pass the stately Cellar House, which has stood in a grove of large black walnut trees on the north bank since 1740.

The grounds are decorated with many modern sculptures, but the real gems are stories about Cellar House’s mysterious past: a Native American burial site unearthed in the cellar in the 1960s, a French sea captain builder who smuggled goods in a tunnel beneath the house, his young wife’s mysterious murder on a dark night when the captain returned unexpectedly from the sea, and later, many north-bound slaves swimming the dark Pocomoke to shelter in the cellar on the Underground Railroad. Cellar House is privately owned, so enjoy it from the river, and do not land unless invited ashore.

Dividing Creek itself is narrow and winding, hemmed in thickly by flooded swampland on either shore. Wildlife abounds in this area, including many water snakes and turtles. One sharp-eyed member of our group spied a Barred Owl swiveling his head to get a better look at our fleet of waterborne intruders.

You can paddle up the creek to the Route 364 bridge and beyond, and the paddle back to Milburn brings the round-trip total to about 12 miles. Some have launched from the public dock at Pocomoke City, underneath the Route 13 bridge, for this paddle. The distance to Dividing Creek is about the same as from Milburn Landing.

Corkers Creek Water Trail

If you are staying at Shad Landing, Corkers Creek Water Trail is a pleasant way to spend an hour or two. This 1.5- mile trail loops around the island that sits at the mouth of Corkers Creek.

Marked with interpretive signs, it can introduce you to the unique vegetation and wildlife of the area, and some of the history. You can also paddle up Corkers Creek by turning left (south) instead of following the trail. Corkers winds around in habitat similar to that of Dividing Creek, and passes under U.S. 113.

Nassawango Creek

In 1977, “Nassawango Joe” Fehrer retired from his job as property acquisition specialist with the National Park Service on the nearby Assateague National Seashore, and began working with The Nature Conservancy (TNC) to acquire easements on property along Nassawango Creek. Thirty years later, TNC has protected 15 square miles, nearly all of the creek’s watershed, and the Bog Iron Water Trail helps lead kayakers and canoeists along the maze-like channels.

Our usual trip launches from either Milburn Landing or Shad Landing, up the main stem of the Pocomoke to a sentinel bald cypress near green day mark #9 that marks the mouth of Nassawango Creek (about 1.8 miles from Shad Landing and 6.2 miles from Milburn Landing).

From the mouth, paddle up Nassawango Creek about 4 miles to Red House Road. The lower creek is fairly broad and open, with numerous cut-throughs across the meanders. After the bridge at Nassawango Road and a broad pool, the creek squeezes down to a twisting, jungle stream that echoes with bird calls, kerplunking turtles or otters and the keening of a red-shouldered hawk circling high above.

About 1.5 miles from Red House Road on the south (river right) bank is TNC’s Francis M. Uhler Nature Trail, which offers one of two places to pull out and stretch or take a lunch break. If you miss the Fran Uhler area, you eventually come to the Red House Road Bridge take-out, a timbered and grassed area that is slippery, requiring teamwork to get everyone’s boat out without taking a swim in the deep, cool pool just down from the bridge.

You can paddle beyond Red House Road, but Joe Fehrer, Jr., who now oversees the preserve his father led in creating, and his crew of chain-sawing canoeists concentrate on the lower creek, so your passage may be blocked unexpectedly.

The Furnace Town Living Heritage Museum is upstream of Red House Road another mile, as is TNC’s visitor center and the Paul Leifer Nature Trail. These are worthwhile stops before or after paddling and will help fill out the area’s history and ecology for you.