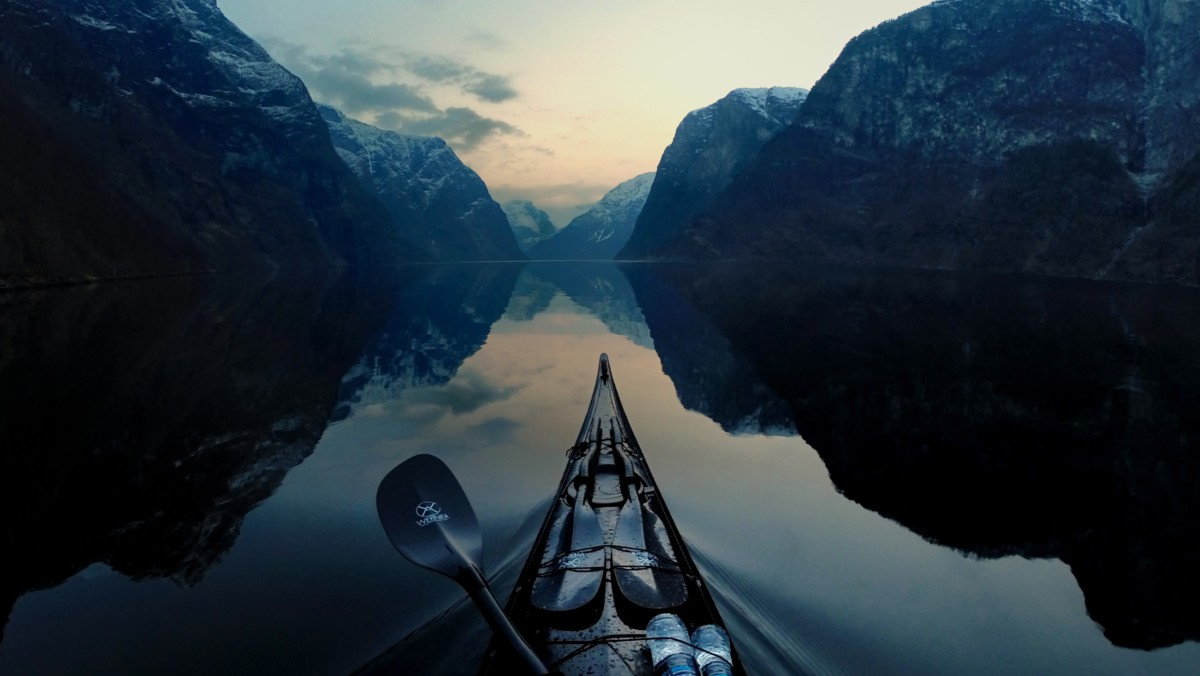

My neighbor up the road is a Ford man; my neighbor down the road has never bought anything but a Chevy. They don’t like each other. By the same token, many of you will disagree with my opinions about cold-water expedition sea kayaking. All I have to say is that I’m still alive after twenty-five years of paddling in nasty oceans like the Canadian and Siberian Arctic, Cape Horn, and the Bering Sea. Some will argue that my experiences are irrelevant because not many people paddle on long expeditions in cold oceans. True enough, but the lessons learned there may apply to less ambitious outings: Even a warm southern ocean or a large lake can bare its teeth occasionally.
Footwear: In My Previous Life I was a Turtle
Which would you prefer: dry feet wrapped in moisture-absorbing inner socks, surrounded by cuddly-warm outer socks, protected by comfy rubber boots-or cold swollen toes itching with salt water sores and screaming for mercy from damp, smelly, salt-encrusted river shoes? The former, of course. When I’m kayaking, though, I opt for the latter. My wife, Chris, tells me that I was a turtle in my previous life and that turtles expect their feet to be cold, wet, and miserable. Most people just think I’m a crackpot, but I’ll stick to my guns. I wear footwear that I fully expect to get wet.
My underlying principle for footwear and kayaking apparel is that I’d rather be uncomfortable all of the time than dead every once in a while. In a perfect world, you’d pull on your rubber boots and step dryly and demurely into the cockpit, stretch your sprayskirt tight, and paddle off into the bonny blue. Boots work fine until the water sneaks in over the top. Maybe you wade in a little too deep or maybe you capsize, miss your roll, and swim.
No, give me a pair of river shoes. Many manufacturers make light shoes with a stiff sole and holes in the sides to let the water run in and out. I’ll get my feet wet for sure, but I can run agilely in the surf to help my partner. If I capsize or swamp, my river shoes won’t pull me under like a pair of cement shoes on a New York mobster.
Formal Wear for Pitchpoling in the Surf
When paddling through the Kuril Islands, my partner Franz and I wore dry suits. They were snug and warm for the first few weeks. We spent nine nights in our boats and then one morning, before dawn, Franz complained that the fabric on his suit was leaking and cold water was seeping down to his butt. The next night water oozed into my dry suit, and collected in a pool, right where I didn’t want it to be. A little water in my undies is no big deal, but a week later the main waterproof zipper blew out, leaving a two-foot hole slanting from my appendix to my neck. A few days after that, I tore my neck gasket. For the next month, the suit routinely filled with water in snotty weather. Every few hours, I’d wring out my fleece undergarments, and pull back my sprayskirt so I could reach down to drain the excess water through my ankle gaskets. Needless to say, I was cold and shivery.
Dry suits are great, but when they fail, they fail catastrophically. Maybe, God forbid, you’re swimming in shoal water and you rip your dry suit on a sharp rock. Then, all of a sudden, you’re weighed down with an extra 20 to 30 pounds of water. On an expedition, it’s the catastrophic failures-not the discomforts-that I worry about.
On my most recent Bering Sea expedition, I wore a Farmer John neoprene wetsuit. Yes, I got wet when pushing my partners out through the surf. Yes, it was horrible to dust the ice out of the pant legs and then slip into the stiff garment on frosty mornings. Yes, it had a strong smell after a four-month expedition. But neoprene is warmer when wet than anything I know of. The vest portion of the Farmer John generally stayed dry and kept my core warm. In addition neoprene provides flotation if you’re swimming and it’s the most shock-absorbent fabric if a big wave tosses you into a rock. If it rips, the hole isn’t catastrophic because the suit is designed to let a little water in anyway. And a little dab of glue will patch that tear in a jiffy. Call me old fashioned, but I intend to stay that way until they come up with something better.
Paddling Jackets: What Every Commercial Fisherman Learned Long Ago
I don’t actually enjoy being cold, wet, and miserable. I’d just as soon be as comfy as possible, so I’m picky about my paddling jacket. You can stay alive with cold feet, but on a snowy day with breaking waves and a strong wind, you’d better keep your chest warm. Neoprene is great stuff, but it doesn’t work well as for a jacket. It’s heavy and restricts arm motion, and it is also beastly hot on a warm day.
There are two kinds of paddling jackets, those for river kayakers and those for sea kayakers. A river-kayaking dry top is the most waterproof garment available. The fabric is waterproof and the seams are backed by waterproof tape. Latex gaskets seal water out of the neck and wrists. Sealed into a cockpit with a tight sprayskirt, you can play in waves and roll in holes all day long without getting soaked. That said, I don’t recommend a river kayaking dry top because it’s not warm enough and at the same time it’s too warm. If you’re confused, hang on.
Every sea has its hot, mellow days and its snotty days, and the perfect sea kayak jacket should keep you comfortable under all conditions. On cold days, a river-kayaking dry top isn’t warm enough because it doesn’t have a hood. A hood is almost essential when a tail wind blows down from the North Pole and races across a thousand miles of fractured sea ice to caress the back of your neck. Even in the Gulf of Mexico, a hood is real nice on a cold rainy day in January-I wouldn’t leave home without one.
On the other hand, on a warm day, you can’t unzip a river kayaking dry top to let cool air breeze across your torso. Most sea-kayaking paddle jackets have a hood and a zipper down the front and no neck gasket. You can unzip and vent your core on a hot day. (For cold weather paddling, I prefer a short zippered anorak to a full zippered jacket.) Assuming that you’re not going to roll or swamp frequently, you don’t need a neck gasket so the zipper and hood system is definitely the way to go.
Sleeves and Cuffs
A paddling jacket with latex wrist gaskets is uncomfortable around camp or on a warm day at sea. On the other hand, sleeves with a Velcro and neoprene or stretch-fabric cuff will leak, and after a long day, water will pool up around your elbow. If you lay a high brace on a rising wave, the water will run down to your warm, dry tummy.
Before I was a sea kayaker, I spent five years as a fisherman on the Bering Sea, and I learned how to keep my sleeves and elbows dry. Most fishermen wear loose-fitting vinyl slickers without tight closures around the wrists. To keep the salt water, fish slime, and motor oil away from their forearms and elbows, fishermen use a separate piece of clothing consisting of a sleeve that extends from your biceps to your wrist, with watertight closures on each end. On a warm, sunny day, we’d wear the sleeves without a slicker. If the weather were nasty we’d wear the sleeves over the slicker.
Chris made sleeves for sea kayaking in the North Bering Sea. She sewed a 3/4-length sleeve of waterproof fabric and sealed the seams. She glued a latex wrist gasket on one end and sewed a Velcro closure on the top of the sleeve. My paddling anorak had neoprene cuffs that were comfortable but not particularly waterproof, but I stayed pretty dry when I wore the sleeves over the anorak. For heavy rain we’d wear our sleeves under our paddling jackets so water doesn’t sneak in over the top of the sleeves and pool in between the two garments. Ashore, I’d take the sleeves off.
Sprayskirts and Layering: Your Roofer Doesn’t Know Best
If you’re walking around in the rain, you won’t tuck your parka into your rain pants and your rain pants into your boots because with that layering system, water would run into your body and you’d get soaked. To stay dry you overlap your clothing like the shingles and siding on a house, right? That’s why I always put my anorak and PFD on over the sprayskirt.
Chris layered her “shingles” all wrong by wearing her sprayskirt over her PFD and anorak. Water wouldn’t have a hard time sneaking in over the top of the spray skirt and working its way into her lap. Now, Chris is a competent expedition veteran and I was in no moral or marital position to tell her how to dress, so I kept my opinions to myself. I thought it odd though that I repeatedly got wetter and colder than she did. One day as we were floating offshore eating lunch, I asked Chris why she wore her spray skirt the way she did.
She conceded that if you’re in a horrible, stormy sea, my method of layering would be best, but in such a storm she’d rather sip tea from a sheltered tent. In a normal kayaking day, even in steep seas formed by the colliding currents of the Bering Sea, most of the splashes don’t rise over the top of the sprayskirt. She pointed out that my PFD was pushing my sprayskirt down, forming a small moat of cold water around my hips and kidneys that was obviously cooling my core.
We finished lunch and continued paddling. An afternoon headwind pushed wavelets over the deck and into my moat. Slowly, water seeped through the seam in the sprayskirt and dripped inside. It wasn’t a big drip, but it was steady enough so that at the end of a long day, I was, yes, cold, wet, and just a touch more miserable than I needed to be.
The next day, I pulled my sprayskirt over the anorak and PFD. Then I cinched up the shoulder straps and turned the sprayskirt into a water-shedding cone rather than a water-collecting moat. Having my sprayskirt over my PFD also helped the PFD’s thick layer of insulation hold an envelope of warm air around my torso.
To make Jon’s sleeves all you need is a yard of coated nylon pack cloth, a pair of wrist gaskets, 12″ of Velcro and some Aquaseal adhesive. The latex wrist gaskets are available from most drysuit manufacturers and retailers. Get the right size for your wrists.
The sleeve is a tapered tube sewn to match the length of your arm from armpit to wrist. The top end needs to be wide enough to fit loosely around your upper arm with whatever clothing you’ll be wearing. Hem the top and sew a Velcro tab for drawing the sleeve tight. The bottom end needs to be matched to the gasket and a form for gluing. A two-liter soda bottle (with a wrap of masking tape to keep the glue from sticking) makes a good form. When you sew the sleeve make sure that the bottom inch of it fits snugly around the bottle. To glue the gasket to the sleeve, stretch the gasket, right side out, over the top of the bottle and roll the end up into a 1″ cuff. Slip the sleeve, right side out, on the bottom of the bottle to meet the gasket. Swab the cuff and a 1″ band of the fabric with alcohol. When dry, carefully coat the fabric and cuff with Aquaseal. Roll the cuff down carefully and let dry overnight.
Treat the seams with Aquaseal. -Ed.
Auxiliary Appendages: Protecting Your Hands and Head
For warm hands, some people prefer pogies while others swear by neoprene gloves. Both work, but don’t forget that every gram on your paddle can translate into lifting an extra ton over the course of a month of paddling. Why spend an extra $150 for a helium-filled carbon graphite paddle only to add fifty grams (fifty tons) of pogie or glove onto the shaft. So, if you can possibly stand it, paddle bare handed. Keep those hand-warming devices in your ditty bag for days when you absolutely need them.
I’d never worn a helmet while sea kayaking, even though I never, never, never paddled in my river kayak without a helmet. My reasoning seemed logical: “A helmet while sea kayaking??? Gimmie a break! The ocean is five miles deep! How am I going to hit my head?”
The answer is simple. “You’ll hit your head when you roll in the surf.”
If you paddle in and out of the surf, eventually you’re going to capsize, pitchpole, window shade, and cartwheel. And when your boat is doing tricks for you, your head is swinging around, looking for rocks. Take a helmet. Tie it on the deck when you’re in deep water, but pull the chin strap tight when coming in for a landing.
Expedition Kayaks Through Surf
Most sea kayakers seek protected bays, fiords, or inside passages, far from the ravages of pounding surf. And for good reason. A breaking wave can lift a sea kayak, fling it in the air, spin it, flail it, and smash it against a rock all while you are in it! Like most people, I started sea kayaking in inside passages. Even when I ventured to hardscrabble coastlines like the Canadian and Siberian Arctic, I continually sought shelter behind island archipelagos or the pack ice. Yet, I always knew that one day I wanted to take my kayak into the open sea. To live out my dream, I paddled 3,000 miles from Japan to Alaska. (Sea Kayaker, Sept 2001). The coastline offered little shelter and my partner and I kayaked in and out through the surf zone almost daily.
Coming in for a Landing
Imagine that you’ve been paddling along the coast all day and now you’re tired and looking for a place to camp. First, you locate a suitable beach (more about that later). Then you point your boat toward shore and take a deep breath. If you’ve been using your rudder, as I do when I’m in deep water, you flip it up to avoid bending or breaking it when you hit the beach. You zip your anorak tight, pull the drawstrings on the hood and sprayskirt, put your helmet on and paddle toward the beach.
Deep-water waves are relatively smooth and symmetrical, but closer to shore, the waves develop a steep face. Paddle in, look behind you, and take a few power strokes. If you want to surf the next wave to the beach, you must move about as fast as the wave is moving. If your timing is right, the wave will curl, start to break and lift your stern; you rocket you forward.
When you are surfing, the wind is in your face, foam is curling under your armpits, and you’re on top of your game. But remember, if one part of your boat moves with the wave while your bow buries itself in the water in front of the wave, you’ll capsize or pitchpole. It’s like running down a trail and catching your foot on a root: Your foot stops, your head and shoulders keep going, and you fall down.
If the speed of your boat is matched to the speed of the wave, you’ll sit on the wave and race to shore with grace and finesse. But commonly, a kayak tends to accelerate and move down the face of the wave until the bow plunges into the trough. The trick is to slow down and stay on the face of the wave between the trough and the breaking crest. Surfers and play boaters reduce their speed by cutting back and forth on the wave, like a skier carving turns down a slope. Expedition sea kayaks, while they are fast in open water, cannot carve rapid turns on a fast breaking wave.
Sometimes you can slow down with a dragging rudder stroke or with some quick, soft back-paddling. But this technique won’t work if the wave is too steep. If you’re still moving too fast, sweep or rudder to turn the boat at an angle to the wave face. You’ll slow your descent down the wave face and avoid driving tour bow underwater. If the wave has a fast-moving crest it will frequently kick your stern forward until it catches up with the bow, and suddenly your kayak is parallel to the wave. The breaking foam will push the boat sideways, and if you catch the kayak edge closest to the shore, you’ll capsize in an instant.
To keep from capsizing, lock your thighs firmly into their braces, cock your hips, and lean your boat, into the foam pile. Brace into the wave: grab the foam pile with your paddle and lean on it. With your boat tilted, the hull will slide across the water and you’ll ride the foam pile toward the beach. It may not be elegant, but you won’t be swimming.
On the first day of the second season of the Pacific Rim expedition, I paddled toward the beach, fully expecting to catch a wave, veer off to one side and side-surf to the beach. Instead, the wave was so steep that the nose of the kayak dropped straight down and augured into the sand with a thud. The boat catapulted up and over and I landed kersplat, on the sand-on my head. I had to adopt a new technique for steep, close-out breaks. For these conditions I now sprint to catch the wave, and when the bow is clear of the water I immediately crank a monster rudder-stroke, turning my boat onto my strong side. I drop in parallel to the wave crest. When the kayak drops off a wave face, it transfers tremendous force to your shoulder, especially if the kayak is heavily laden. I hold my brace low and tuck my elbow against my ribs to avoid a shoulder dislocation. I lean the boat into the wave and hold my brace and I’ll ride sideways to the beach.
Who Forgot the Seed Potatoes?
OK, you’ve landed. But unless someone brought seed potatoes, a fishing pole, and an ax to build a cabin and spend the winter, the following morning you’ll have to paddle back out through the surf. Launches are more difficult than landings for the simple reason that you’re trying to move against the motion of the water. If you make a mistake on a landing, the waves will probably wash you onto the beach, which is where you want to be. But if you make a mistake while launching, then the waves will probably wash you onto the beach, which is where you don’t want to be.
The key to launching is to build enough speed to punch through the breaking wave. If you are moving too slowly, the breaking wave will catapult you over backward or wash you onto the beach, where you started. If the wave is breaking far off the beach, paddle out and hit it with as much speed and power as you can muster. But on many coastlines there is a nasty shore break that beats right on the beach. The best technique to combat a close-in break is for one person to remain on foot and to push his or her partners through the surf. Of course, you ask, who goes out last, without assistance? You can play rock-scissors-paper, take turns, or pick the dufus who locked the car keys in the shuttle rig.
Here’s the system we used along the Kamchatka coast. We dragged the first kayak down the beach until it was close to the surf, but still sitting on wet sand. The first paddler climbed aboard and I would drag the boat a little farther, until it floated when a wave rolled in and sat on the sand when the wave receded. Waves usually come in sets: three or four big ones, a few medium, and then a set of small ones. We watched the ocean until the timing was right. Then, I grabbed the bow loop and towed the boat into the surf until I couldn’t run any more. (It’s important to pull from the bow, because if you push from the stern, the kayak can deflect off a wave and turn sideways.) Quickly, as the paddler started stroking, I ducked under the upraised shaft, and gave the stern a huge shove. Generally, the momentum and paddling pushed the boat through the wave into the deep water.
As the last at the beach I was without anyone to help me. I sealed myself into the cockpit while the kayak was high and dry. Then I scooted the boat down the beach with my hands. It is quite common for the waves to hit the beach at an oblique angle. After the wave has washed up the beach, the water recedes down the beach at a different angle, usually perpendicular to the beach. In this situation, as I was scooting along, the boat would float on the wash and follow it down the slope of the beach. Then, the next breaking wave would hit the bow at an angle, turn it sideways, and wash the boat back up the beach. The problem was that the water breaking on the beach was foamy and aerated. I couldn’t get any power out of a paddle stroke and I couldn’t brace. I tried every technique I knew, but, on average, I washed back up the beach three times before I blasted through the shore break.
Ultimately, speed, power, and luck turned out to be more important than timing. I’d push like a madman, get the boat floating, and then hope that I’d find green water before the break hit me. If I could manage just one or two quick strokes, I’d hit the wave with enough speed to crank a prying, bracing stroke that would pull me through.
Ocean waves are powerful and dangerous, but most of them will carry you toward shore. You might get thrashed and you might capsize, but you’ll probably be alright if you wash back up the beach. Bail out the boat if necessary, catch your breath, let your adrenaline settle out, and try again.
In some instances, however, undertows or rip tides carry hapless boaters out to sea. If you’re caught in a powerful rip and you’re in your boat, relax. You can’t fight against a force of nature that is more powerful than you are. Even though this advice seems counter-intuitive, paddle away from shore, into deep water. Eventually, you’ll leave the shore current behind you. Then swing wide and approach the beach in a place where the shore current is weak. However, if you have capsized and you’re swimming, a rip or undertow can drag you into deep water unless you can move across the current and out of it. Try to get back in the cockpit, bail out, and reattach your sprayskirt. Get underway and move away from the current because your survival may depend on it.
Choosing a Landing Site: It’s a Kayak, Not an Aircraft Carrier
Surf landings and launchings may be exhilarating and sporty but they’re also dangerous. A broken boat, a bent rudder, a hard knock of body against rock, or a dislocated shoulder are no fun. For me, expeditions present an odd contradiction. First I pick a route that is inherently dangerous and then I try to make it safe. If you ask me why I don’t pick an inherently safe route to begin with, I’ll stammer, look at my shoes, and grin foolishly.
I frequently carry both navigational charts and topographical maps. Navigational charts provide information on currents and show water depth, which, as we will see, are essential in predicting surf conditions. On the other hand, topographical maps provide a more detailed picture of stream courses, valleys, and headlands.
When you are cruising a remote coast, you’ll need all this information.
Swell Direction
Every morning, look out to sea and note the swell direction. Then look at the chart and map and try to predict how the swells will strike each little bluff and headland. Remember, you’re in a kayak, not an aircraft carrier. Sometimes a tiny hook of rock may form a protected beach no more than 50 yards wide. That’s great. Even fifteen feet will do.
Water Depth
The most forgiving surf forms over a gradually sloping bottom where the waves break a few hundred yards out, and form a wave face with a gentle angle. You can ride such an easy break even in a fully loaded sea kayak. Study the depths on your navigational chart at your present position. Then ask, what’s the surf like here? If it’s easily manageable, try to pick your next landfall at a place with a similar bottom profile. Make note of any part of the coast that has a gently sloping bottom with no shoals or shelves: you may be able to land there.
Don’t forget that water depth changes with the tide. A beach with a rough break at high tide may be fine at low tide and vice versa. So, when you’re sitting around the campfire at night, watch how the surf changes with the tide, and use that information to plan your landing the following day.
River Mouths
A river may erode a channel through a beach. Frequently, you can paddle up this deep-water path and avoid the surf altogether. On the other hand, if a river carries a lot of sediment, it will form bars and shoals that generate dangerous offshore breaks. Often you can spot bars on your navigational chart, while at other times you must rely on local knowledge.
Rocks and Body Parts
Do I need to say it: If the surf is big and there’s a possibility that you might crash, roll, capsize, or pitchpole, then sandy beaches are better than rock. And don’t forget to wear your helmet whenever you paddle through the surf. Even if the sand is soft you need to protect your head from collisions with other hard things like your kayak.
Expedition Strategy
Let’s imagine that you can comfortably paddle 25 miles a day in calm water. So you wake up in the morning, and look on your map for a potential camp 25 miles away. Ideally, you want a deep bay with a narrow entry that will shelter the swell and create a calm harbor. But chances are that on an entire expedition, you may never find a perfect harbor exactly 25 miles from your previous camp. So you make a variety of choices. If there’s a good harbor 15 miles away, followed by the Big Ugly, maybe it’s time to take an easy day and rest those tired muscles. Or alternatively, if the wind is going to be at your back and there’s a good harbor 30 miles away: Go for it!
An expedition is about analyzing the paddling conditions for the day and then basing your comfort, your safety, and even your life on your decisions. A magazine article or a teacher can impart helpful guidelines and simple rules. But the ocean is complex and chaotic and every rule has its exception. Be alert for nuances in your watery environment, remember your experiences, and constantly fine-tune your paddling techniques to match the feel of the sea.